Manic's Gaming Boards build - A long log of events

ManicMan

Member
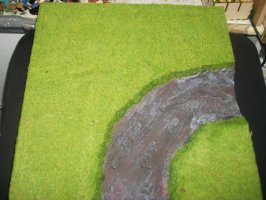
Okay, haven't got new photos yet but I've added the grass mat/sheet paper whatever the stuff is. I tried to make it cut back a bit from the edges of the river but might have been a bit too close in places.. either way, next I want to try to blend them edges a bit. I'm not 100% sure on how best to go about this.. I think I would be better to try to extend the 'rock' edge more then thin out the grass but.. not sure.. Was originally going to use some flock around the edges of the grass going to the ground to smoothen it a bit and hide the edges of the grass mat but like I said, not quite sure..

water effects will be... later ^_^ I've seen alot of ways of how to screw it up.
 

ManicMan

Member
okay.. Hopefully photos this weekend ^_^

after doing the grass mat-ing I used some flock (I think its more flock then static grass.. feels more like flock) which match's the grass mats pretty well, along the river edges using PVA.. a bit annoying but my first pot of PVA I've had for some time now cause... using a large amount of PVA took time, and moved to my other pot which.. is a different type.. that's no real problem BUT it turned out that 'clear' PVA, or atleast this type, is a bit more watery.. just means there is a bit of run which I can either paint over where it needs a bit of touching up or just leave it. a bit of grass is in the river but that is pretty fine. Grass annoying grows well in water anyway (I got a little garden pond but it's too big to get right into the middle and... weeding it is a bugger for me.. So probably don't do as much as It needs.. still.. home for Newts, the odd Frog, snails and some various insects. and cats like to lay by it, more so in hot weather).

I probably left the PVA way too long to dry, not that you can leave it too long, but it just slowed down the process by leaving it for 24 hours. I then went over it with a desktop vacuum.. First I was using my nice little Henry but there seams to be a problem right now so it's not sucking right, So I used a generic USB one which has far smaller (and trickier to clean) chamber but it's a far less messy way to re-capture the excess flock then just tapping it.

I'll have to touch up some of the paint and then I'm wondering about adding some dirt in places on the grass to thin it a bit.. not sure.. also debating some flock to give a bit more texture in places but I quite like the grass mat I use and does give a nice range really (Scenicmaster 'Summer Grass'. Not that pricey and nice quality really).

Oh when the flock was added, I think the clear PVA has made it a tiny bit darker then it looked before glue but.. might be just me.. either way, that's not a huge problem. Alot of grass can be like that around rivers
 

ManicMan

Member
Okay, quick picturesDSCF2579.JPG
The Basic bend. You can see a fair different in colour between the flock and grass. The colour didn't look quite so pronounced before I glued it, and it's a clear glue but oh well.. Like I said before, it's not a huge thing as that often happens. The grass is fairly flat but not quite so it's a bit natural like in slight bumps and mounts, but nothing too major so easy for figures to stand on.
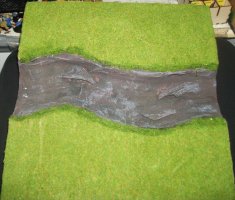
DSCF2577.JPG
Straight River section, nothing much to really add on this piece. I am wondering about putting the odd misc piece of folk scattered a bit on the grass to show the odd patchs of a different type or thicker grass.. really, if this was meant to be totally natural grassland, which doesn't really exist but oh well, then the grass would be fairly high and I'm not sure that would even be too good for a board..
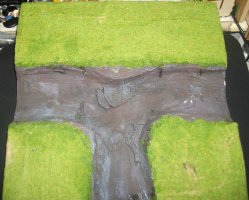
DSCF2578.JPG
On this T section, you can see a couple of patches were some of the grass got a bit scrapped off the mat (incorrect storage ^_^ of the grass matting) but that works well enough for more bare patches. the white bits in the river, i think are just a bit of dirt that needs cleaning off.. but not a huge issue either way.
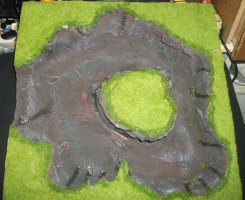
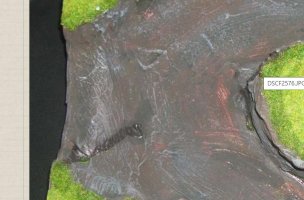
DSCF2576.JPG
And the Small lake tile. you can kinda see a bit more glue run on this as it was the more irregular shapes of the edging seams to leave my rubbish pva applying to run a bit more (also, this glue seams more watery) but really, I doubt it matters much.. though there is a bit more grass in the water.. might see about some tuffs of underwater plants before the resin... I was thinking about some stepping stones instead of leaving it purely up to a bridge (I'm having a tiny problem getting my first bridge together as I got one side attached with some nice metal wire to work as thick rope, but where part of the wooden panels have come unglued, the wire is now adding a bit too much pressure to keep it away wanting to re-glue without holding it for hours.. gonna need to use a bit of better superglue on it) but it's a bit deep for that.. from the bottom of the lake to the top of the island is about 40mm so... about 8 and a half feet deep.. with it taking up most of a 1 foot board (well.. more 30cm), that kinda makes a maximum width 64 feet.. probably not a small-small lake but really.. stepping stones which are 8 and a half foot tall? unlikely..

next stage? ... mm.. need to think.. Do I add random patches of flock / dirt to show patches of higher grass, different type etc, and bald patches of dirt... I think seeing if I can get some little bits for weeds in the lake bottom would be nice.. it's a bit deeper then the main river (apart from the feeder of course). I'm also a bit unsure if I should/ need to water down some pva to coat the whole thing to seal it.. the Resin pouring for the Water is still one of the last steps so I don't think I'm at that point yet..
 
As a paperbacked mat user, do NOT use watery pva on it, it will warp and be a right mess.

I too have the odd scratch and what not on mine, I just very roughly patch it with whatever is flat so as to make base placement unbumpy, and I figure in time that all the patches and fixes will just make it look less like a perfectly tended golf course.

I think reeds and stuff around the banks would be great, but not sure you need anything on the main table proper.

Here is a 10mm games pond I did with reeds and stuff:

pond1-1.jpg


pond1-2.jpg


And a river I did for some 15mm:

wbf6uane6rdb8avrq2vmi9lnk570lf72.PNG


5yri4nr3jzu8sc2xqofazq1aczkjucmx.PNG
 
The river is done with vallejo still water, normally it self levels nice and flat.
So for ripples, just before it sets an whilst still a bit jelly-like, I used a brush to sort of stroke/brush on the ripples.

The pond is done with many many coats of gloss varnish (as my still water had dried up) and for that I brushed it on in rings starting at the edges and pushed the brush toward the shore.
Then moved inwards ring by ring, always brushing outward until I had just a dab in the middle.

Do not recommend varnish for a project your size, but still water may be good, though it will probably need a few layers so resin could indeed be the best shout.


EDIT: The trick is to stipple and dab, do not drag the brush or it will create tracks and troughs more akin to a ploughed field.
 

Machen

Member
Great thread. I've decided not to get into making scenery until I have more painted minis to populate it with, but seeing your progress makes me look forward to tackling it in the future.
 

symphonicpoet

Moderator
The river tiles make it almost feel like you're making the best Carcassonne set ever. Which . . . might be a darn fine model for how to build some modular terrain, actually. Great stuff!
 

ManicMan

Member
been a bit nervous about the resin pouring since if I screw up, that's the whole thing screwed up really.. also been waiting for a couple of bits (and some decent weather).

been wondering.. for the resin, Do I pour a tiny bit at a time building it up in layers, or pour all at once.. I'll wait on the surface as that'll be a small layer which I'll try effecting but any advice?
 
Only ever used resin that cures hot from when I sold resin terrain.
I assume yours cures without an exothermic reaction?

In which case in layers?

OFC if you have more than you need, try it on a rough test piece?
 

ManicMan

Member
thinking about it.. I'll probebly have to buy some more resin.. The best thing I got is AK interactive's 'Resin Water'. I have used some before (on a very small bit which didn't quite go to plan) but seam to have about half of it left, so thats only.. 60ml.. I did wonder If i could somehow only pour the 'surface' leaving a gap but couldn't figure out how that would even be possible ^_^;
 

Eric

Administrator
Depends on the resin - you get resins designed for deep pours, but I'd have thought your river beds would be okay for most resins. The spec sheet for the resin should say how deep each layer can be. I'd certainly do a few test bits first just to build up confidence if nothing else!
 

ManicMan

Member
any recommendations on resin? Other then that water effect, I only really have stuff or small time casting or stuff which I think it's kinda well past any use date
 
I am not sure, but I did a lot of resin casting over the years and I found these guys to be very helpful.


If you are not in a mad rush, drop them and e-mail and I am confident they will point you in the correct direction.
Their comms were always good and shipping prompt.
 
What I will say though is that when you pour you will need to seal the edges of the tiles, should be obvious.
The easiest way is to blank them off with something that the resin will not stick to.
Failing that cover the blanks with something that wont cause an adverse reaction with the resin and that will not stick to the resin, mould release agent maybe?

But when you stick a blanking plate on the edge of your tiles to stop the resin draining away, the fit will need to be flush.
This looks like there will be gaps?

edge.JPG
 

ManicMan

Member
I'll do a bit of cleaning up first, but it'll be pretty tight, plus I'll seal it a bit with a mixture of hot glue and tape. It's pretty easy to take off which being a pretty tight fit so problems with leaking. I was also thinking of a thin layer of silicone onto the wood I'll vice into place to hold it tight. resin comes off silicone pretty well. but thanks ^_^
 

Fimm McCool

Member
GlassCast from Easy Composites is my go-to resin for clear. They do a 10, 50 and 50+ which are the respective maximum depth of pours. It has an additive which pushes out the bubbles so you don't need to heat gun or huff over the top of it. Whatever you do make sure your resin is epoxy. Polyester resin stinks, shrinks badly and stays tacky for months afterwards. Epoxy can be pigmented with regular acrylic paint but for translucency a proper epoxy pigment or glass paint works best. All resins exotherm when they cure, but not badly enough to effect the foam unless you pick a 10mm maximum pour resin and try to pour 100mm depth with it. The deeper the pour the longer the resin will take to set, allow yourself at least 24 hours for it to cure properly. For end dams I usually go for acrylic held in place with a clamped baton or duct tape, but a piece of thick card wrapped in electrical tape or parcel tape should be adequate for a shallow pour. If you cut them the same height it helps to get the water level consistent.

It is possible to have the gap underneath you mention. I do this quite often with students who want to stylistically represent water. A piece of clear acrylic laid flat does the job. You can always pour resin and do water effects on top. The edges can be sunk into the foam and disguised with bushes, flock and sand. It doesn't look quite as convincing as a resin pour unless you're going for very clear water or you use a tinted acrylic.
 

ManicMan

Member
Don't think I got enough acrylic to use as boarding.. but not hard to get.. I got some plywood and I was wondering about taping it up with parcel tape. that weak brown stuff that doesn't seam to hold strong on anything much ^_^;

yeah.. I though the top layer bit might be pretty annoying ^_^

Ordered about a kg of "GlassCast 50 Clear Epoxy Casting Resin" which they say is 25mm depth, so I think that's enough that it won't take forever to pour layers but not too much that I need to get a huge batch mixed up together. I'll probebly leave it unpigmented and have to make up a little board or something as a test piece.
 
Back
Top