Manic's Gaming Boards build - A long log of events

Fimm McCool

Member
I think I would have been tempted to have the frame lower on the tile and cut down to it around the edge, allowing hills etc. to be built up easily. But given they're small tiles constraining a tall hill to just one might look a bit false whilst spanning multiple tiles adds another complexity to the modularity.
 

ManicMan

Member
small cheap hand wire cutter. I'm sketching out a bit more detailed shape for the river paths, then I want to cut that before filling.
 

ManicMan

Member
okay, No photos right now but.. I've plasted two of the boards.. then my plaster ran out, so need to pop to the local hardware shop to get some more.. What I used was what I have left over which was some 'Ever build' All purpose Powder Filler.. so cheap stuff.. It was filler, it was a good price ^_^ meant to be extra tough and with added PVA powder. no clue what that means..

Anyway.. tried to mix it up how it says, 2 1/2 parts powder to 1 part water.. mixed it and.. nope.. that's very thick and alot of it still powder.. added a bit more water.. all measuring was by eye so not fantastic. in the end, seamed okay but a tiny bit runny,, not a huge lot though. enough that it could feel resistance to mixing and it wouldn't pour so much as paint out.. A bit thicker then most paints i think.. anyway, then added what i felt was a fair amount but not too much extra PVA and mxied it all up.. the stuff is meant to have 30-40 work time and 1 hour dry time.. left to dry for 2 hours and seamed okay but.. well.. I'm not an expert with this stuff.. there are a couple of patches on one which after a day, still feels a tiny bit damp but maybe I got a bit of water on them? not sure. and a bit powdery.. but that's probably okay.. looks like I might need a tiny bit more to flatten the top a bit but doesn't need to be totally flat, ground isn't totally flat ^_^ The two bits I've been able to cover so far are the left -> right river section and the T way river section. Just need to do the Curved part of the three boards in the works right now.. I've done some sanding, with black clothing getting white powder marks which might draw some interest in some places. Nothing out of the norm.

I might not get around to getting the plaster until next Monday but that's okay. Nice and slow is fine.

Also wondering.. Should I put more PVA in the mix then I did? I think it might be an idea to coat the whole thing with PVA after the plaster is all done before I go to the next step.

For the river areas themselves, I didn't smooth them out too much, though did a bit of work. While some rivers do have a kinda smooth bottom with stones and stuff on top, others have quite a rough and leaving the bit more rougher bottom is fine I think. with some plaster on it, and later some stone stuff (I think I have some moulds for river bed rocks.. in fact, it would be (after a quick check) Woodland Scenics 'Creek Bank Rock Mould' which may be added to the river bed before adding some other stuff.. anyway.. See how it goes.
 

Fimm McCool

Member
If you're going to coat the surface with flock of some kind you probably don't need to coat the plaster/filler in PVA. Sounds like you got the mix right.
 

ManicMan

Member
What I'm thinking is I'll do a basic paint job on the plaster, then getting some more better reference shots, I'll probebly use some paperbacked grass sheet but in some shapes to be kinda patches, allowing some 'ground' free, then using some flock and stuff in places to blend it a bit or something.. or might see about flocking the whole thing (well, apart from the rivers).. see how it goes and have a better look at ideas and effects
 

ManicMan

Member
okay.. Now, armed with some more plaster and a few things having happened to.. deal with some 'personal' issues really, I've plastered up the third board and waiting for that to be fully dry. Hopefully tomorrow, I'll take some photos.

I have some sanding to do to smooth out some bits and then I think the next stage would be to cast up some plaster rocks for the river. Normally, I use plaster of Paris and I think I probably will again, though do I wonder what the poly-filler would turn out like..

anyway, once the rocks have been made up, I'll place the river ones, seeing what they look like before gluing into place. Then comes first stage of painting. I'll have to work out any more worn path areas I might do and give the paint to the river areas and them, most of the board doesn't need to be painted because of putting the grass over it.. I'll probably go with Grass mat with some extra stuff to smoothing the edges of the path and river.

I've also started construction on the first bridge model. I was doing to construct it all by hand and probably balsa as that's easy to cut but decided.. I was being stupid.. I have a basic home laser cutter.. So I worked out a basic design and cut it. Thats for the main bulk of the bridge. I'll have to get some dowels or such like for some posts, and might add a bit of roping around the edge. Scale wise... might be seen as a bit bit as i wanted to give it enough width of a 30mm round base as that's my standard (though my Skaven use 20mm square. 30 mm round for skirmish figures, 20mm square for regimental) but that's fine. Basically cut pieces for the two sides and a bunch of slats which are then semi-randomly placed (with some slight change in size between different slats) to get a more rustic well worn (and repaired) bridge. I won't be able to complete the bridge until quite late though. really, It should have a few supports which go into the water. As I want this to be mobile and not fixed on any set board piece, the Supports won't go fully into the water but I need to know the water height.. Haven't decided that fully yet though will need to get a rough idea as when I pour the water, I don't want to have TOO much mixed up and each board needs to be kinda level. Once I have done this, I'll have a good idea of how long the dowels need to be for the under supports.

So.. Hopefully photos tomorrow.

EDIT: Damn.. just after I posted this, I remembered.. No chance for Photos tomorrow really.. Got a few things to do and in the evening when I normally have the most time during the week to work on stuff, I've got my.. kinda quarterly games night with some friends that we have been able to do. Normally HeroQuest at the moment but something different this time ^_^; So.. probebly Saturday for Photos
 

Fimm McCool

Member
Looking forward to seeing photos. I don't think casting rocks in polyfiller will be very successful, too much thickness. Handy to have a little laser to play with.
 

ManicMan

Member
yep ^_^ Did wonder, didn't think it would be great but.. very cheap really ^_^. mm.. I wonder if I got any dental plaster powder.. I got some with some form of wrapping.. advantage of having a sister who is a head dental nurse.. Supplies too 'out of date' for there use? fine for me ^_^
 

Fimm McCool

Member
Yeah dental plaster is definitely the way forwards! I tried to cast resin into those rubber rock moulds one time, didn't come out at all well! I've also tried jesmonite but dental plaster gives definitely the best results.
 

ManicMan

Member
okay.. dull looking but lets go through these
DSCF2551.JPG
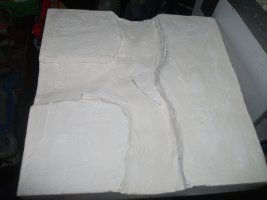
this is the T section board with it's plaster and a couple of 'river rocks' on it.. the rocks didn't come out quite right as I think I mixed the plaster a bit too thick so while they ended up in the moulds, way too much was used but they add a little bit of interest so no real problem. The Ground area's have been sanded but not 100% flat which is fine. having perfectly flat ground kinda makes having them as a rural board pointless, but the edges are pretty good. the Plaster on the river isn't 100% level with the laser cut bit but it's good enough and once there resin water has been poured, it wouldn't make a difference. anyway, the River bed is fairly smooth on this one but fair enough. The odd bit where a bit of the foam is visible but again, doesn't matter.
DSCF2552.JPG
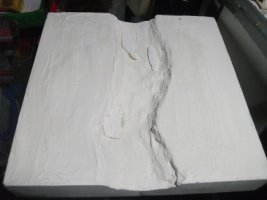
This is the straight section. The Uhu glue is a bit.. oddly visible where I glued some river rocks into it but when painted and then resined, no problems at all.. so far, so good.
DSCF2553.JPG
This is the third of this current lot, the 90 degree bend.. Could have made it a bit more interesting to take up a bit more of the board but no real need and later on I might make new board sections so I can do it with that. a bit more of the foam is visible because I think I had a bit too little water.. or too much with the polyfiller and when I was sanding, a bit of a chunk came off, but again, that's gonna be covered so just slightly uneven ground.. A bit more rocks on this section cause 1) it was the first section I was trying the rocks with and 2) wanted a little bit more interest as the water flows around the corner.

I think the next step would be to start with the painting. This would be a basic job, mostly around the river sections, but also working out some possible 'walk ways' where grass would have been trod down a bit over time by animals or people.
 

ManicMan

Member
While I'm waiting for some paint, cause local 'craft' shops think poster paint should only come in black, white, red, blue or yellow.. if you are lucky to get THAT range ¬_¬ and alot of online places either seam very pricey or very limited.. oh well, got some coming which is.. maybe a bit dark but I can base with it and then mix with some white to do a dry brush or something.

While that is going on, slowly working on my bridge (waiting for some 'rope' to arrive cause I wasn't 100% impressed with what I got, though I might have something I'll mix up with it). Also I started on a fourth board.. I thought, hang on.. if I'm gonna have to mix up some paint and do the resin pouring, wouldn't it make sense to do the final water bit at the same time? the small lake. So I'm working on that bit right now. See how weekend goes (I might have to help someone move house)
 

ManicMan

Member
well.. I'm being a bit stupid at first.. I decided to get the boards painted and after trying to get some brown paint, I ended up getting some.. but.. it turned out to be.. well.. looks more like charcoal to me then the image gave the impression off. for some reason, the description said brown, and some people say it's a brown (though I thought it was a bit dark but that's no problem as I could build up lighter bits on it) but others say it's a grey.. either way.. not that fantastic.

So after trying craft shops.. I tried a local toy shop ^_^ for a good price, some base colours and some mixing pots.. So, for some reason, I was drawing a complete blank on how to make brown from what I had.. no clue why but I did.. I ended up kinda wasting two pots.. one has.. well.. a brown that'll be a nice base for the one tree I got to paint (large tree) and the other.. well.. I refer to the colour as 'sewage'. and annoying ended up taking up the whole of the mixing pot.. either way, I finally got a brown mixed.. a bit darker and not quite what I had in mind, but a perfectly servable brown. While doing some waiting, I had my fourth board made up because I had a small lake tile planned, with a island in the middle. Since this would need the same brown and everything as the river parts (also with resin water) so it made sense to have this as a set already. There was a minor issue with gluing the edging but.. I can deal with that.

So.. gave them a paint in the brown mix. I then made a darker brown mix and added about 50% or so water (maybe a bit more) to make a dark wash. I then Washed the boards (including bits I didn't paint cause I was grass matting the boards anyway). turned out a bit.. dark but not too bad.. mixed up a little much lighter brown as it was now a few days later and my mind was working far better then when trying to do the first mix. I dried brushed this over it and it didn't do quite as much as I hopped, so I then dried brush some white WHILE I hadn't really cleaned the brush from the brown. this turned out pretty nice I think. so while a bit darker then my original idea, I think the river section rocks and bits look pretty good. I hope to take photos tomorrow when it's lighter and I got a bit more time. I have a couple of bits of stone blocks for 'ruin' like bits to put in the bottom of the lake but I think the next stage (as well as doing that) is to apply the grass matting. Resin will probably be one of the last things I'll do on these. I think before that, it might be an idea to seal it with PVA or something, but that'll be after I've added some detailing on top of the grass and stuff to keep them good.

Work on one bridge is also going well as I'm fixing the 'roping' to the bridge, after debating alot how to do it (as in how it attaches etc). It fits pretty well over the river sections and while kinda oversized (because of course.. alot of miniature stuff has to be oversized to make it practical for gaming) but not too bad. The only bit it doesn't really fit too well is.. from the bank to the island on the lake section. Kinda works in a couple of places but oh well. works well enough that the island would be a great place for either some objective that needs to be guarded/captured or a place for putting a cannon or something, or with the range of 3 foot, a nice place for a Skaven Jezziel.

Anyway.. Like I said, plan is for Photos tomorrow
 

ManicMan

Member
DSCF2557.JPG
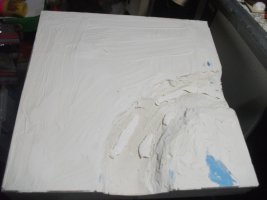
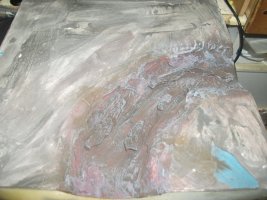
The lake section with 1 entrance for the river as a feeder. bits of blue foam don't matter as that stuff is mostly covered with grass, same with some of the odd plaster patches. I will touch up some bits later before sealing. I don't think it's worth doing it too early because the odd bit of chipping while being worked on.
DSCF2558.JPG
DSCF2559.JPG
DSCF2560.JPG
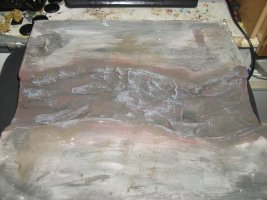
I think the flash made the highlighting look a bit... lighter but.. fair enough. not fantastic but I think fair enough.
 
Back
Top