

You are using an out of date browser. It may not display this or other websites correctly.
You should upgrade or use an alternative browser.
You should upgrade or use an alternative browser.
[Warfork Fantasy Battles] New Year's resolutions 2025 - The Battle for Arduthrond Glade
- Thread starter KingOfTheLeadPile
- Start date


KingOfTheLeadPile
Lord
As I am replicating a scenario from the 4e boxed set, I used the 4e boxed set cover as inspiration for the banner of the unit:

I cut out one banner of the printed sheet, ...
... and taped it to a dried out wet wipe and my cutting mat.
The I cut out the shape. The wraps were too thin and and ripped off.
For the second try, I first painted the main colors of the banner on the cloth, to strenghten the fibres.
Then cut out the shape again.
From a second banner, I cut out the inner oval, and placed it as a template over the actual banner, to paint the yellow oval.
I then did the same with the smaller oval and a cut out skull, to paint the turquoise area.
Then came some freehand touch ups, and with violet and yellow I added some shading to the skull.
I cut out one banner of the printed sheet, ...

... and taped it to a dried out wet wipe and my cutting mat.

The I cut out the shape. The wraps were too thin and and ripped off.

For the second try, I first painted the main colors of the banner on the cloth, to strenghten the fibres.

Then cut out the shape again.

From a second banner, I cut out the inner oval, and placed it as a template over the actual banner, to paint the yellow oval.


I then did the same with the smaller oval and a cut out skull, to paint the turquoise area.

Then came some freehand touch ups, and with violet and yellow I added some shading to the skull.


Michael Stockin
Lord
Great result, I used to use wet wipes for my 15mm stuff.
I should really think about it for my 25mm...
I should really think about it for my 25mm...

Brother Meredith
Lord
I used a bit of muslin stiffened with Modpodge.
Last edited:
Michael Stockin
Lord
I used a but of muslin stiffened with Modpodge.
Ha. I actually stiffen my dried wet wipes with Mod Podge.
KingOfTheLeadPile
Lord
Following the colors of the banner, I choose yellow as the unit's unifying color. The bows as well as the some bits on the banner bearer and horn blower, were painted with Golden SoFlat Permanent Yellow and highlighted with Golden SoFlat Pale Yellow.
Onto the shields of the banner bearer and the unit leader, I freehanded the banner design.
As described in Da Skull Crusha, I will use Ninjon's underpainting approach. For Orcs & Goblins, I don't like uniformed units, in my mind this does not fit them; they use whatever they get their hands on. So I tried to use a variety of colors for the clothing, to create a ramshackle look. I used as underpainting / main color the following groups:
For all the leather straps, belts, etc. I used different browns and ochres, also always with an underpaintig gradient, to give as much variety to the models as possible.
The banner I attached with one dot of superglue on each strap.
When that was dry, I cut the overly long straps short, until they just wrapped around the poles, and attached the end also with a drop of superglue.
I did the banner way too long, in order to be able to cut it to an appropriate length when on the model. If I had designed it too short, there would have been nothing I could do about that, cutting a too long banner is always possible. I tried to give it a bit of a frayed bottom
Then I wrapped the model in aluminium foil for protection.
With a lighter, I burned the banner here and there, especially the bottom edge to hide the straight cuts.
After bending the banner a bit in shape, it got a coating of thinned down Modge Podge.
Basic painting done on the unit, next up are oil washes.
Onto the shields of the banner bearer and the unit leader, I freehanded the banner design.
As described in Da Skull Crusha, I will use Ninjon's underpainting approach. For Orcs & Goblins, I don't like uniformed units, in my mind this does not fit them; they use whatever they get their hands on. So I tried to use a variety of colors for the clothing, to create a ramshackle look. I used as underpainting / main color the following groups:
- Golden SoFlat Cerulean Blue Hue to Golden SoFlat Cadmium Orange
- Golden SoFlat Light Magenta
- Golden SoFlat Raw Umber to Golden SoFlat Turquoise
- Golden SoFlat Naphtol Pink
- Golden SoFlat Blue Violet to Golden SoFlat
- Golden SoFlat Mars Yellow
- Golden SoFlat Cadmium Orange Hue to Golden SoFlat Light Green Yellow
- Golden SoFlat Cerulean Blue
For all the leather straps, belts, etc. I used different browns and ochres, also always with an underpaintig gradient, to give as much variety to the models as possible.

The banner I attached with one dot of superglue on each strap.

When that was dry, I cut the overly long straps short, until they just wrapped around the poles, and attached the end also with a drop of superglue.

I did the banner way too long, in order to be able to cut it to an appropriate length when on the model. If I had designed it too short, there would have been nothing I could do about that, cutting a too long banner is always possible. I tried to give it a bit of a frayed bottom

Then I wrapped the model in aluminium foil for protection.

With a lighter, I burned the banner here and there, especially the bottom edge to hide the straight cuts.

After bending the banner a bit in shape, it got a coating of thinned down Modge Podge.

Basic painting done on the unit, next up are oil washes.

KingOfTheLeadPile
Lord


KingOfTheLeadPile
Lord
Well, that amount of minis should be managable within one year, right...?
Remember me writing this, beginning of the year?
Well, I managed to build the greenskins

and paint one engine of war with crew and one goblin unit

I did not touch the elves at all.
Could have been better, but at least I got this amount done
 So, no New Year's Resolution 2026 on the hobby side for me, still busy with this one...
Brother Meredith
Lord
Making some progress and the others are built up at least? Look forward to further updates!
KingOfTheLeadPile
Lord
The second unit of Goblins took some time. I started back in Decembre with the airbrush base coat, then in March/April I got some brush work done, and it took me until July to completely finish them. I need to get up to speed with this project... But life and stuff constantly got in he way.
The banner on this unit was too integrated into the model to be easily removable, so instead of painting the banner on dried wet wipes and gluing it on, I had to free hand it on the cast banner. After painting the yellow base color with shading/highlight, I applied a coat of superglue. This preserved the work done, and would allow me to wipe away the freehand with alcohol in case I made some errors – which I might have used once or twice.
And here is the finished unit:
The banner on this unit was too integrated into the model to be easily removable, so instead of painting the banner on dried wet wipes and gluing it on, I had to free hand it on the cast banner. After painting the yellow base color with shading/highlight, I applied a coat of superglue. This preserved the work done, and would allow me to wipe away the freehand with alcohol in case I made some errors – which I might have used once or twice.

And here is the finished unit:


Brother Meredith
Lord
Nice to see you have been able to get some progress on the army! Love the on brand painting shots!

twisted moon
Moderator
looking good.
KingOfTheLeadPile
Lord
[Warfork Fantasy Battles] Yellow Toe Nail and Fleabite Worm
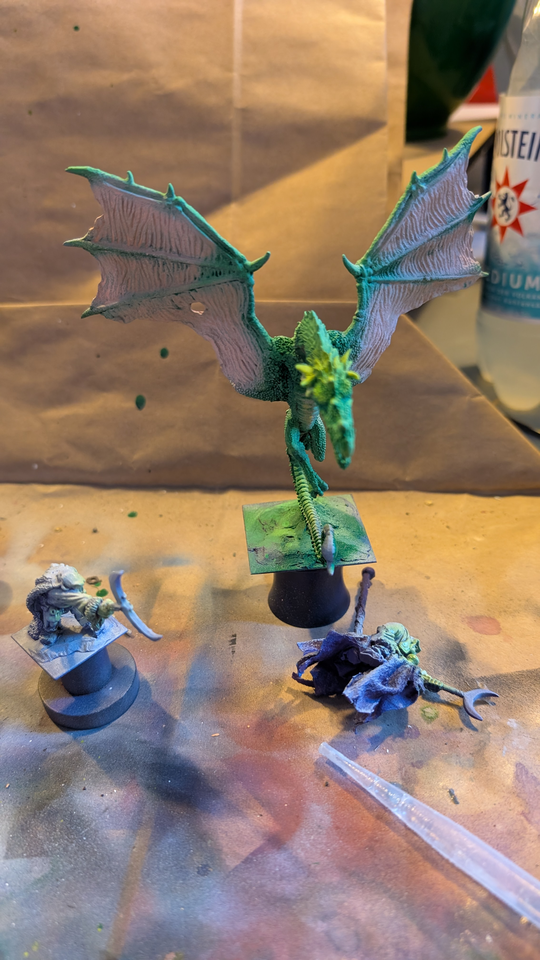
As it is Orctober, time to start working on an actual orc model. The mounted shaman on wyvern will also be my Golden Gobbo entry this year.
I started with the same purple undercoat as every other model of the [Warfork Fantasy Battles] New Year's resolutions 2025 - The Battle for Arduthrond Glade project. The Orcs (well it is one Orc, in mounted and unmounted pose) were then airbrushed with the skin color as the other models before (see [Warfork Fantasy Battles] Goblin Archers).
For the wyvern, is tarted with airbrushing over the purple with:
Underbelly Section
- Molotow 010 lobster
- Molotow 259 sand
- Molotow 117 peach pastel
Unfortunately, the model is so tight, that a lot of that was oversprayed with green later, so I need to re-paint parts by brush.
Wings
- Molotow 259 sand
- Molotow 117 peach pastel
Although using two of the three colors of the underbelly, without the lobster base tone, the winfs look differently enough. same as with the underbelly, too much green overspray…
Underside of feet
- Molotow 236 poison green
- Molotow 006 zinc yellow
Green scales and wing ribs
- Molotow 096 mr. green
- Molotow 222 universes green
Last edited:
KingOfTheLeadPile
Lord
I tidied up the overspray by brush and gave the base a nice dark bown coat.


KingOfTheLeadPile
Lord
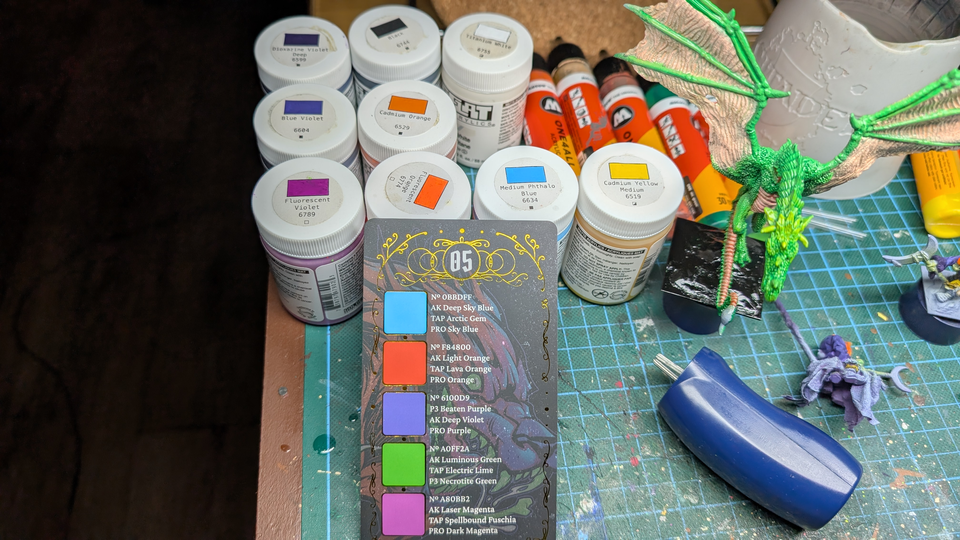
I had started to paint the Yellow Toe Nail, when my Deck of Many Colors (by Ninjon) arrived. Flipping through it, I found a card that nearly matched my colors chosen – the yellow was missing, but based on that card I added blue to my palette, a choice I wouldn't have made myself. Already worthwhile, the investement
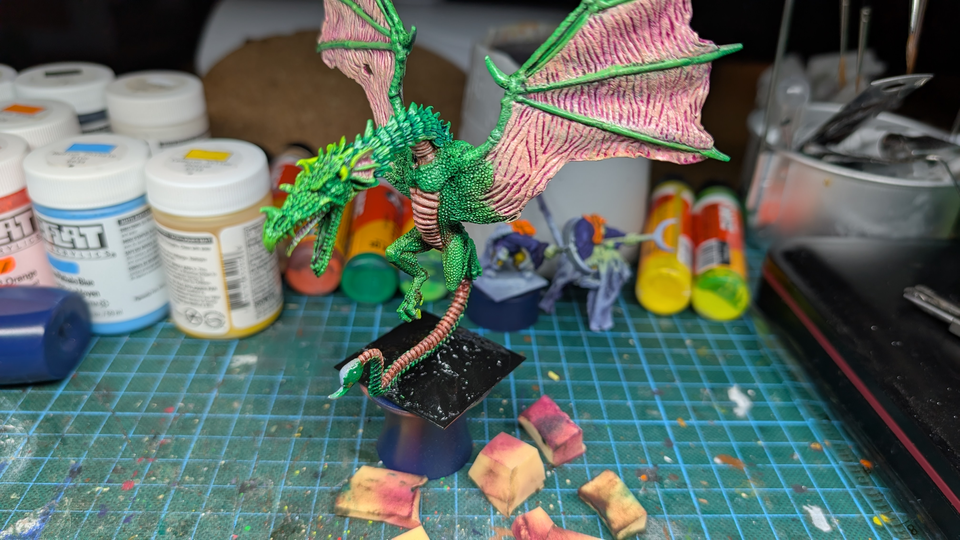
The wyvern had gotten a coat of gloss varnish two days ago, and was now covered in oil paint.
I used two different greens mixed with violet; one for the scales, the other for the rest of the green areas. The wings got magenta, to give them a "skin hue". The belly section got brown.
After about 40 minutes, I wiped the excess off.
The wyvern had gotten a coat of gloss varnish two days ago, and was now covered in oil paint.
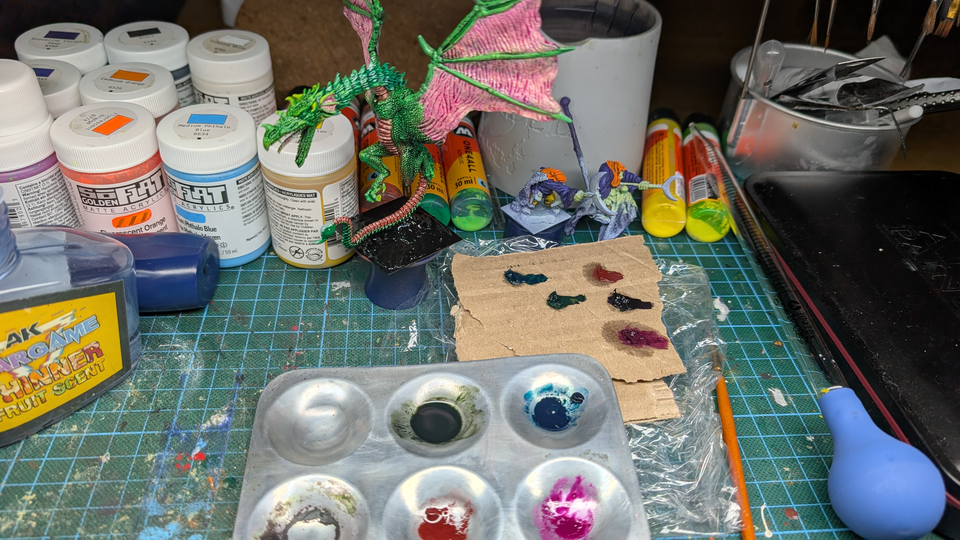
I used two different greens mixed with violet; one for the scales, the other for the rest of the green areas. The wings got magenta, to give them a "skin hue". The belly section got brown.
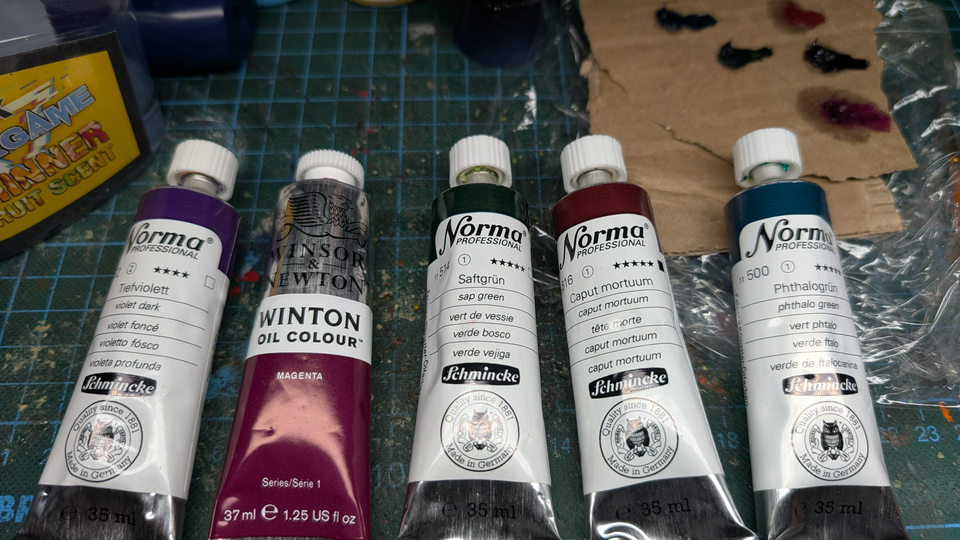
After about 40 minutes, I wiped the excess off.

orkwrangler
Lord

robh
Vassal
Interesting technique using oils. I painted a lot of horses that way, some 25mm but mainly 54mm and above but never varnished the undercoat before applying the oils.
The varnish must prevent the oil from tinting the undercoat/basecoat so you are effectively only using the oil as a shade (or a contrary tone) rather than also allowing it to modulate the underlying colour? Did you find a theory about the technique or is it one you worked out? I have never seen it done that way before.
The varnish must prevent the oil from tinting the undercoat/basecoat so you are effectively only using the oil as a shade (or a contrary tone) rather than also allowing it to modulate the underlying colour? Did you find a theory about the technique or is it one you worked out? I have never seen it done that way before.
KingOfTheLeadPile
Lord
The ones in the picture were used to remove the oils. I saw this painting-with-sponges-thing on YouTube a lot recently, and might have some egg shaped sponges lying around which I haven't used so far.Those cards are an approach to painting I've not seen before. Do you use the sponges for painting or is that just for removing excess paint? I have been pondering trying to pain with sponges.
KingOfTheLeadPile
Lord
You can use the oils directly over acrylics, which indeed tints them as you cannot remove as much, and they work themselves into Matt surfaces Satin varnish sits in between, gloss varnish allows for the most removal. And is especially good when aiming for pin washes.Interesting technique using oils. I painted a lot of horses that way, some 25mm but mainly 54mm and above but never varnished the undercoat before applying the oils.
The varnish must prevent the oil from tinting the undercoat/basecoat so you are effectively only using the oil as a shade (or a contrary tone) rather than also allowing it to modulate the underlying colour? Did you find a theory about the technique or is it one you worked out? I have never seen it done that way before.
No, I didn't work that out myself, mostly learned of it from Marco Frisoni (Not Just Mecha YouTube channel).