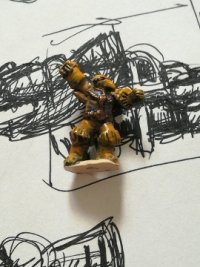
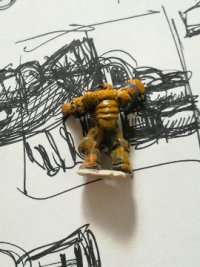
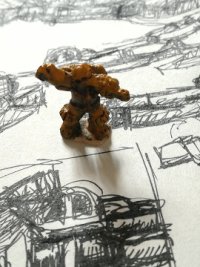
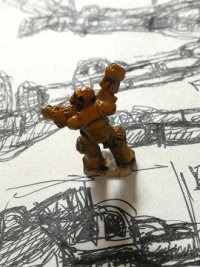
That's an interesting project. It's nice to see that it is possible to get that armor around a normally proportioned person.
Note: the following advice is from a middling painter. A good amateur, but not a pro.
As to painting, even coverage doesn't need to be your goal if you don't want. You can get good color without ever getting a really even coat on there, depending on what effect you want. Uneven paint can look dirty or moody. It can look gritty, worn, or weathered. There's more than one way to do it, of course. But I'm not even sure that an even coat over an entire miniature was ever really recommended. For flags, insignia, and heraldry, maybe. But not for the rest of the miniature. You can use a light color on the bottom and then darken the cracks with washes and inks. Ordinary artists inks work reasonably well. A good wash supposedly has a flow improver of some kind in it, but you can go a long way with simply using a watered down paint. The point is you want more pigment to settle into the cracks. The flow improved just helps it do that more evenly . . . but since even isn't always necessary . . . As long as your color is tidy it doesn't necessarily need to be completely even. You need at least one good solid base coat everywhere, but above that it can get remarkably spotty.
The other alternative is to start dark and do lighter coats to hit the high parts. This can be drybrushing or highlighting, or even sponge painting if you do it right. The basic idea is that there isn't quite enough paint on the brush to actually cover everything. And you can vary this considerably with practice. You can put a lot of paint on a small brush in a small area and spread it out (highlighting), or you can put a little paint on a large area with a large brush that you wiped off to some extent (drybrusing). The two can produce relatively similar effects, though they are a little different. And if you do this on top of a still wet coat of paint you can do some really neat in between colors, particularly around the edges. (This last is a little trickier, especially if you use an acrylic and don't use an agent that makes it dry more slowly . . . like a flow improver.)
Artists acrylic inks usually have a flow improver, so they tend to dry more slowly to begin with. If you put an ink on something a bit heavily you can then drybrush on top of that and it will blend in fairly nicely.
As to the miniature you have there, you could do a lot by simply using some inks or washes to give it some depth. A really quick, if slightly messy solution is to dip him into a runny translucent brown varnish, like a floor polish, and then spin him around inside a bucket on a drill so the brown only stays in the cracks. I've never tried this myself, but some folks swear by it, and they've gotten decent results. You might be able to achieve a similar effect with translucent inks, like Windsor Newton or Holbein. (I've used mostly the former, but the latter seems fine as well. And there are doubtless other brads that would work comparably.) Most of the time you want to change colors of inks for different colored parts of the miniature, but in his case you could probably just do him overall in brown (which works well with yellow) and just avoid the metalic bits. You might have to pick out his eyes when you're done.
The sculpting came out pretty well, actually. From your post I get the idea this is a first effort? What material did you use? I'm trying to learn to use green stuff (also sometimes called kneadtite.) It will make some remarkably fine detail, but it's finicky stuff and you have to work almost frustratingly slowly. Your miniature is maybe something more porous, like a clay? It's a good idea. I'd like to learn to make a form so that I can work up from one rather like you did there. Great start. Keep it up and I expect you'll do really neat things.


