90's inspired 40,000 terrain

I started to build me a new terrain set for SiFi games (40,000, Star Wars, ...). With much of the stuff I want to have it look similar to the terrain I grew up with in the pages of White Dwarf, and which I alway wanted to have myself, but somehow never got around to building myself. I do not try to copy the terrain, but rather build it in the general look of.

 
Last edited:
Anybody remember the Alien Plants from White Dwarf and other GW publications from the 90's? The expanded polystyrene balls with cocktail sticks in them? There was an article in White Dwarf 164 (August 1993) "Take Cover" by Adrian Wild, which, amongst other terrain, showed how to build them, in the "Soft Cover" section. They featured for quite some time in White Dwarf articles, Battle Reports, in 40,000 Codices, etc.

Just a couple years late to the party, I finally want to do my own.

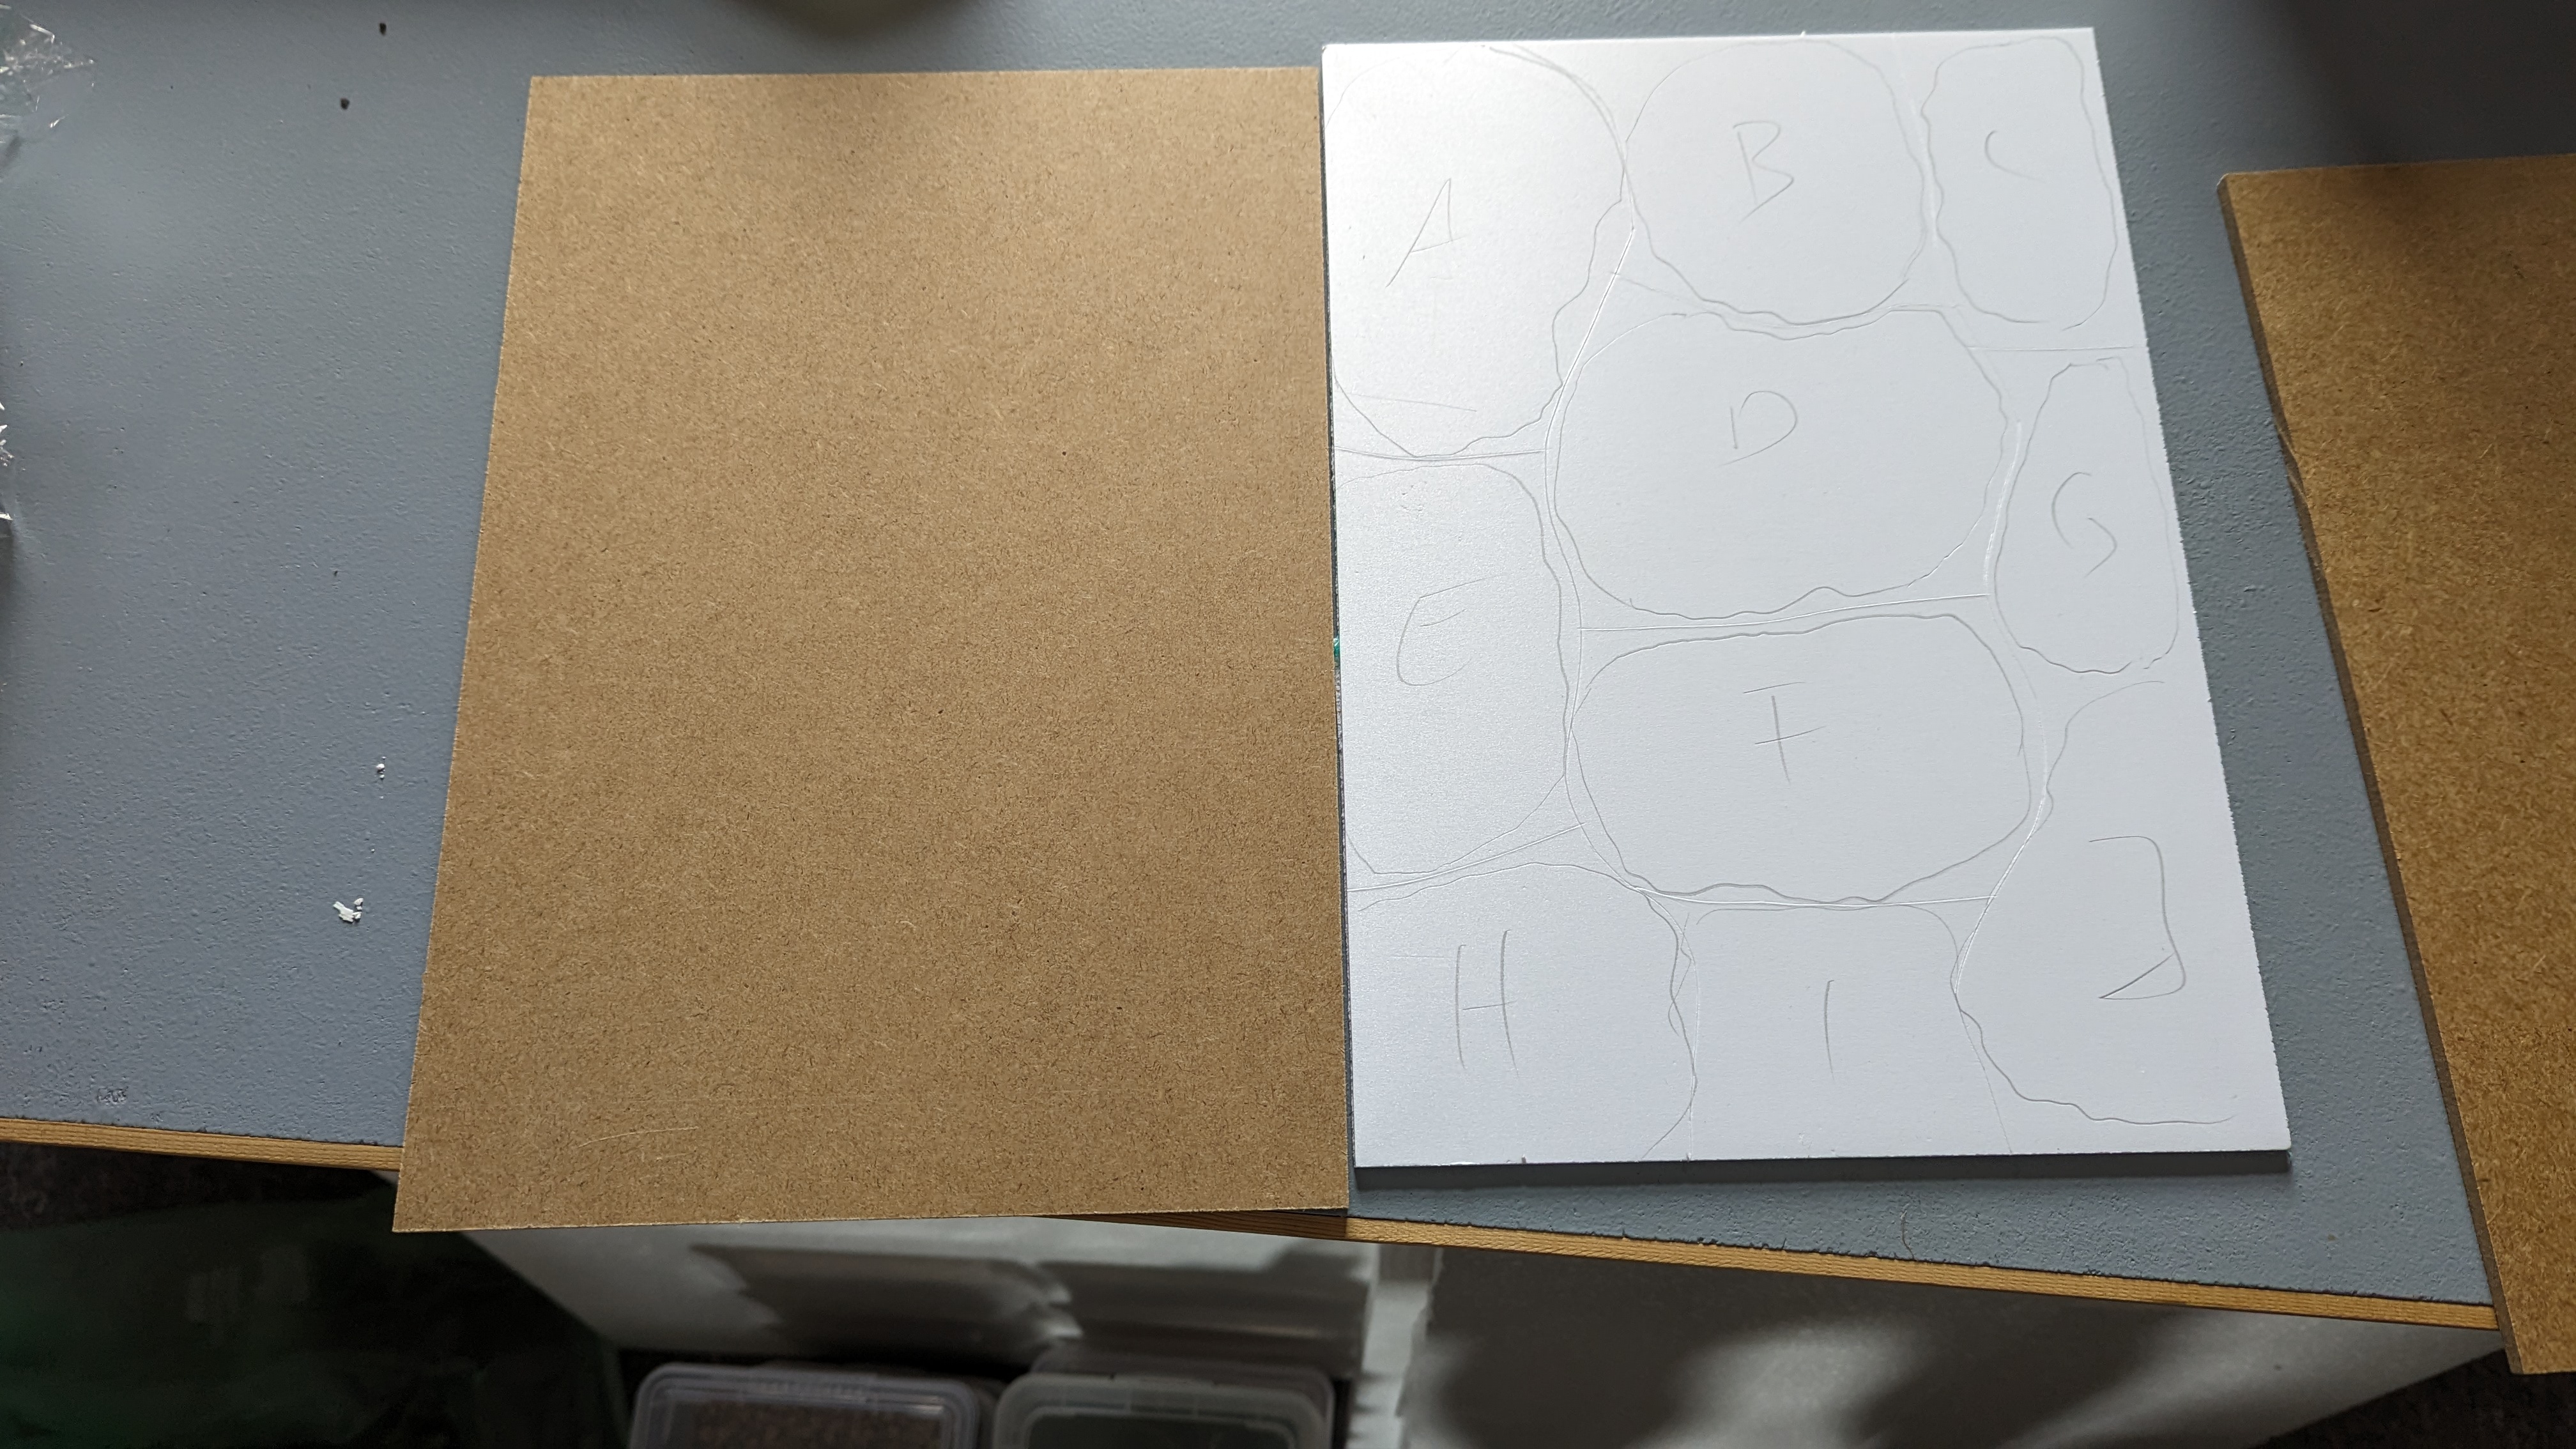
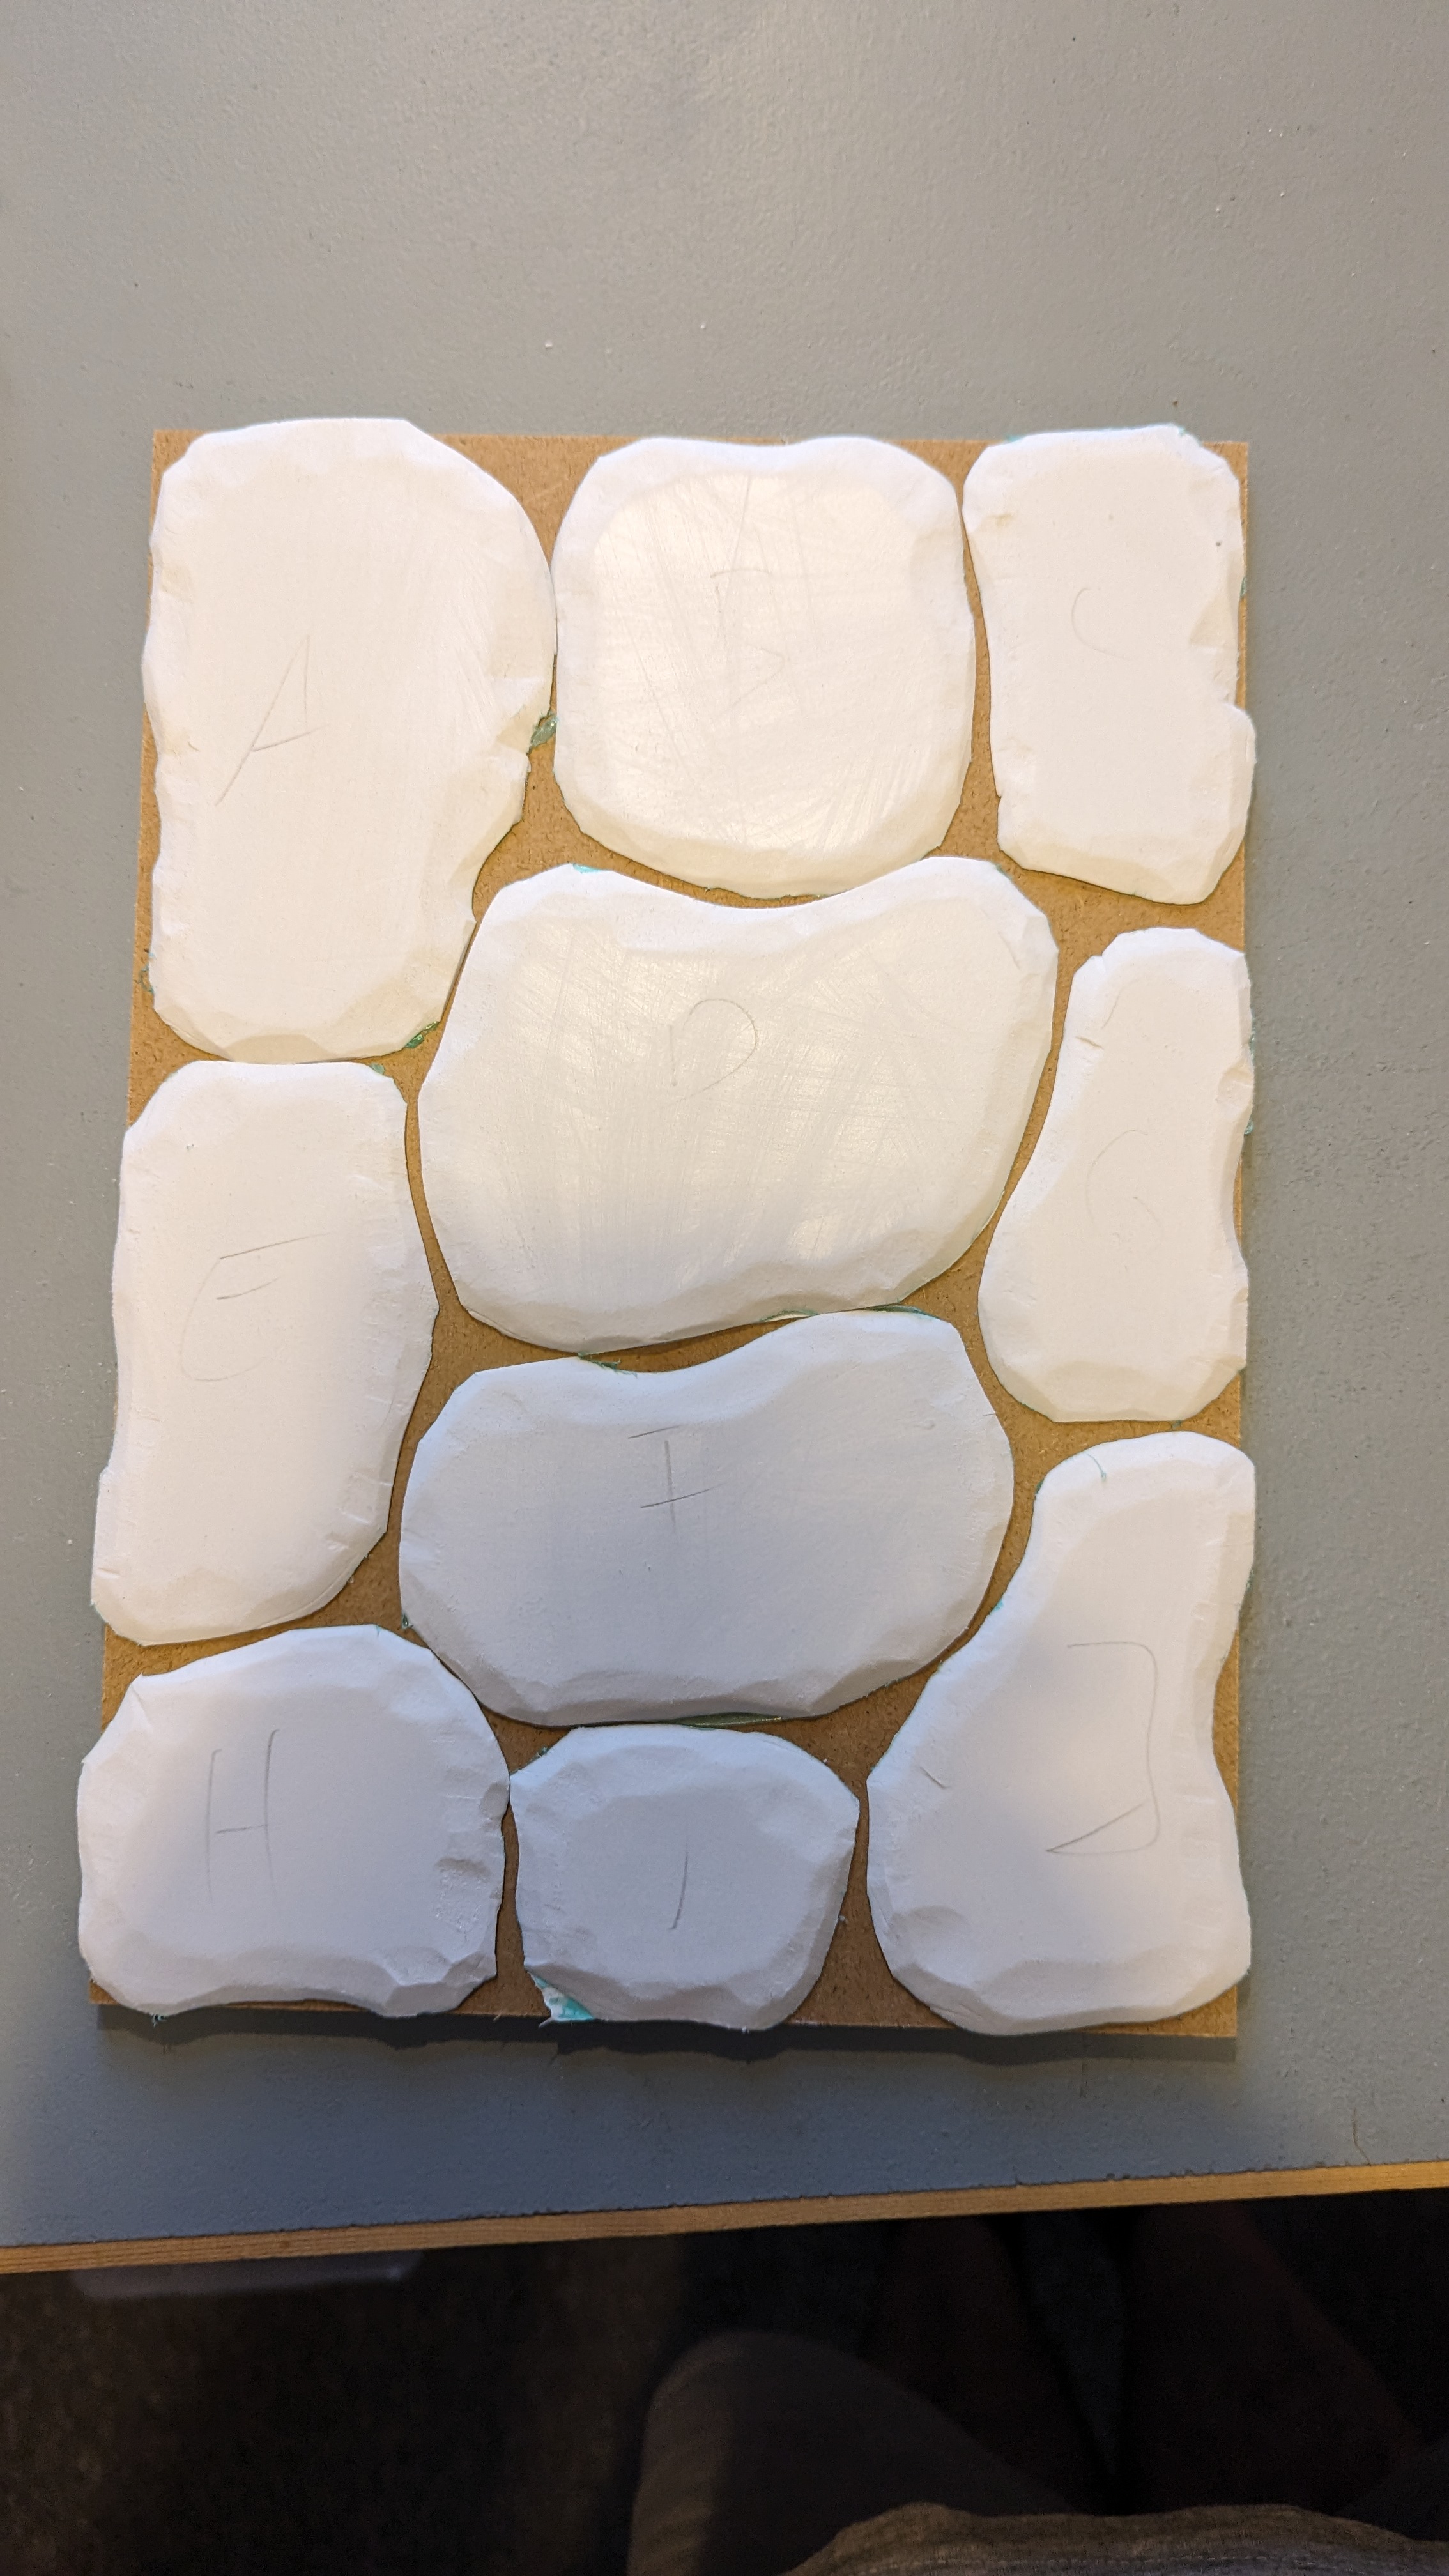
I started with a sheet of 3mm PVC, cut to A4 size. Onto this I marked the bases of the single plant pieces, thus ensuring that they would fit into the A4 box I will store them in.

PXL_20230725_125846594.jpg


I then bevelled the edges with a knife. At this stage I also traced the edges of the bases onto the MDF sheet to know how to align the single pieces in the box.

PXL_20230725_165429408.jpg


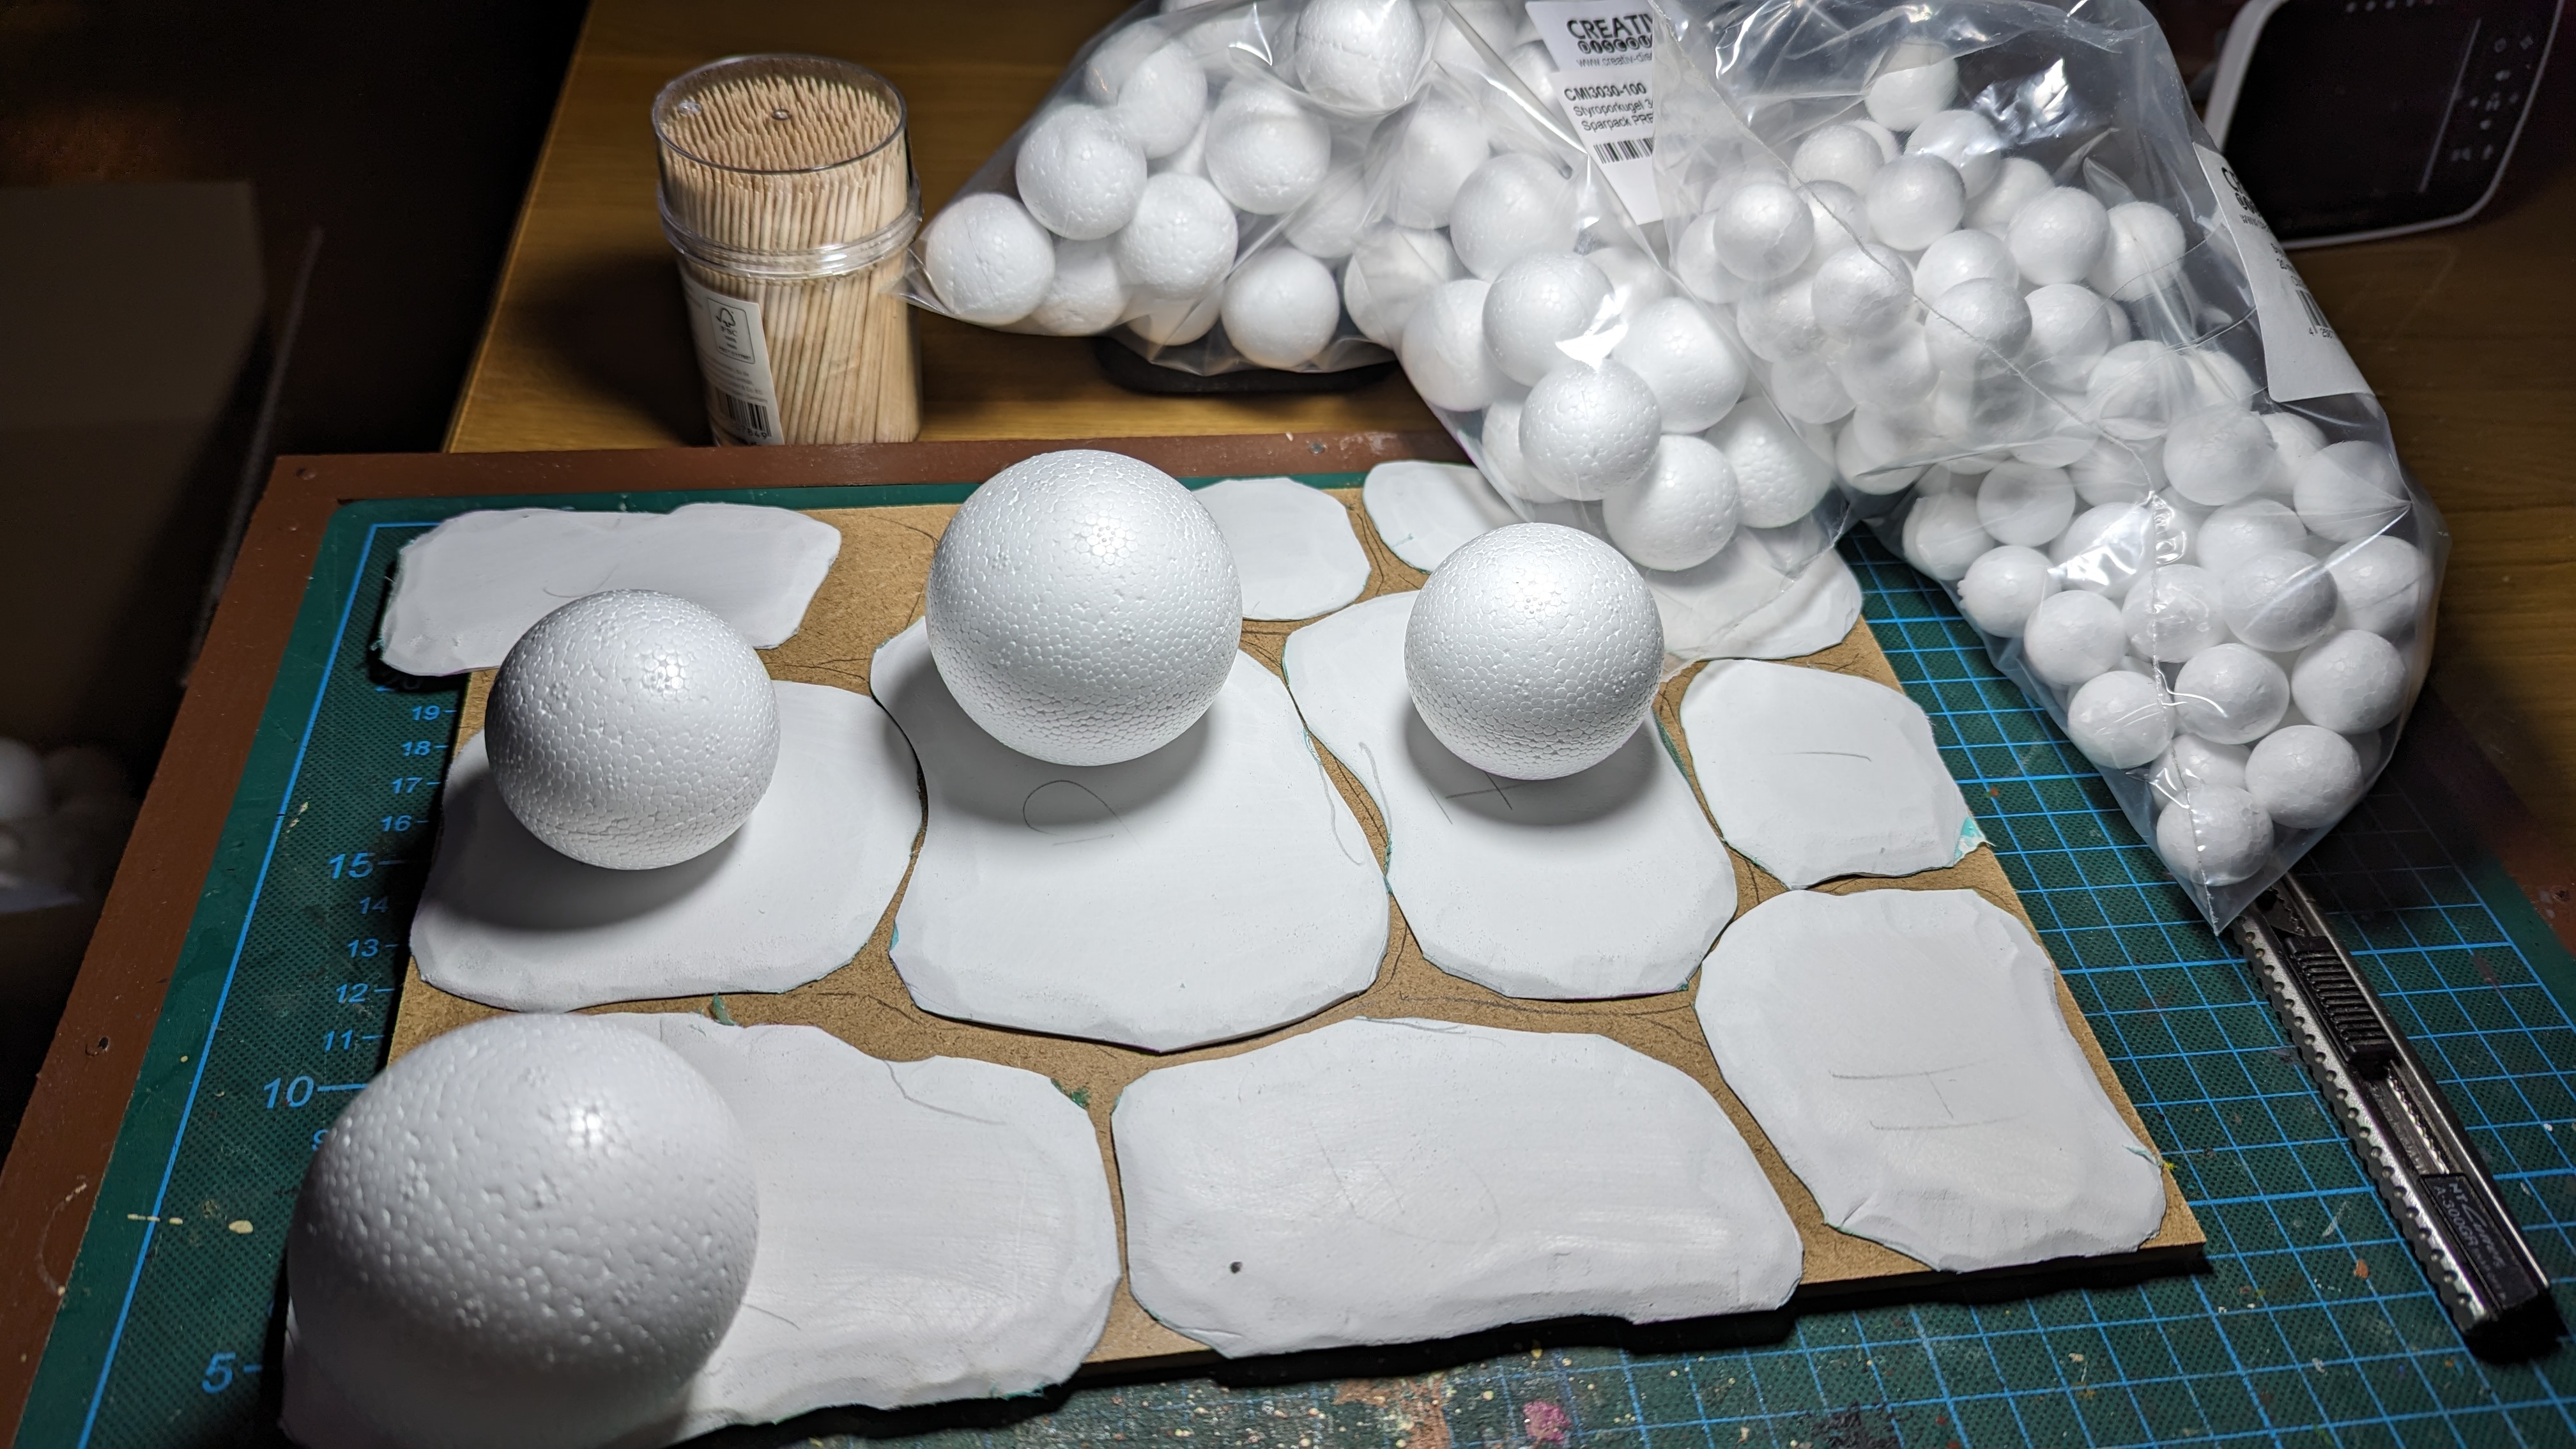
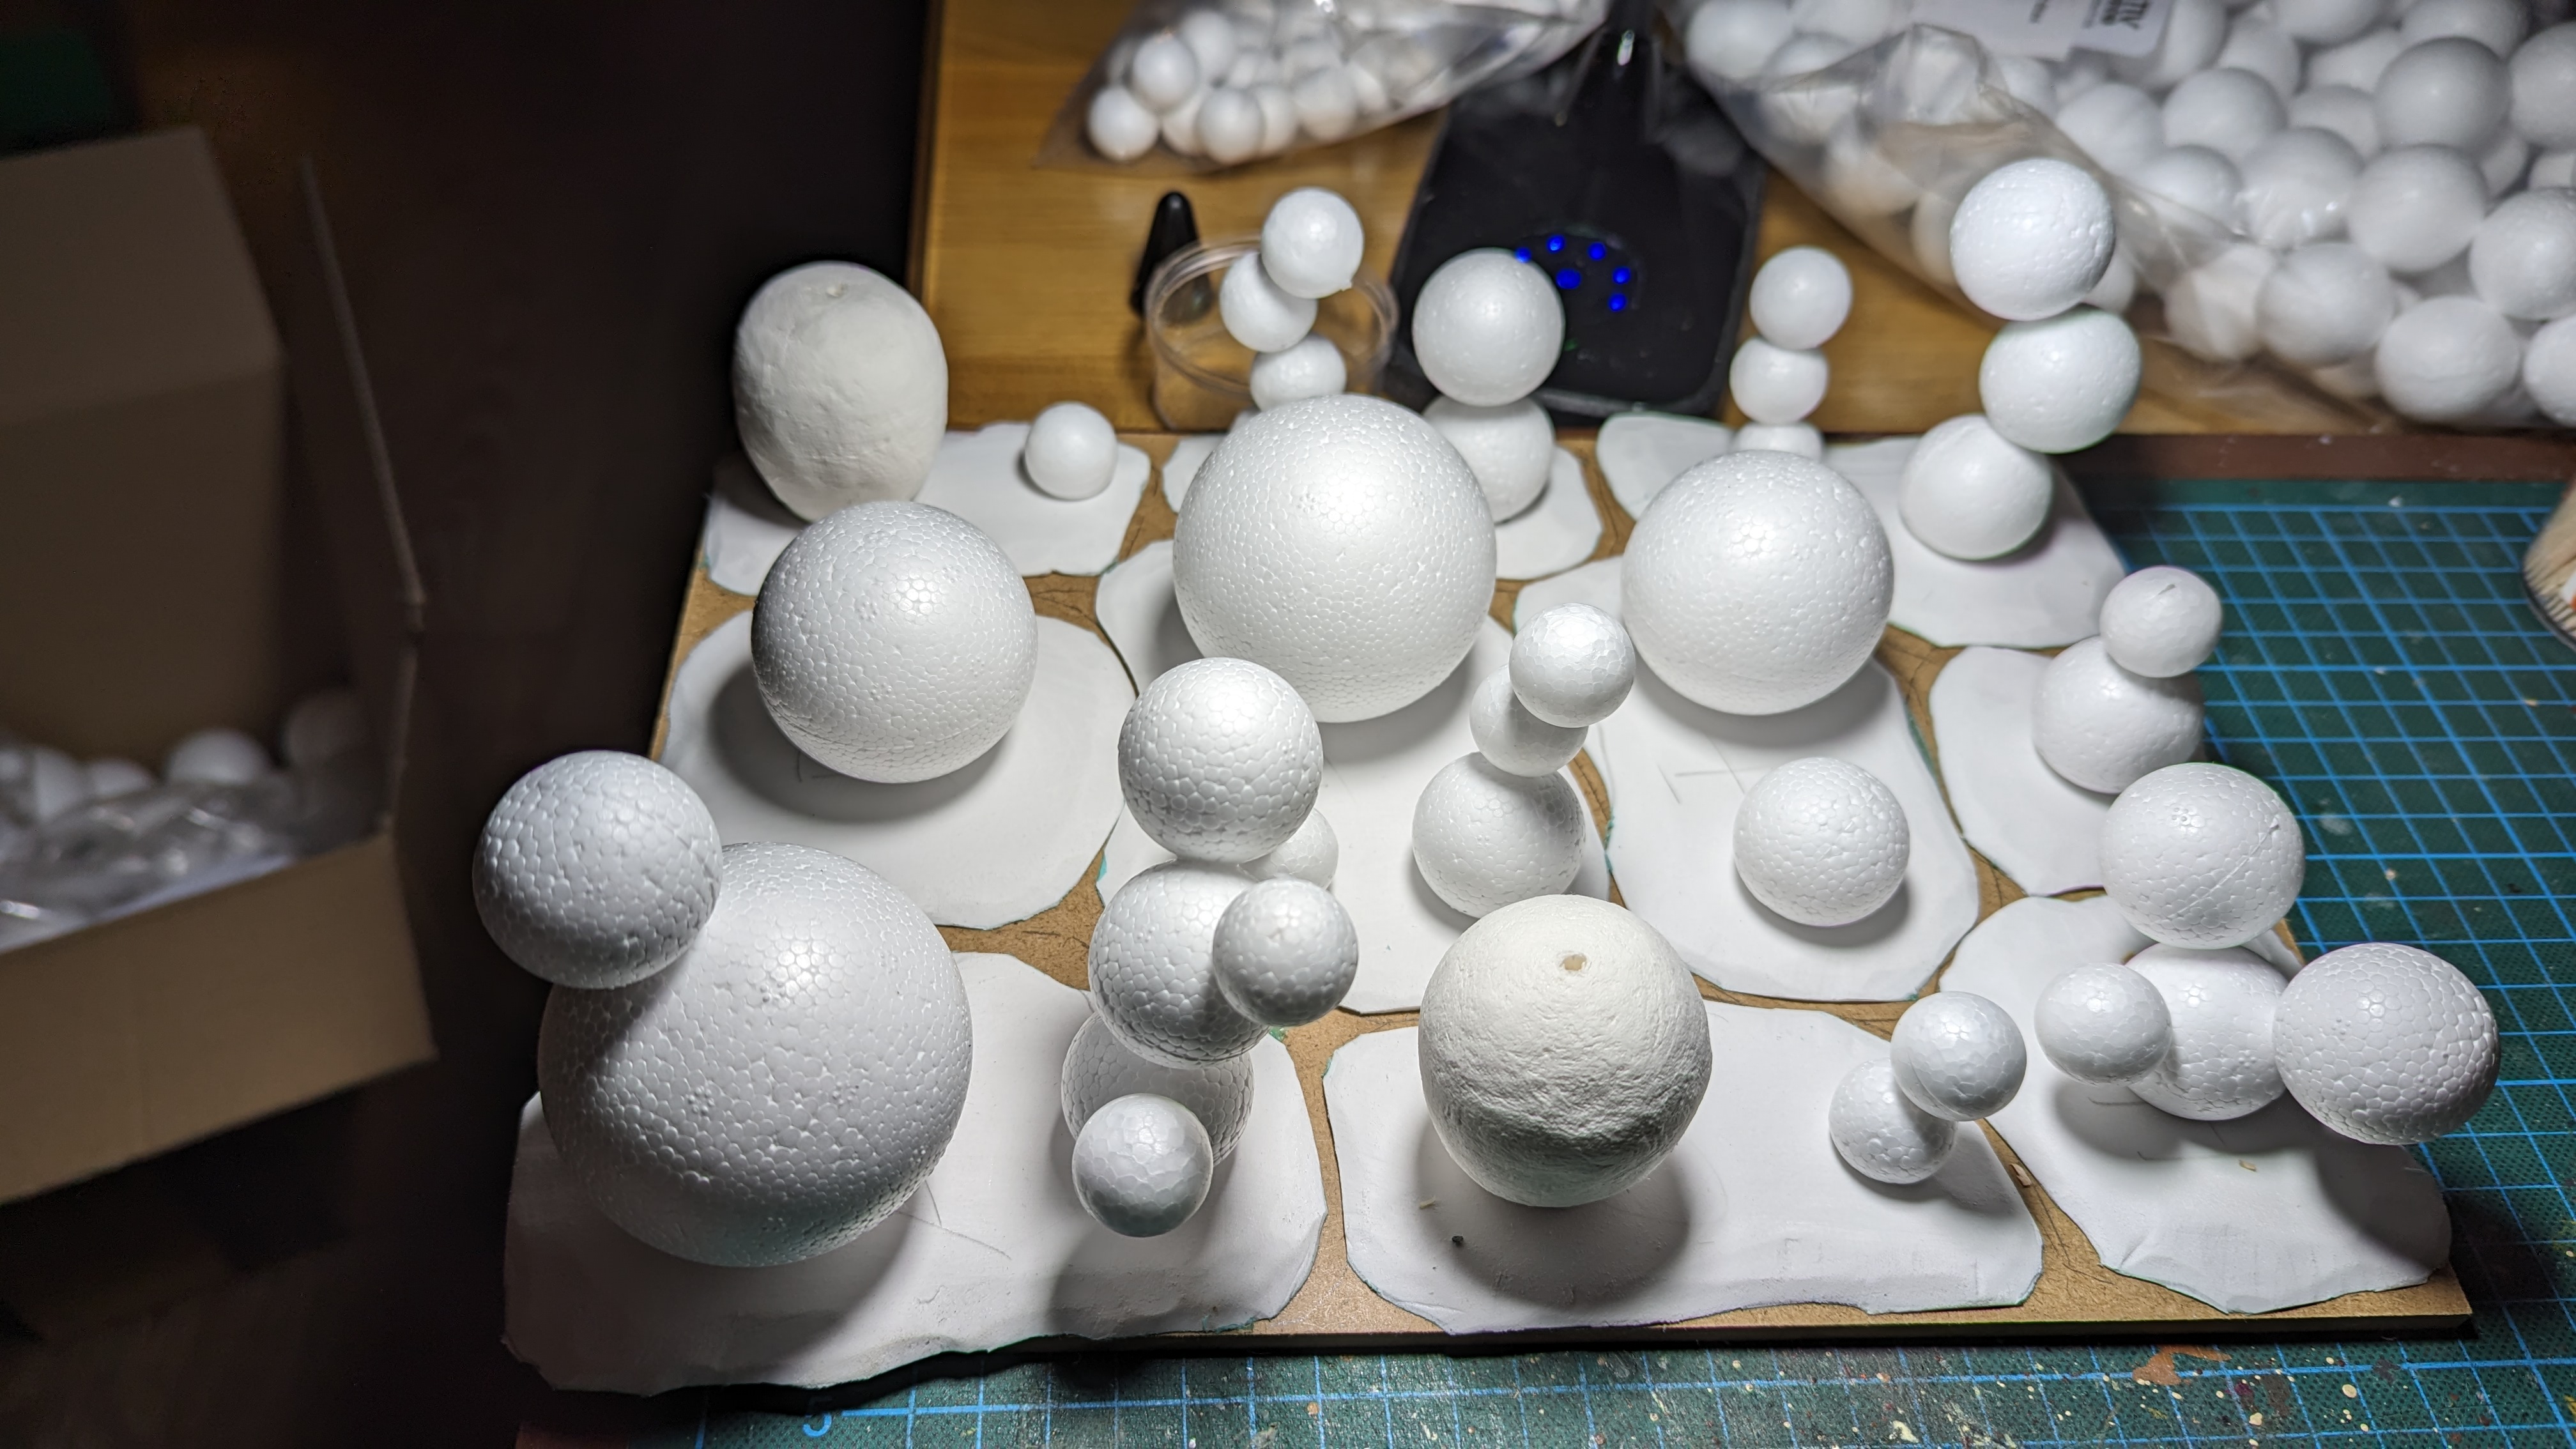
I then started to glue down the largest balls first. I ordered a couple different sizes of polystyrene balls and eggs. (They send me cotton wool eggs instead of polystyren eggs, but they worked fine as well.)

PXL_20230725_191636681.jpg


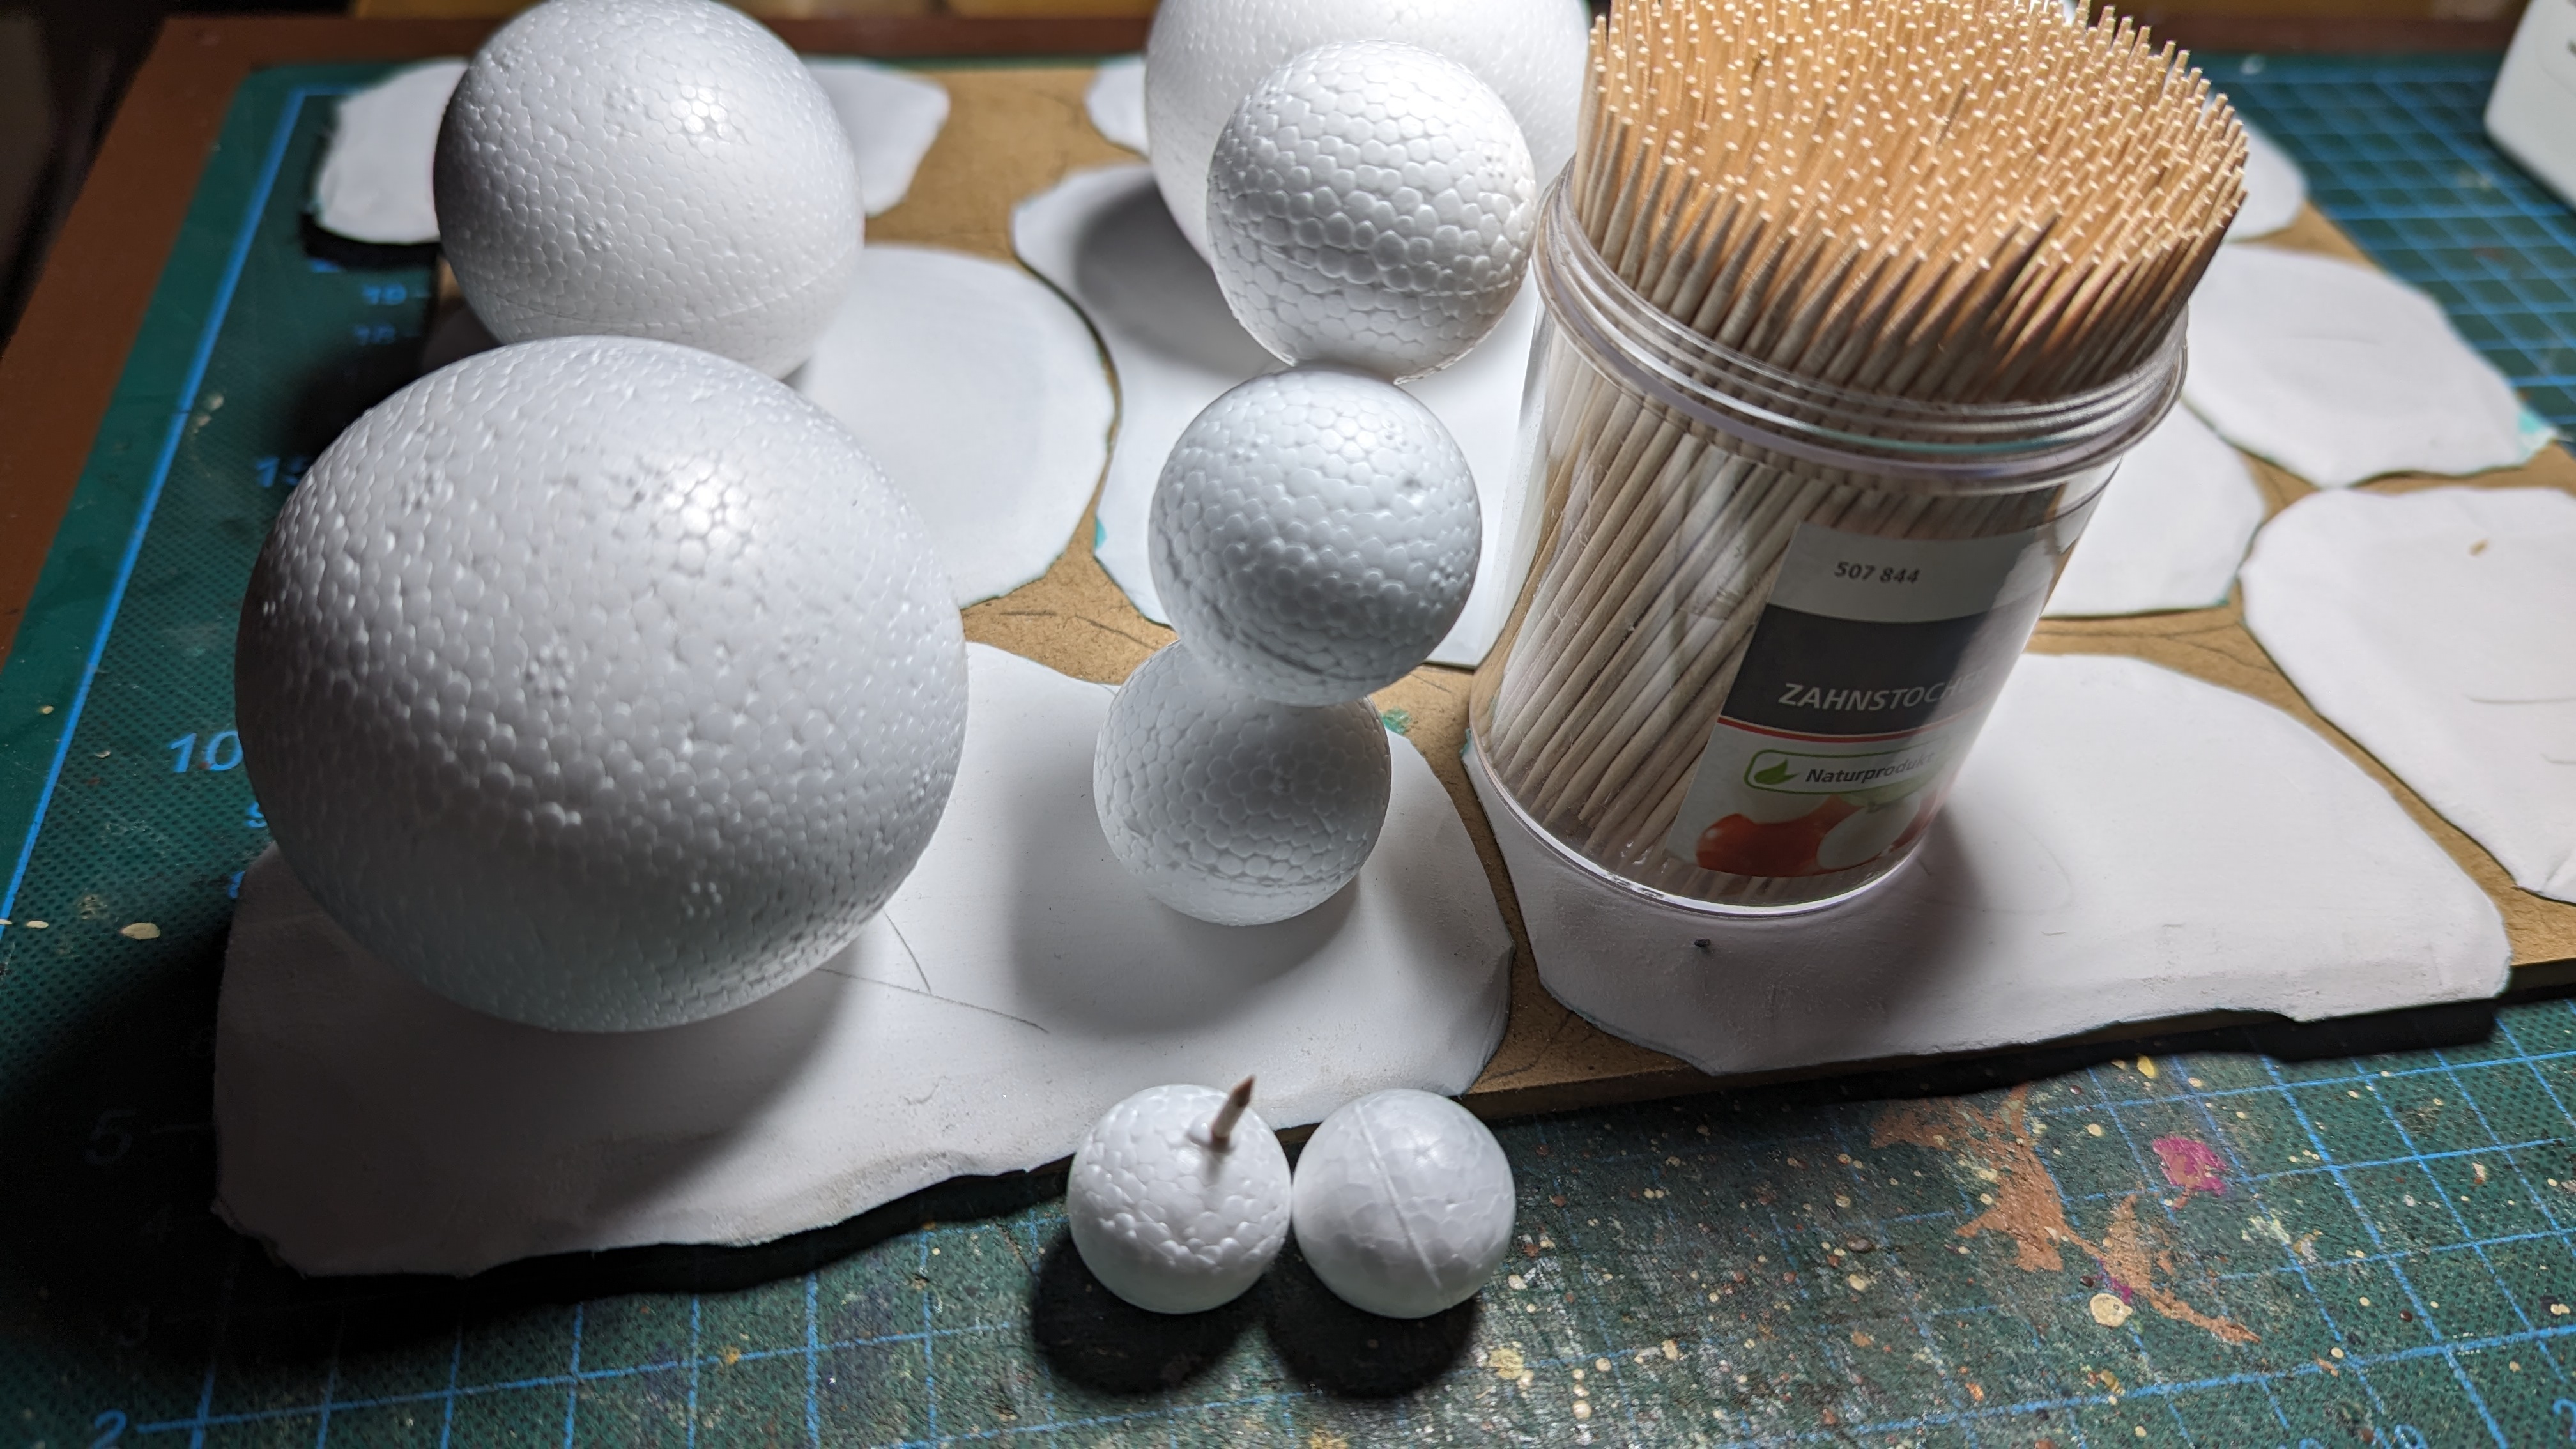
When mounting ball on ball, I strengthened the glue with cocktail sticks.

PXL_20230725_192657574.jpg


Basic contrusction done.

PXL_20230725_200617694.jpg
 
looks like it's going well.. Of course I know the classic alien plants but didn't know which issue had a bit about them. so.. thanks ^_^
 
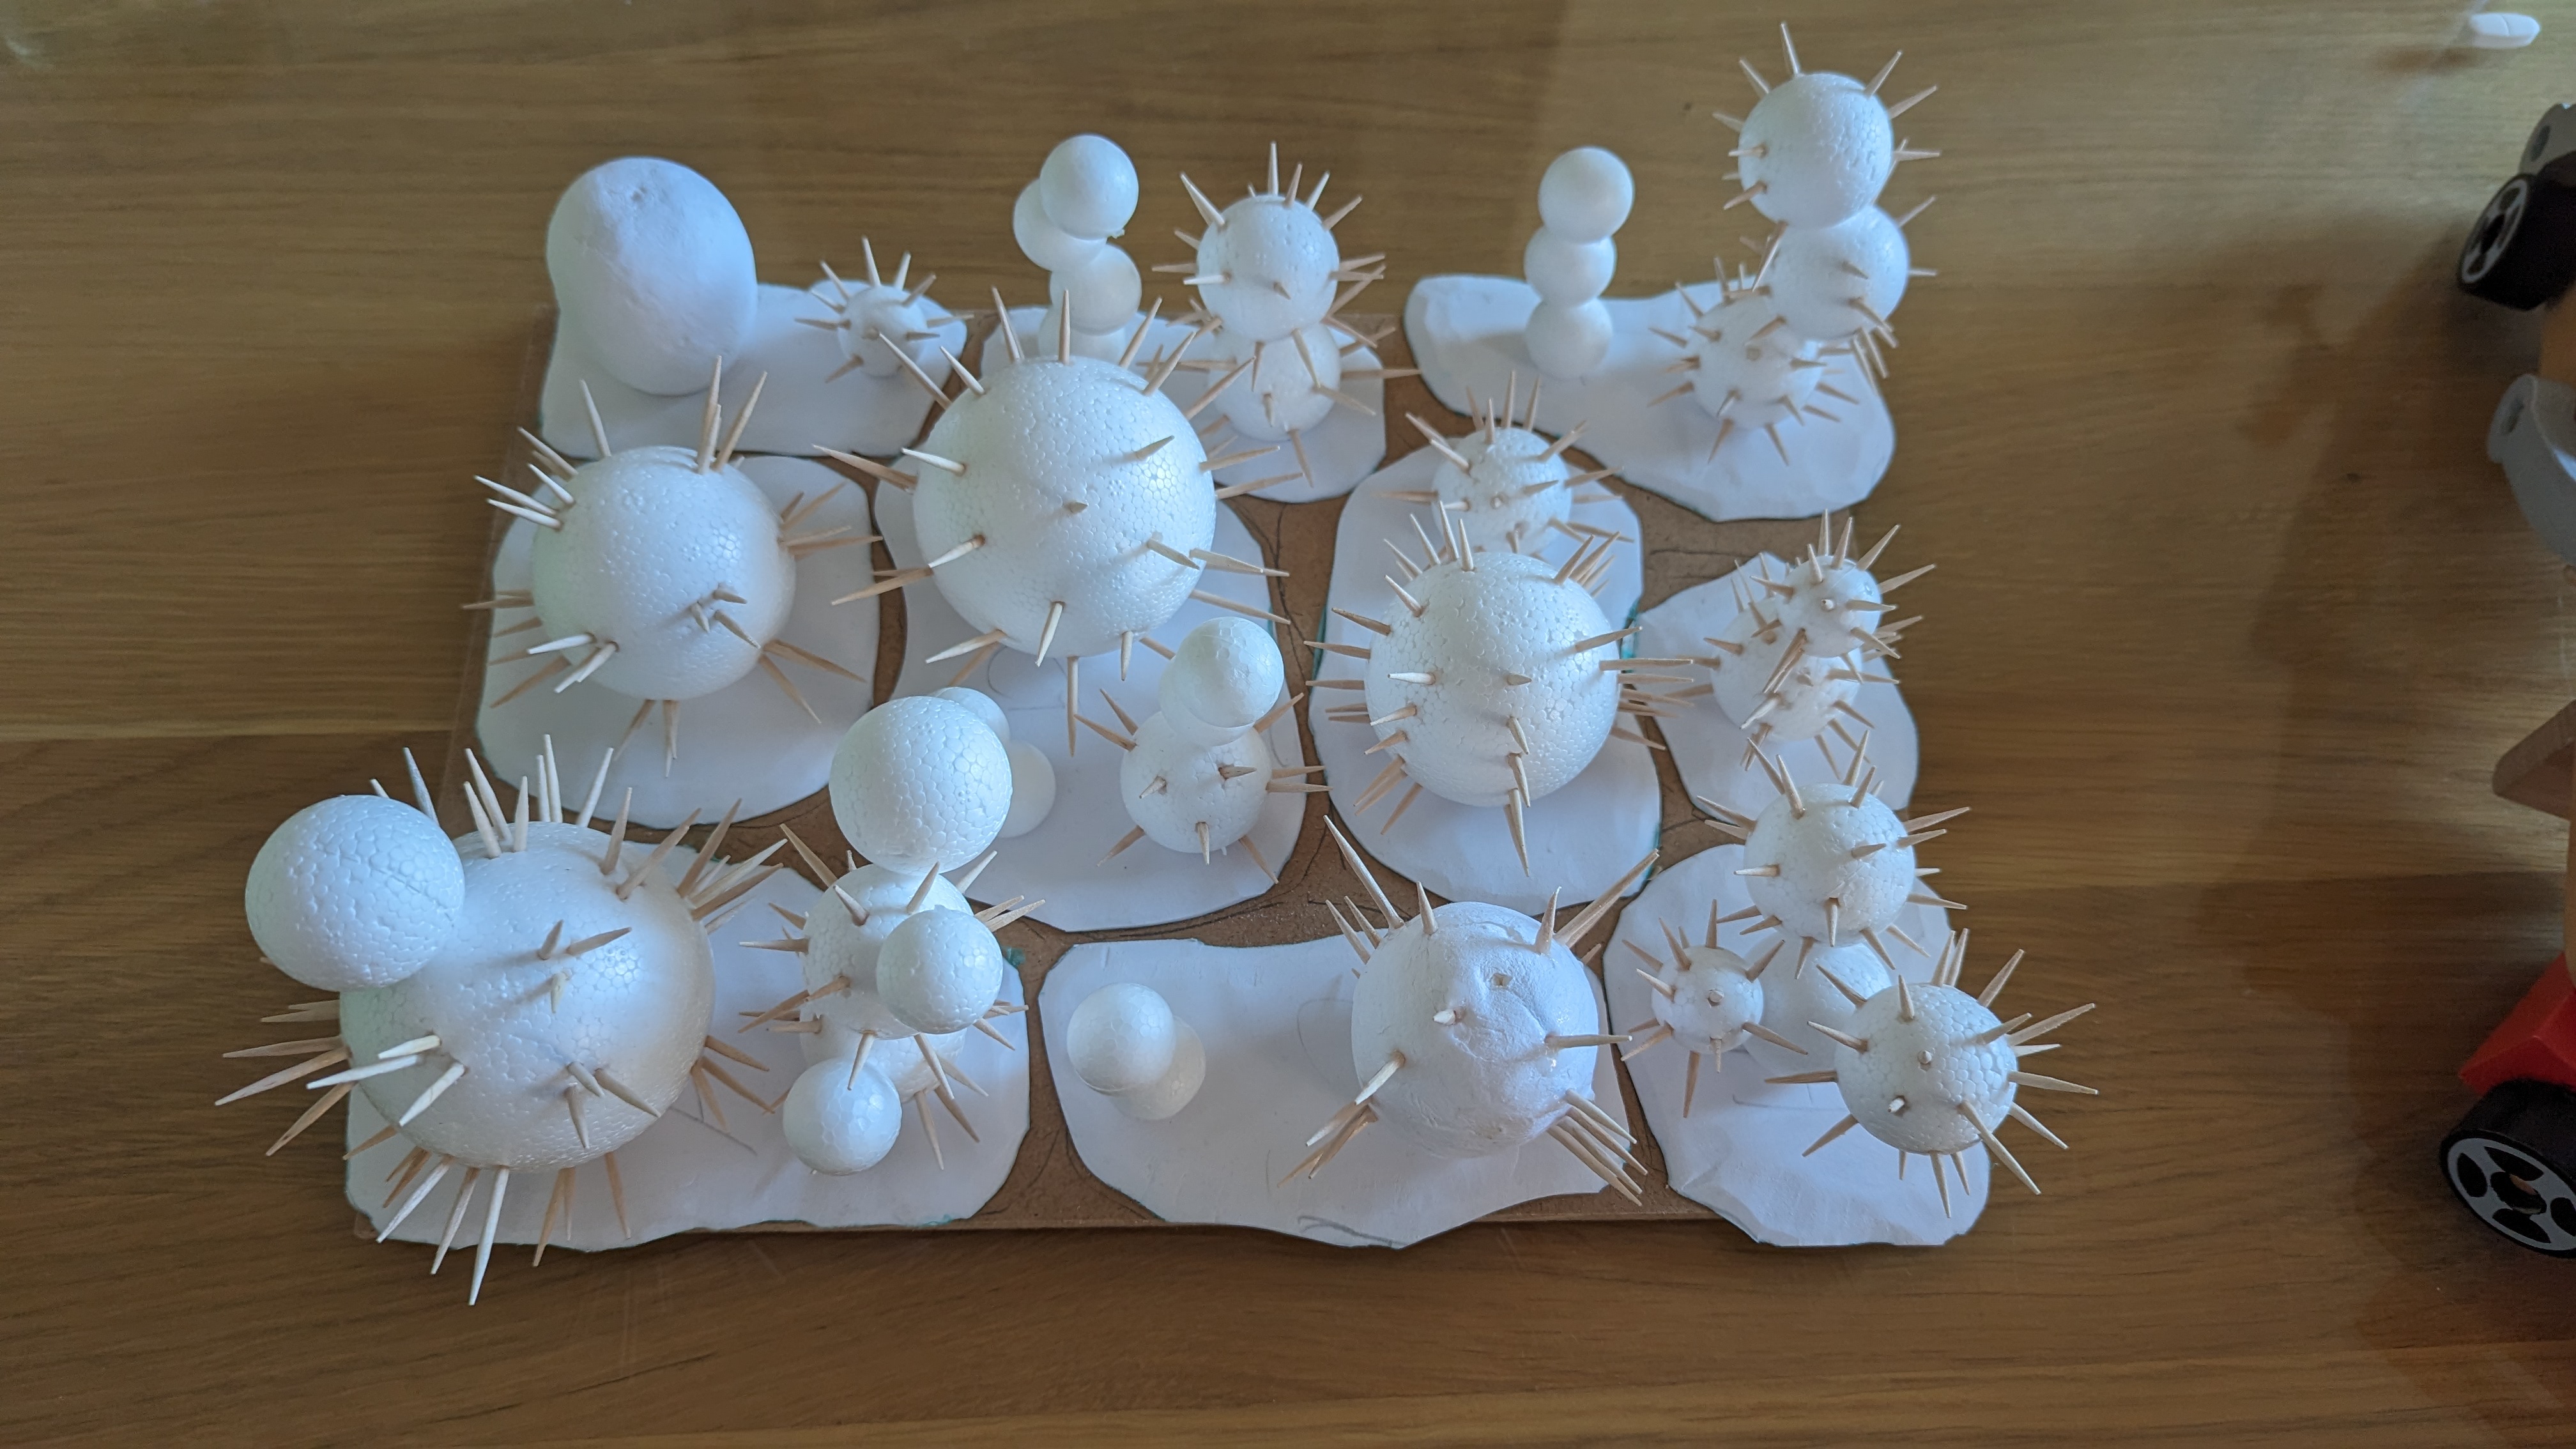
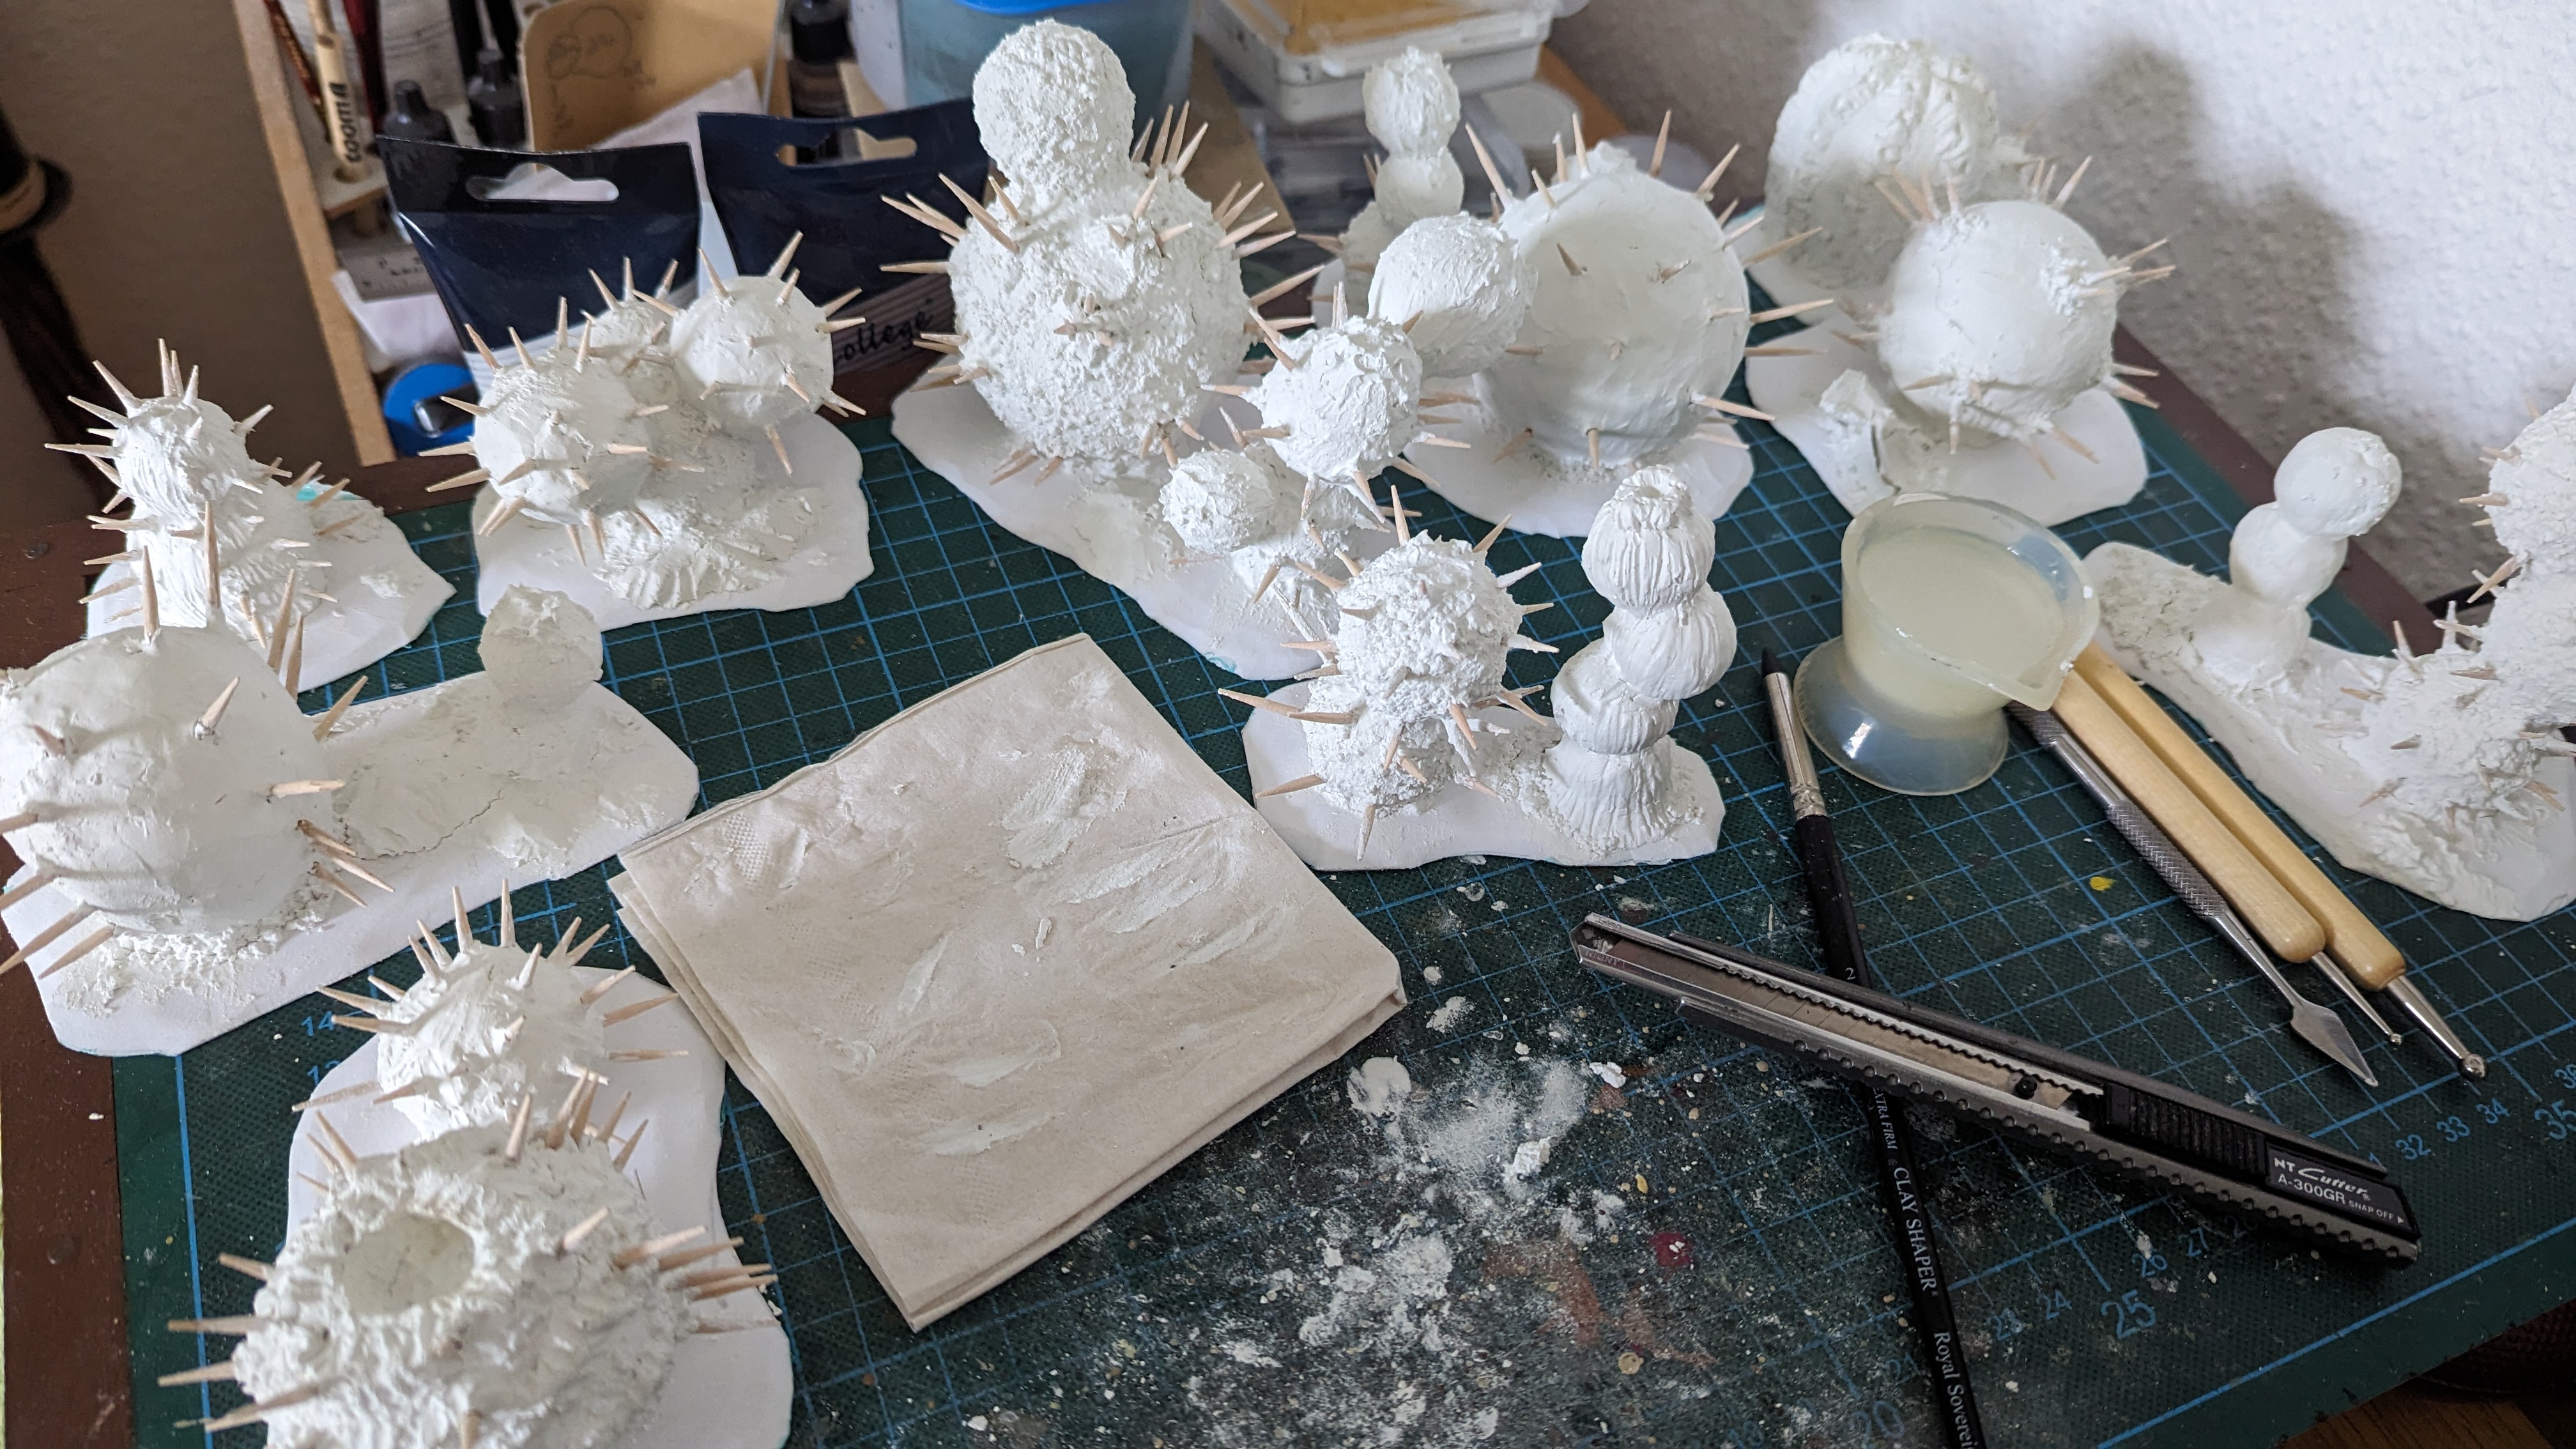
Next step was to cut cocktail sticks to size und poke them balls with. I had planned from the beginning to use static grass as an alternative kind of spike, and I soon was very glad for that. Because it takes so many cocktail sticks... so many...

PXL_20230810_175825144.jpg


Then I controlled if everything fits into the storage box - of course it did not. I ha to trim some spikes, even some bases here and there. But then everything fit in snuggly.

PXL_20230810_182155486.jpg
 
Looking forward to seeing your interpretation of that classic bit of terrain all painted up. They have been on my "to build" list for, well decades. I did start to have a go once, but never got much past finding a few balls and thinking I needed thicker cocktail sticks. Maybe this will inspire me to finally make some myself?

Wish I'd remember to scale my terrain for storage before I build it! ... just started on a bit more graveyard stuff and quite forgot to design it to fit in anything (again). Also cool seeing someone else who uses PVC (foamed I assume) for basing!
 
The only issue I've found with it is that when doing large bases (~1'+) it can still warp if you put something that shrinks on it - so when I did my ponds the large one did warp a bit as the resin cured and shrunk a little. Not as badly as MDF can turn into a banana at least!
 
Textures. That was what I needed to apply next. With some of the original plants, and with quite some I have seen since online, it always bugged me when you saw "polystyrene balls with cocktail sticks" and not "alien plants". When now thinking about this topic, I nailed it down to:

  • no visible polystyrene bubbles
  • no visible perfect ball shapes stacked onto one another
  • different textures

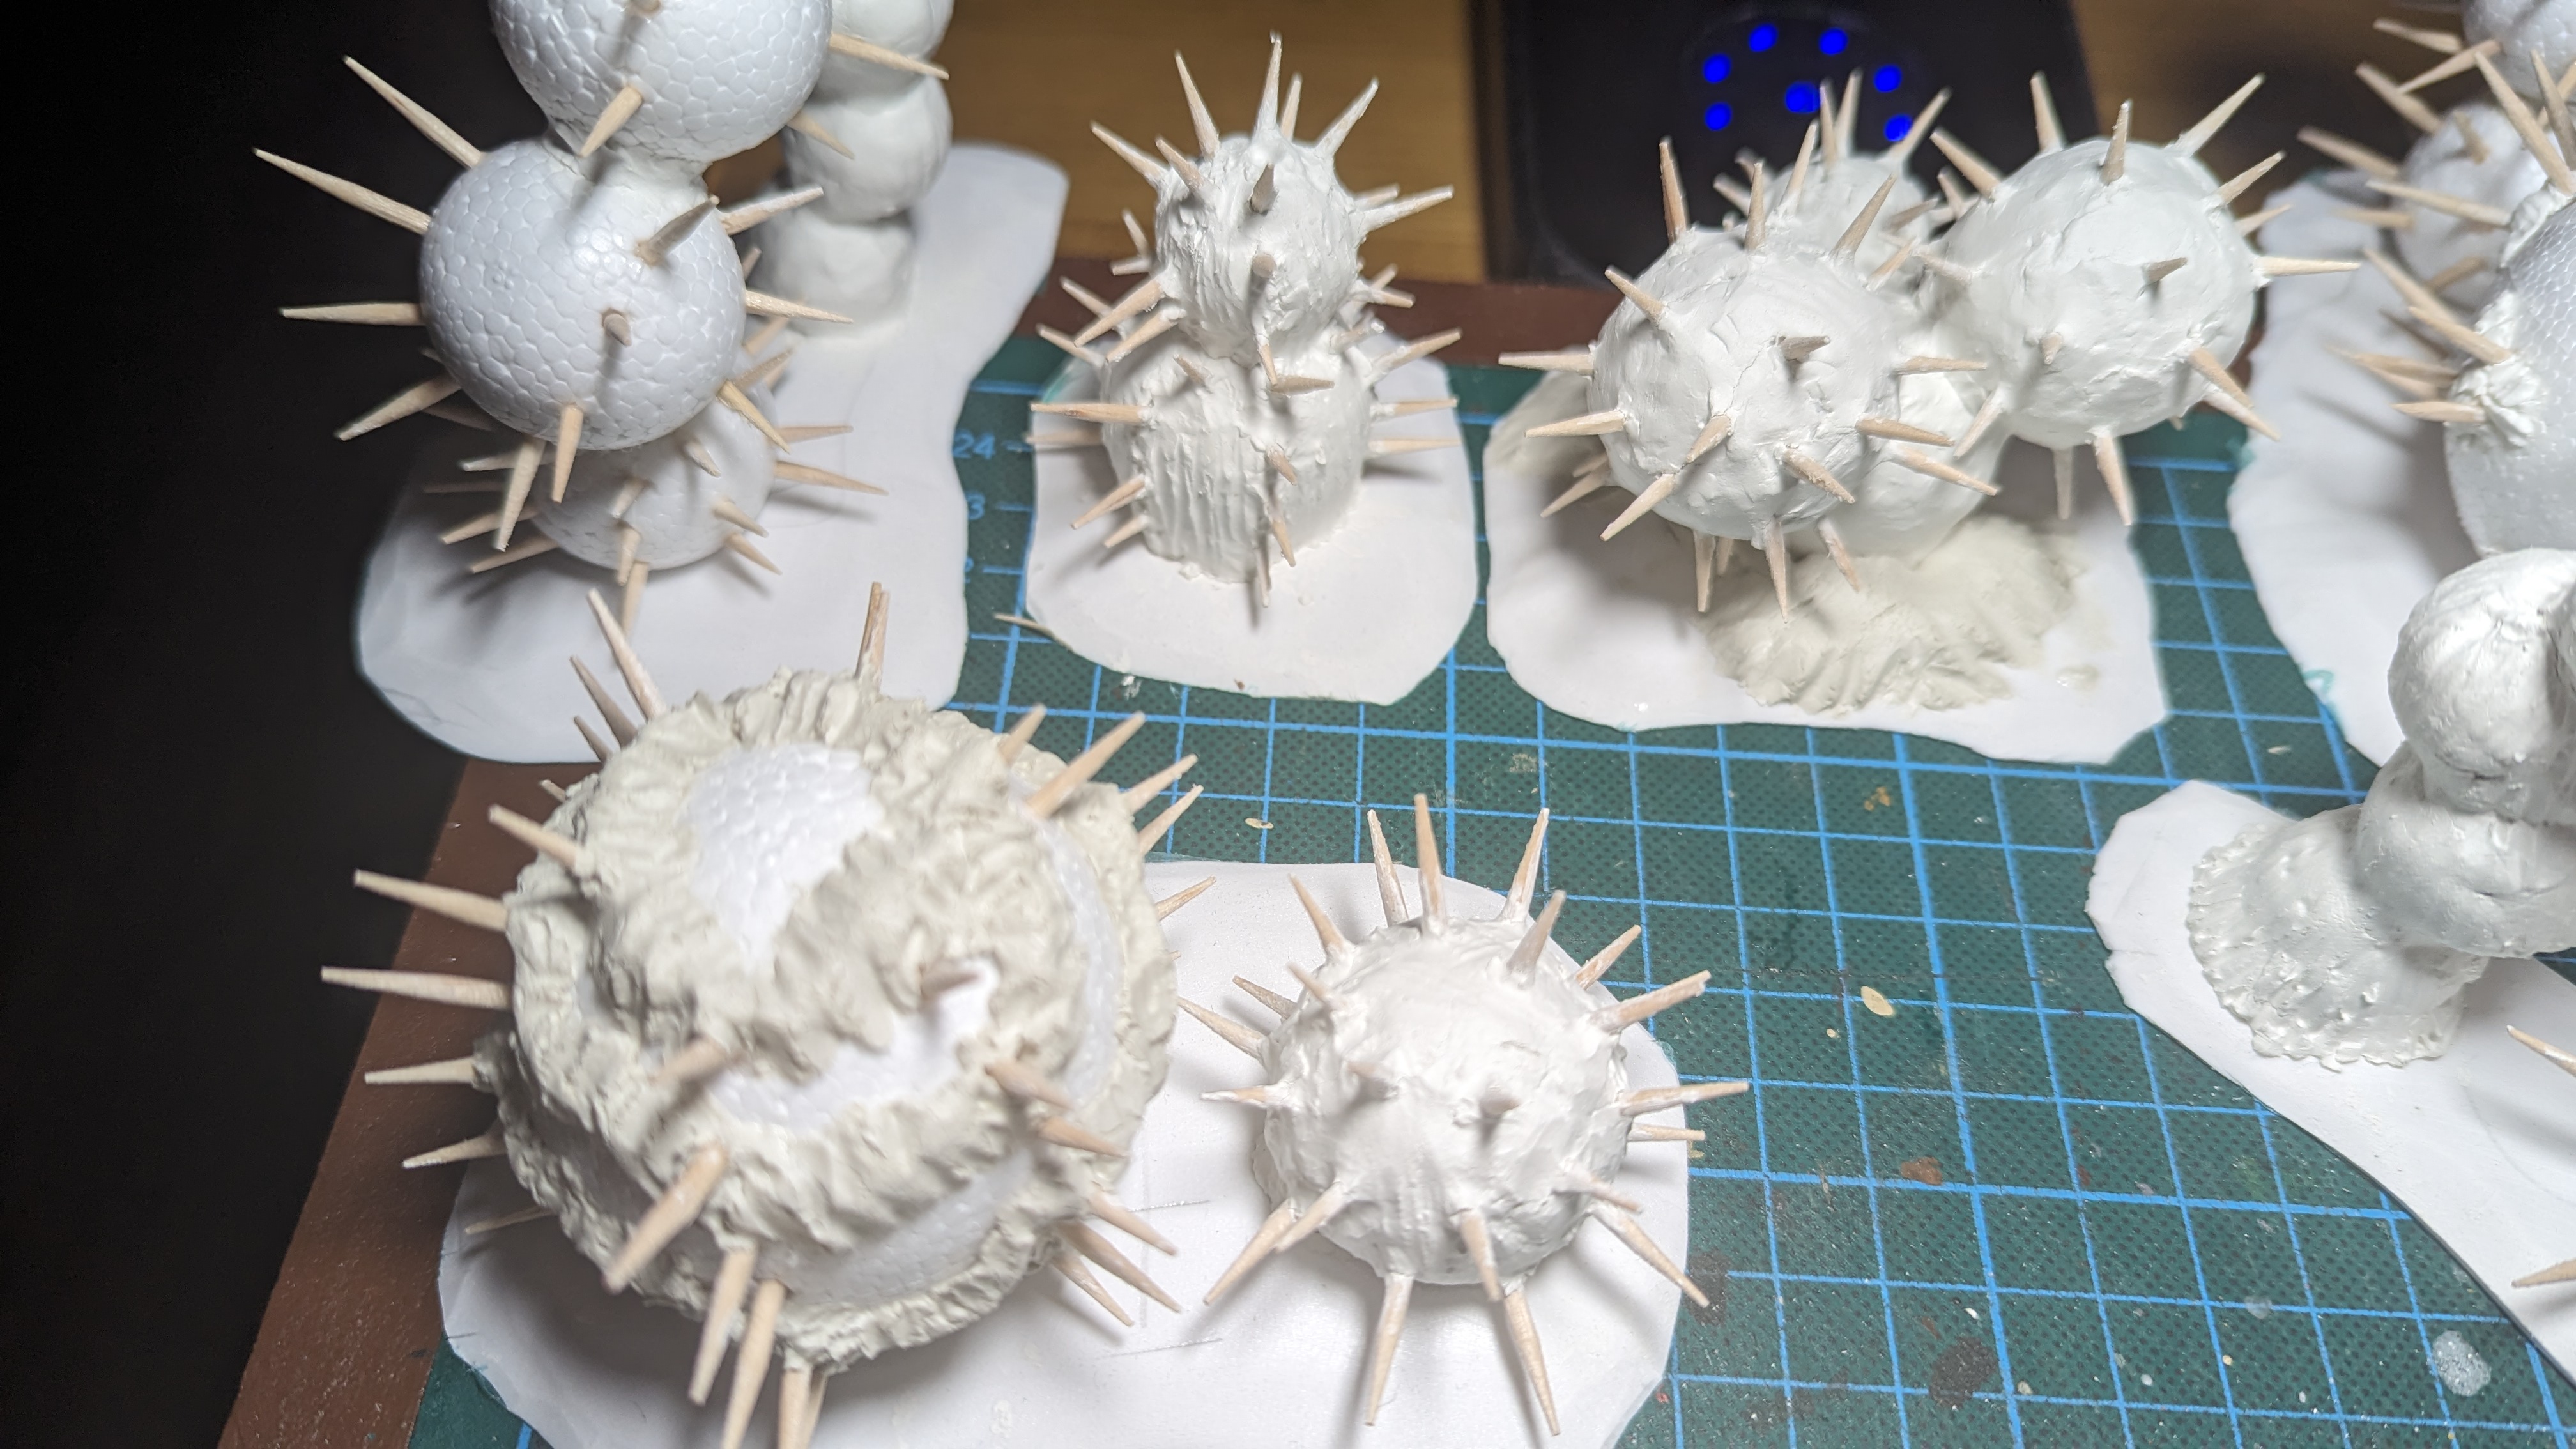
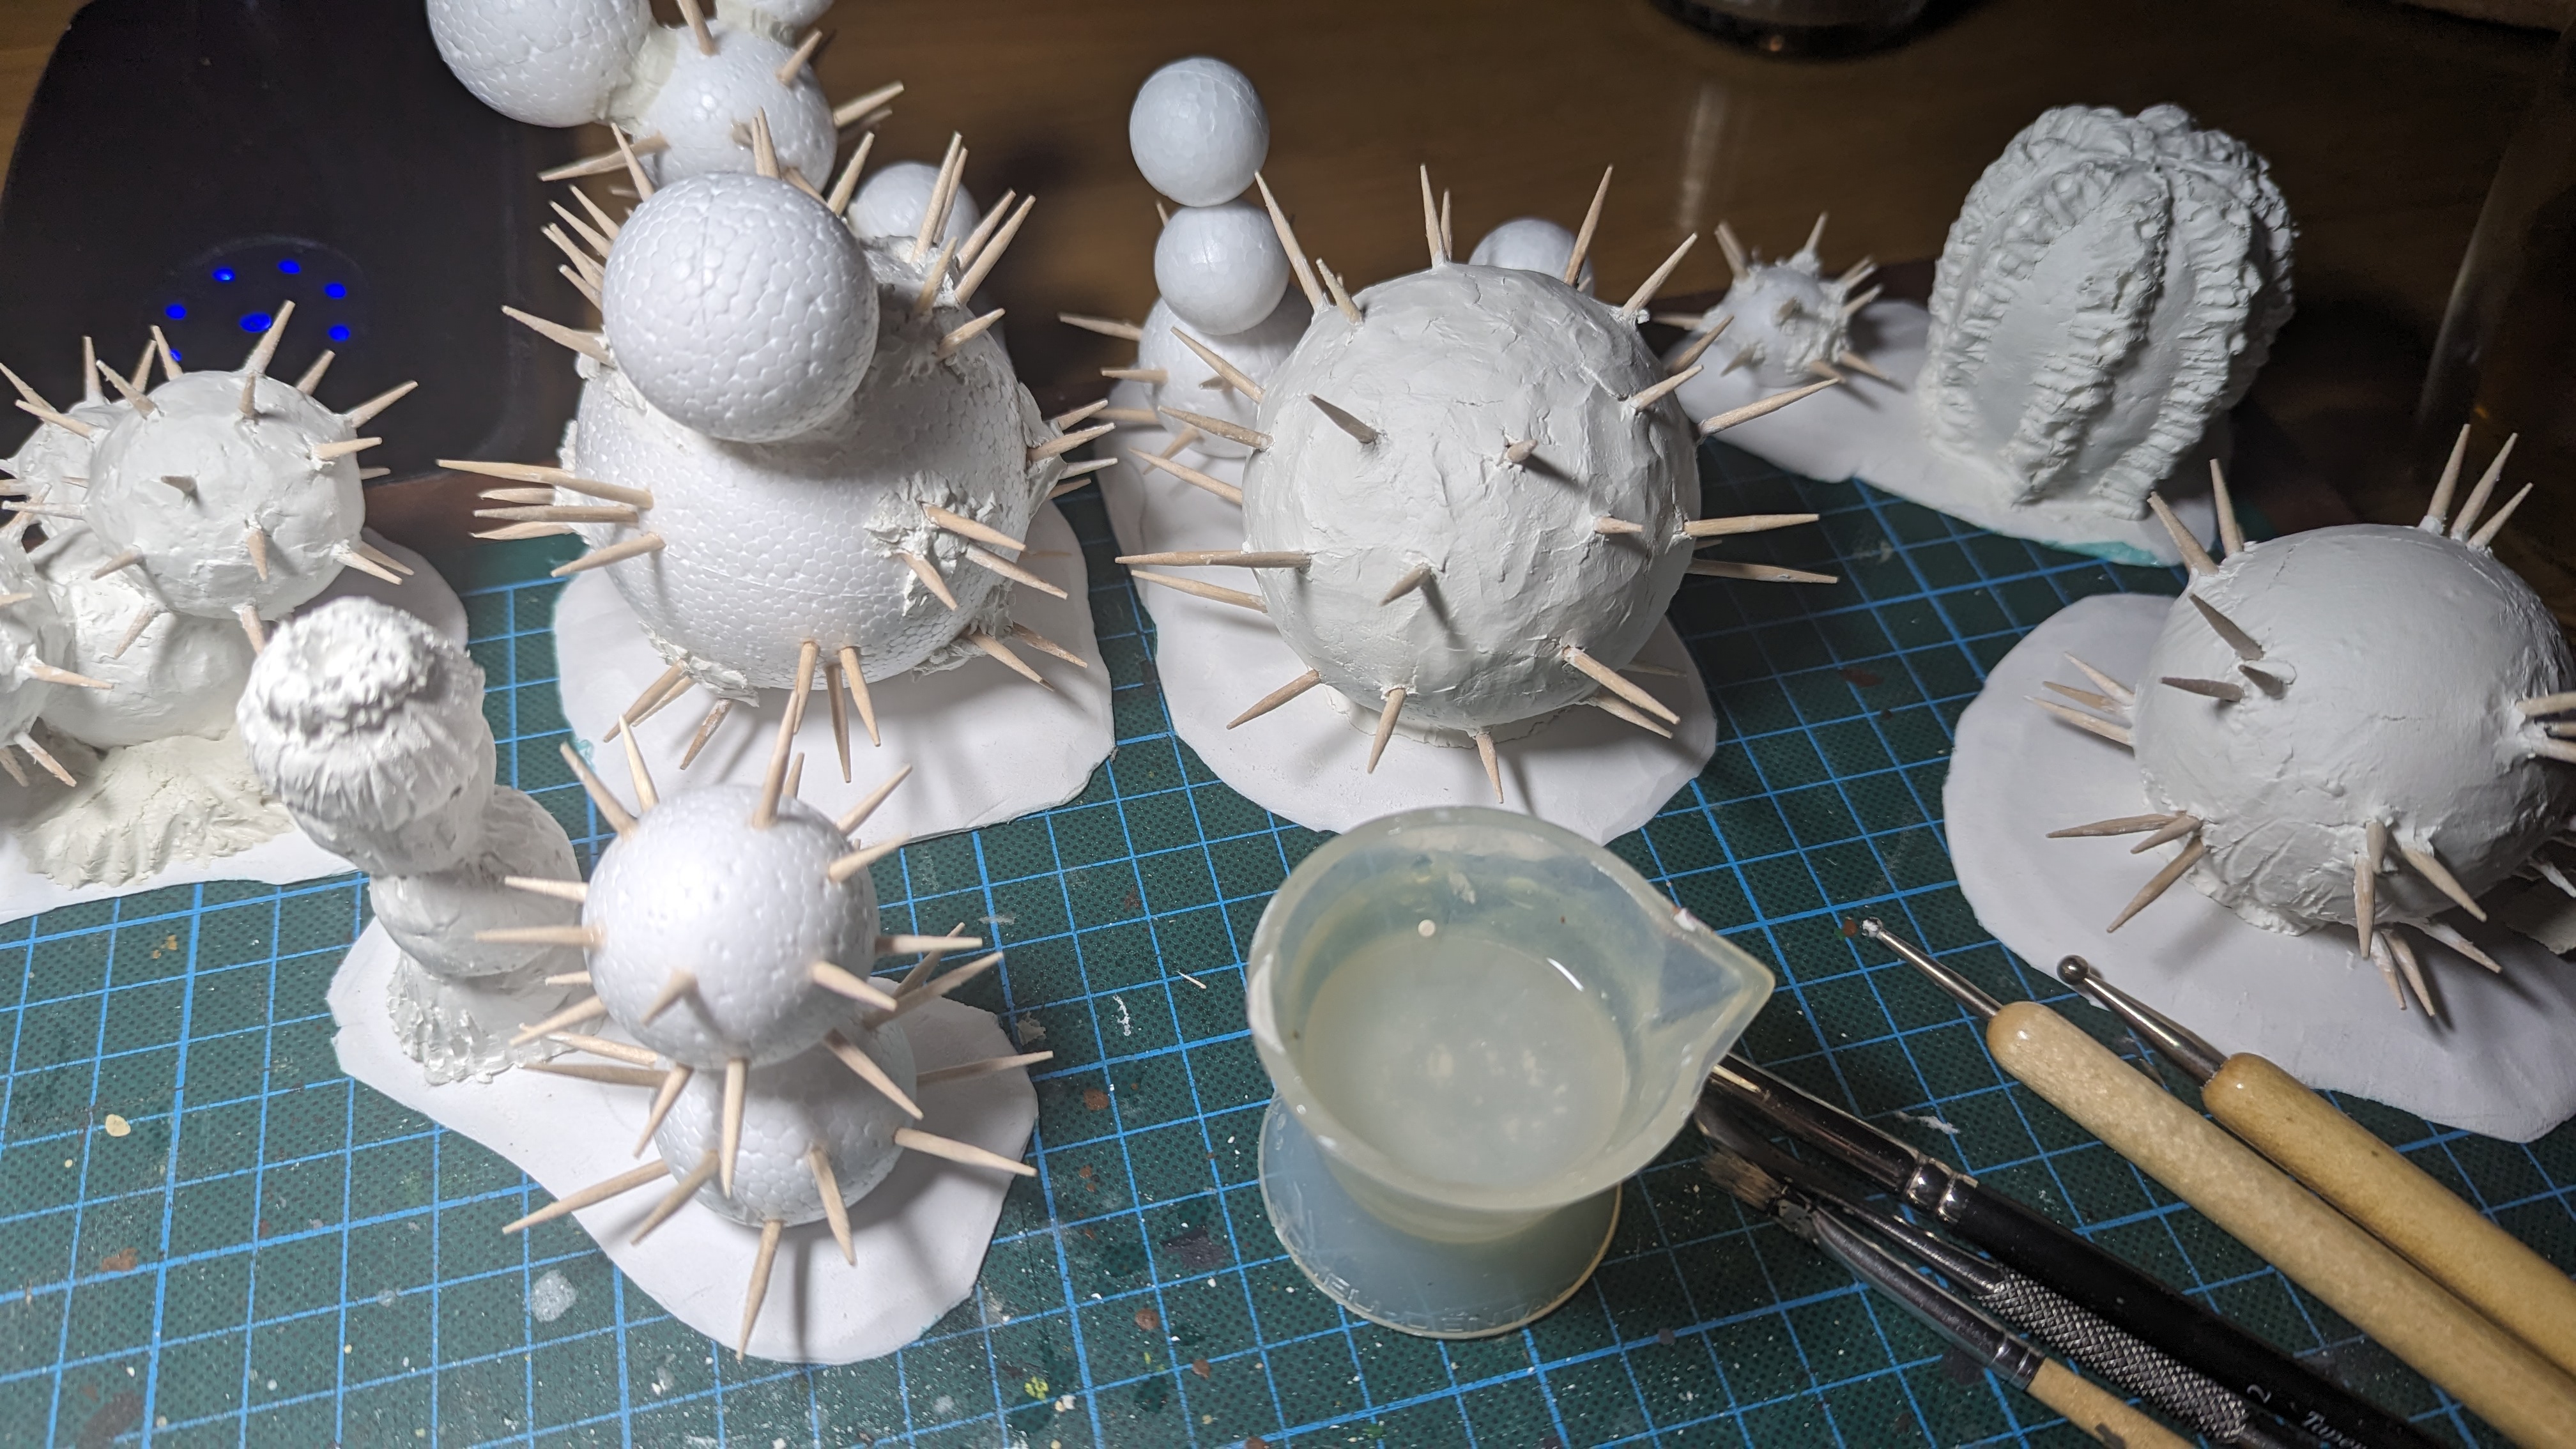
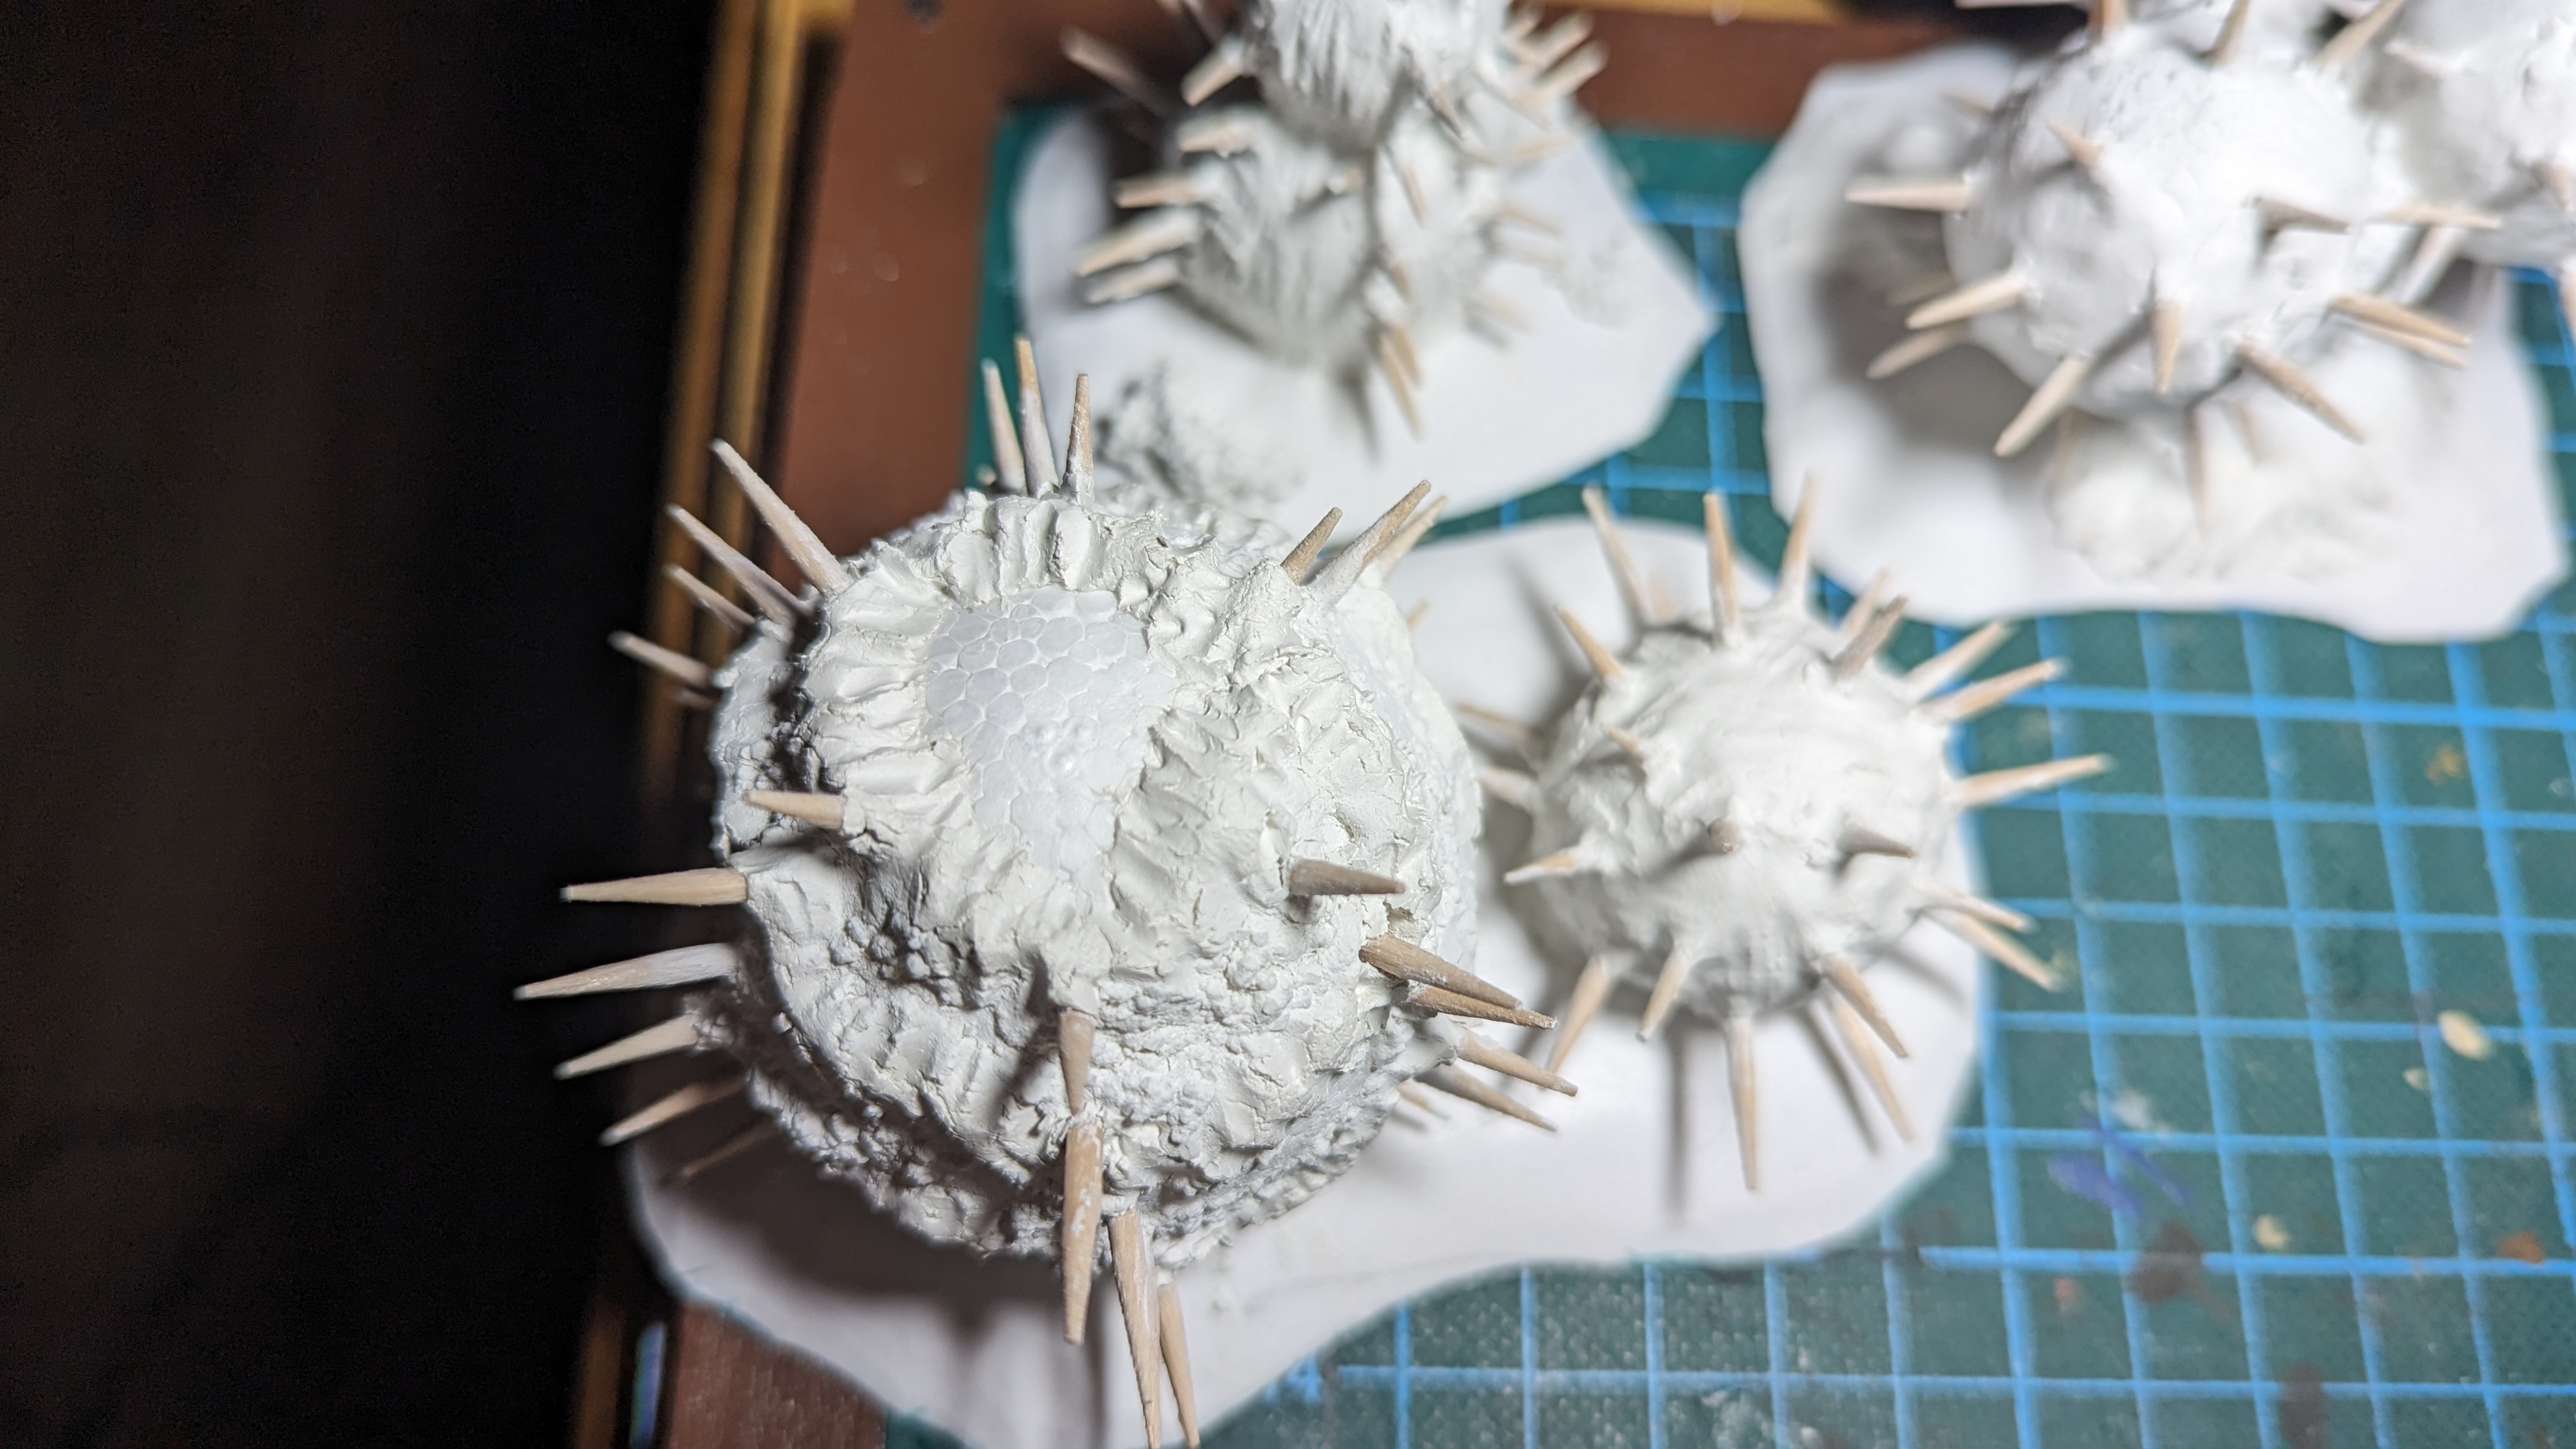
To achieve this, I started by covering some plants in thinly rolled airdrying clay, on others I carved structure onto the substructure with the same clay.

PXL_20230814_202104171.jpg


PXL_20230814_202107943.jpg


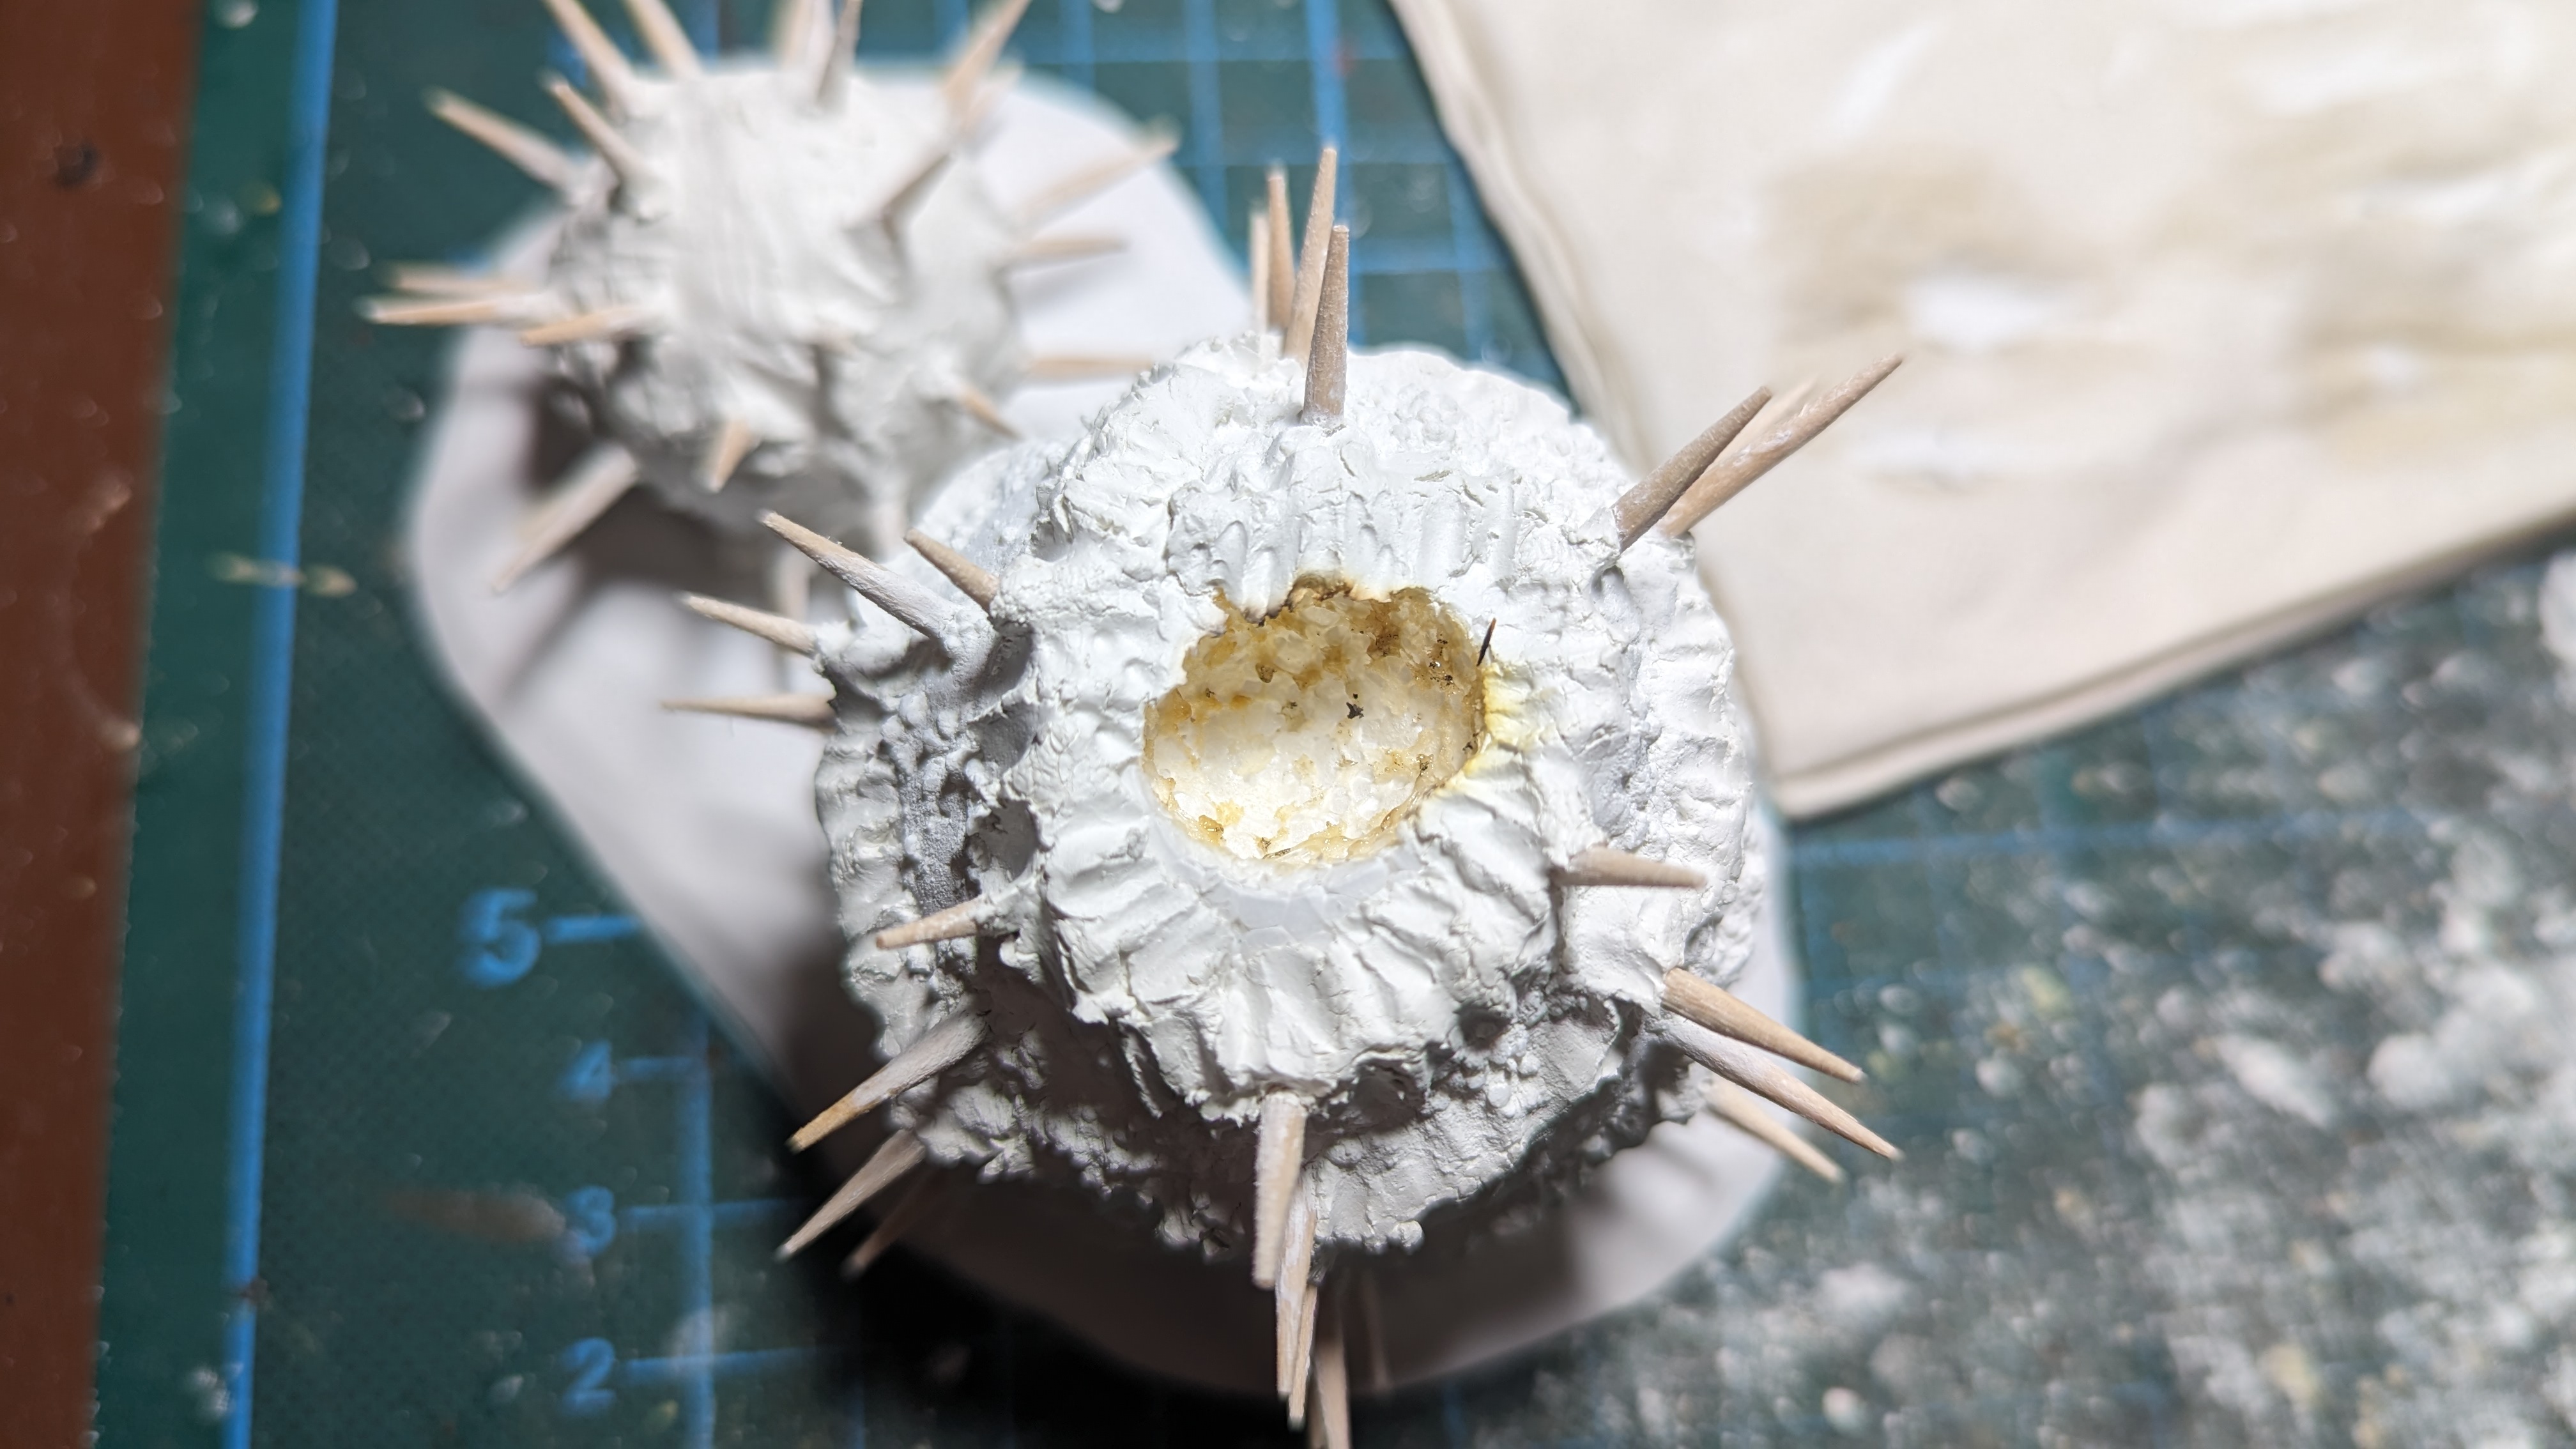
On one plant, I burned out the top with a match stick (in a well ventilated area of course, such fumes are toxic).

PXL_20230815_195408653.jpg


PXL_20230815_195624987.jpg


To cover the rest of the plants, I mixed gesso primer with tile grout; and another batch where I added sand to the mixture for a grainier effect.

PXL_20230816_065637920.jpg
 
Thank you :-) I am like 99% sure I even could at this stage as all the surface should be covered by either clay or gesso & tile grout. Except for where I missed parts...

I will spray them nonetheless, but with airbrush and acrylic paint, not a rattle can ;-)
 
^_^ yeah.. Why it wasn't something important, i remember the first time i used a spray can on some poly and after an hour or so.. wondered what was going on ^_^
 
Textures. That was what I needed to apply next. Didn't I mention that before already...? Whatever, it is still true :-)

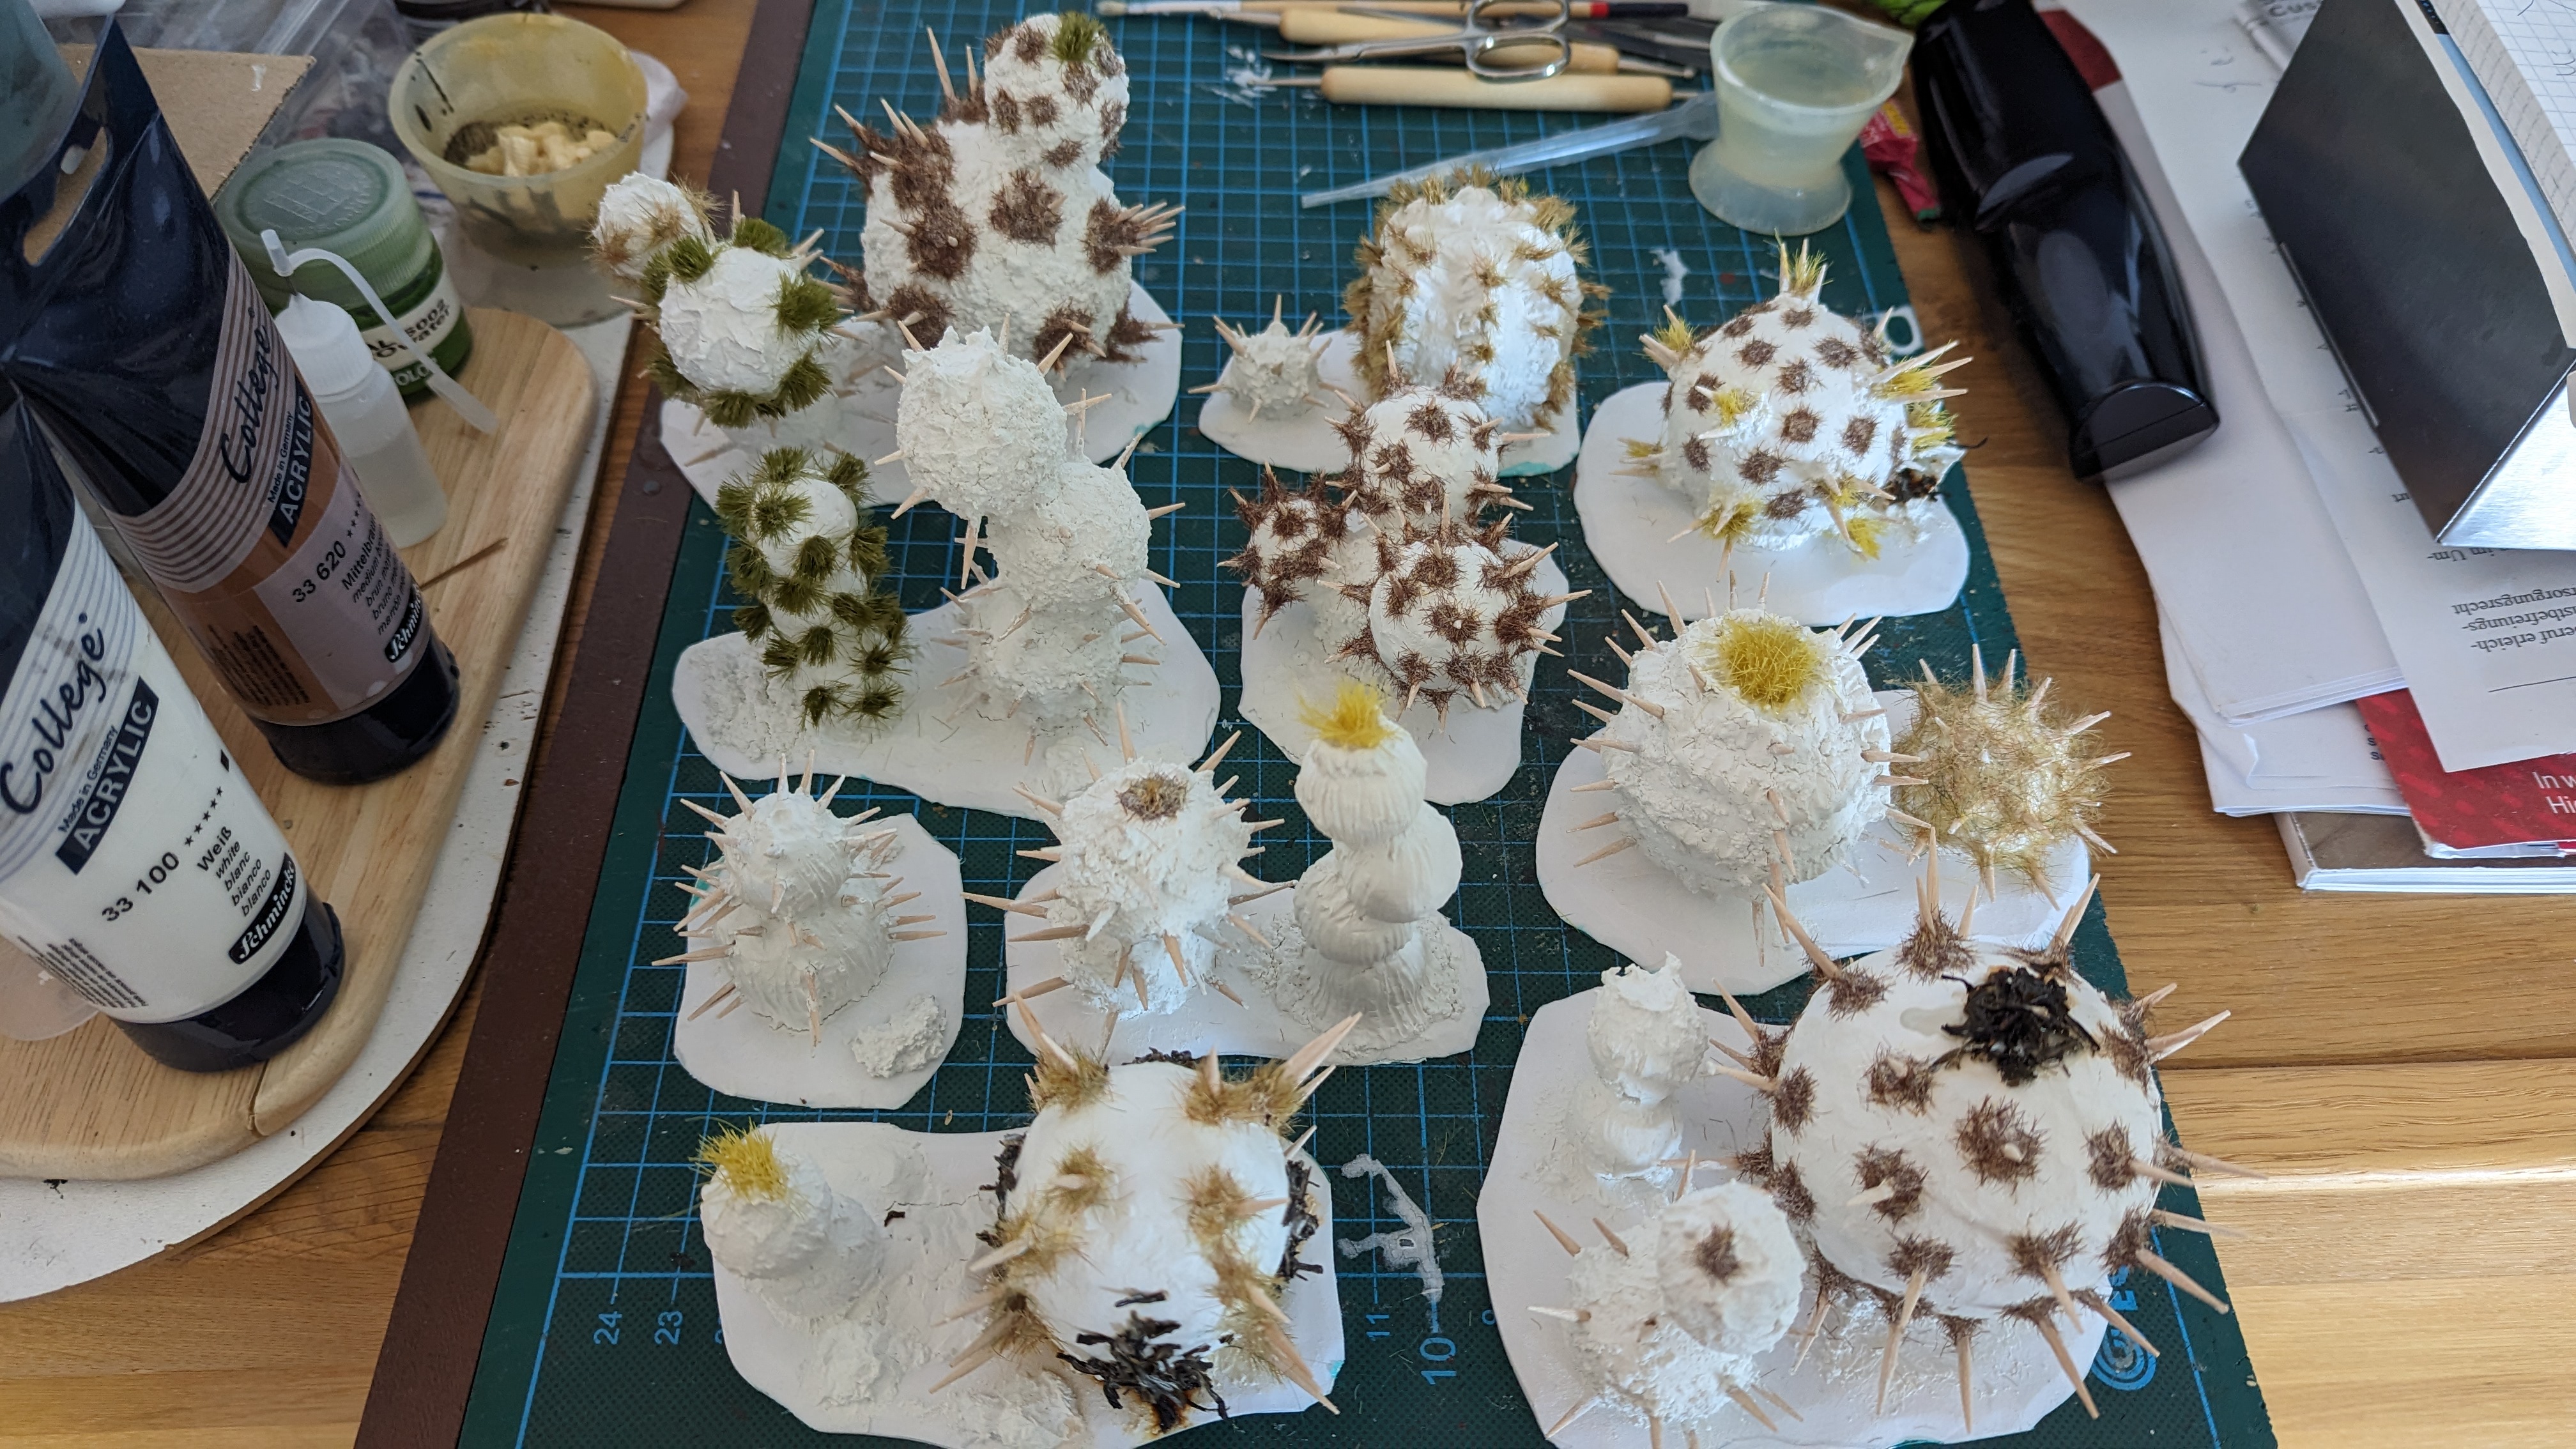
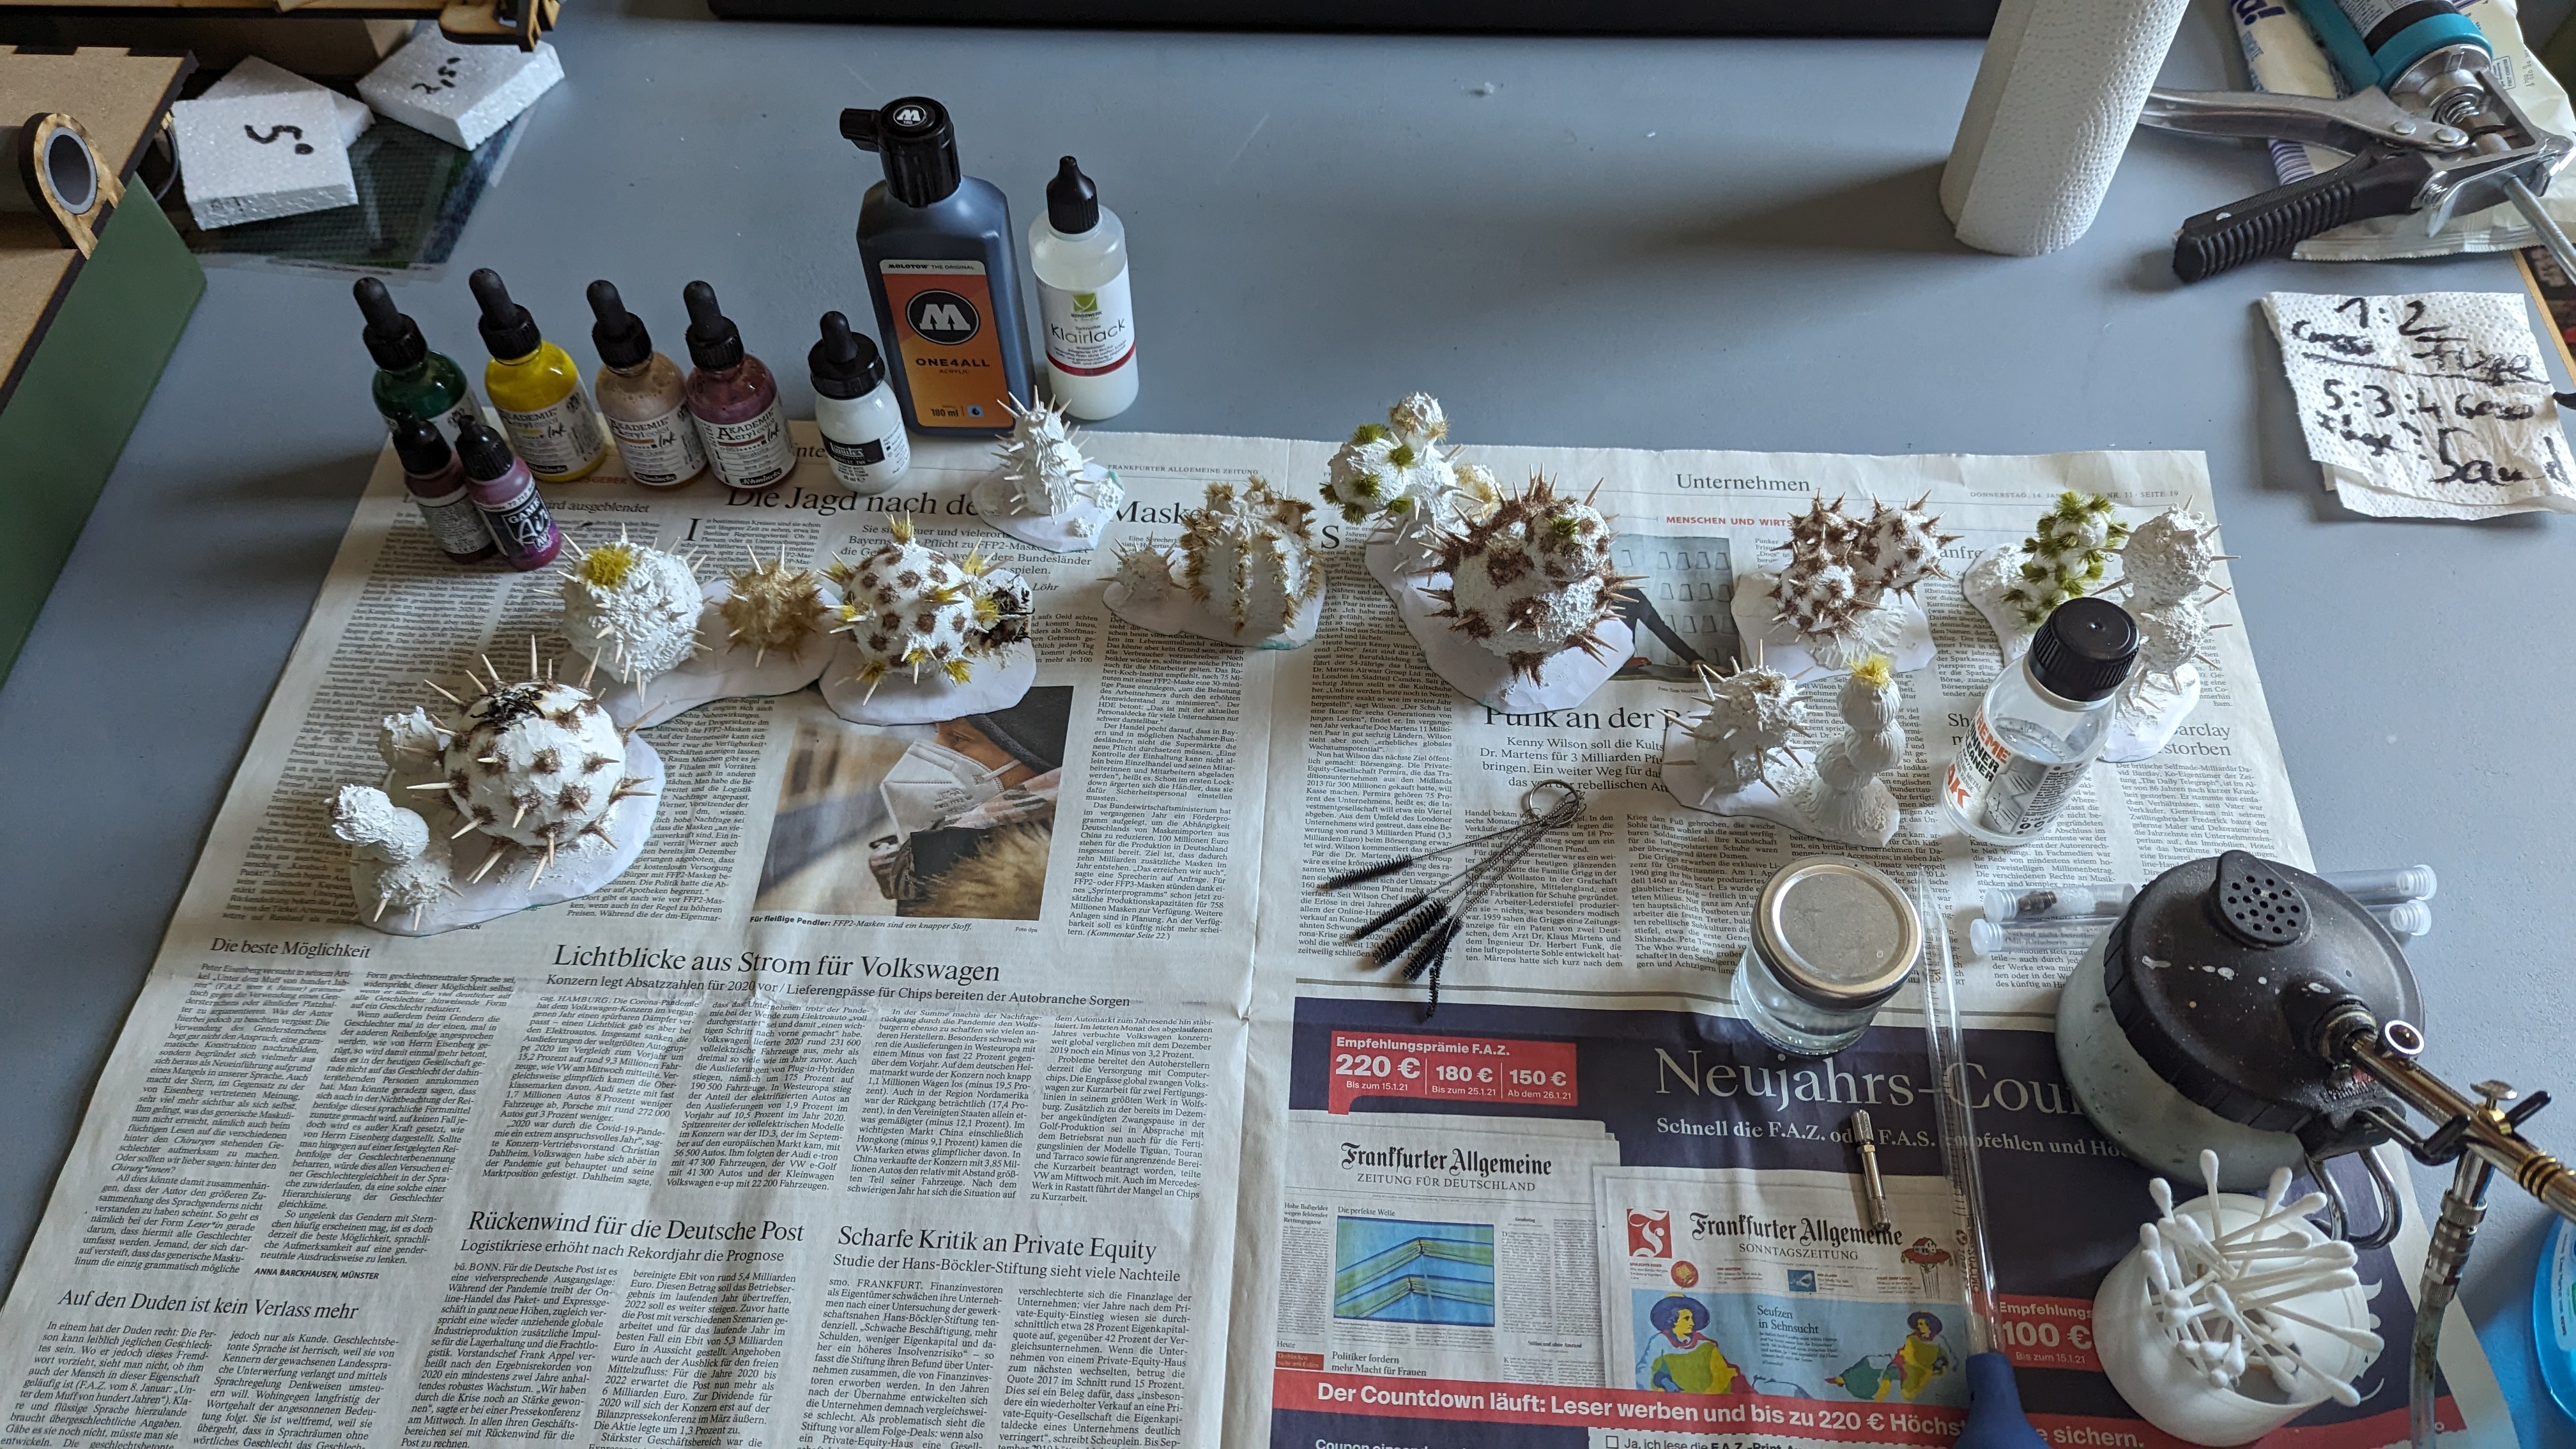
I added two different length of static grass to the plants, 12mm and 6mm. Some grass I glued on in its own patches, some around the cocktail stick spikes. Then I added some ready grass tufts on other plants. Finally, I added some dried tea leaves that I enjoyed the brew of in the past (always a pleasure to open that box, you get a nice nose full of blended tea aromas...).

PXL_20230818_064112778.jpg


Next is priming and painting.
 
I think adding the textures has made all the difference on these. Whilst a part of the nostalgic me quite likes spotting the signs of expanded polystyrene in old war-games terrain, these do look so much better (already). Static grass around the spikes is another excellent idea. I shall be pinching both ideas if (or when?) I decide I need some of these for my terrain.

Looking forward to seeing the colours you pick, are we going classic red era GW with bright green and orange-red spikes or are you thinking something more subdued and elegant or are we into the fantastical world of fluorescents? They should lend themselves nicely to airbrushing.
 
I'm one to defend the use of real 'day-glow' colours ^_^ getting some nice really UV glow pigments can look fantastic too..
 
For the painting scheme I wanted to go with the classic, basically green plants and red spikes. For the most part, I will be using the airbrush.

PXL_20230818_154939880.jpg


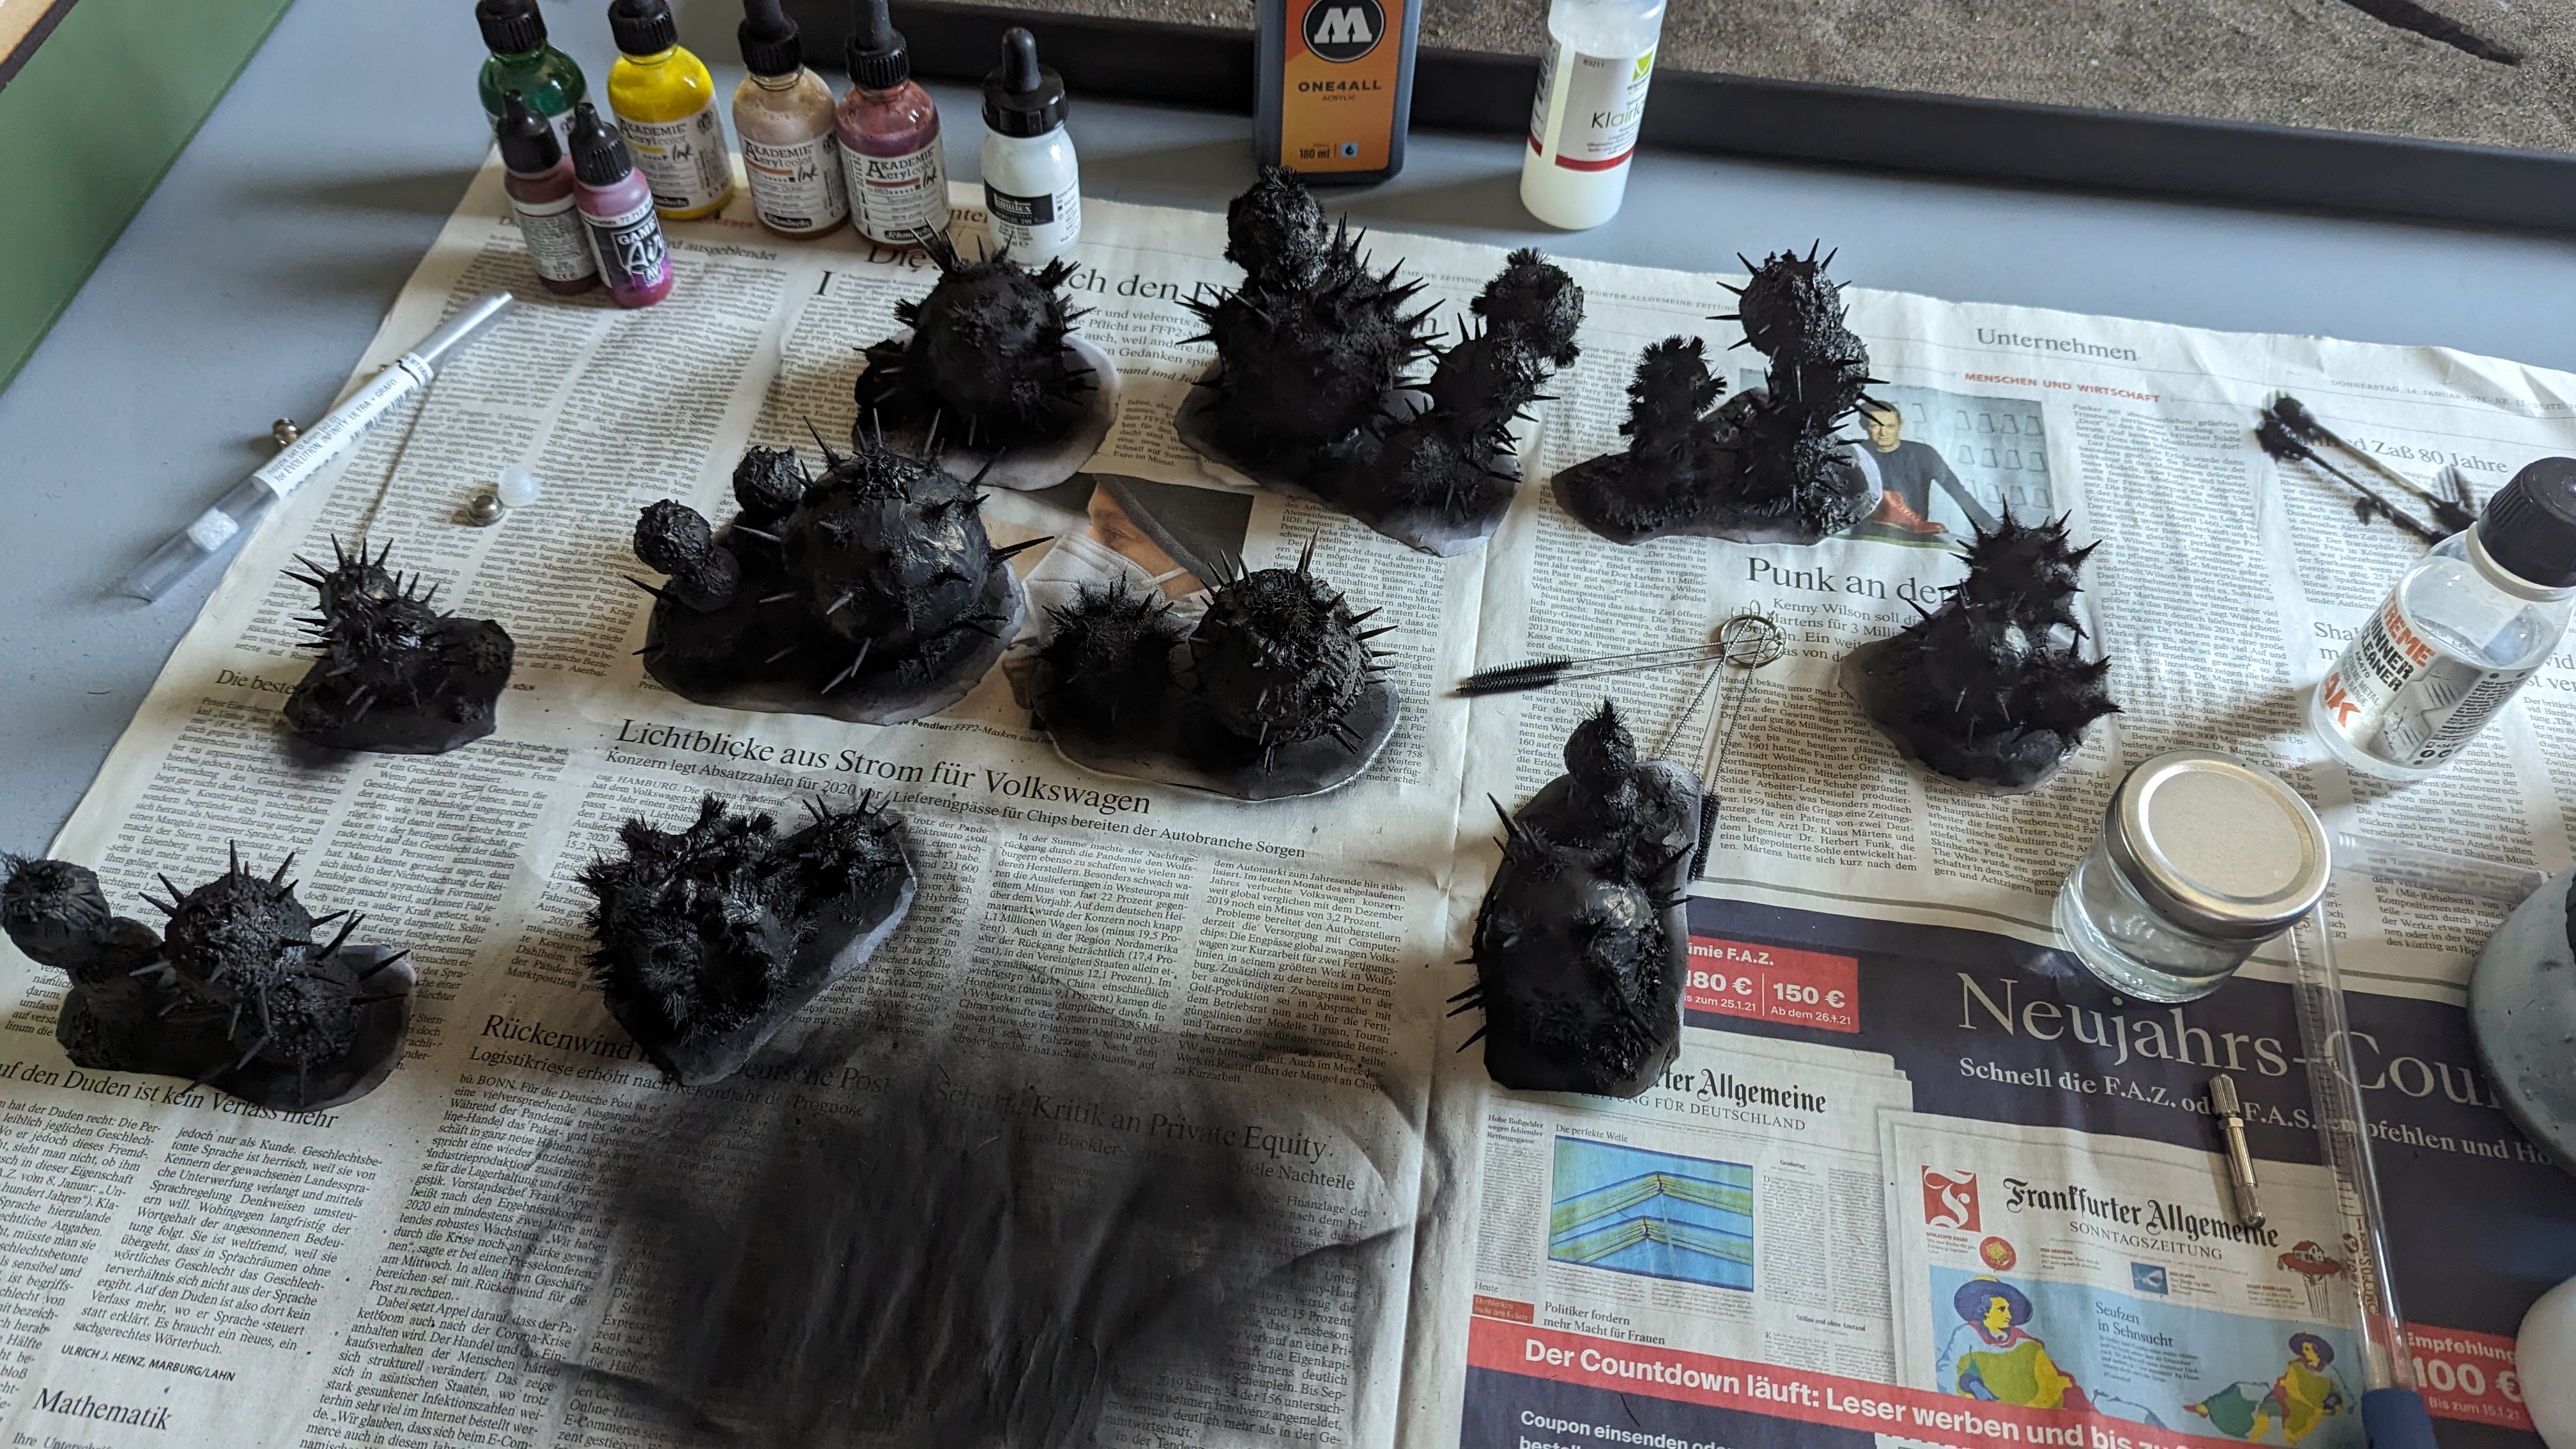
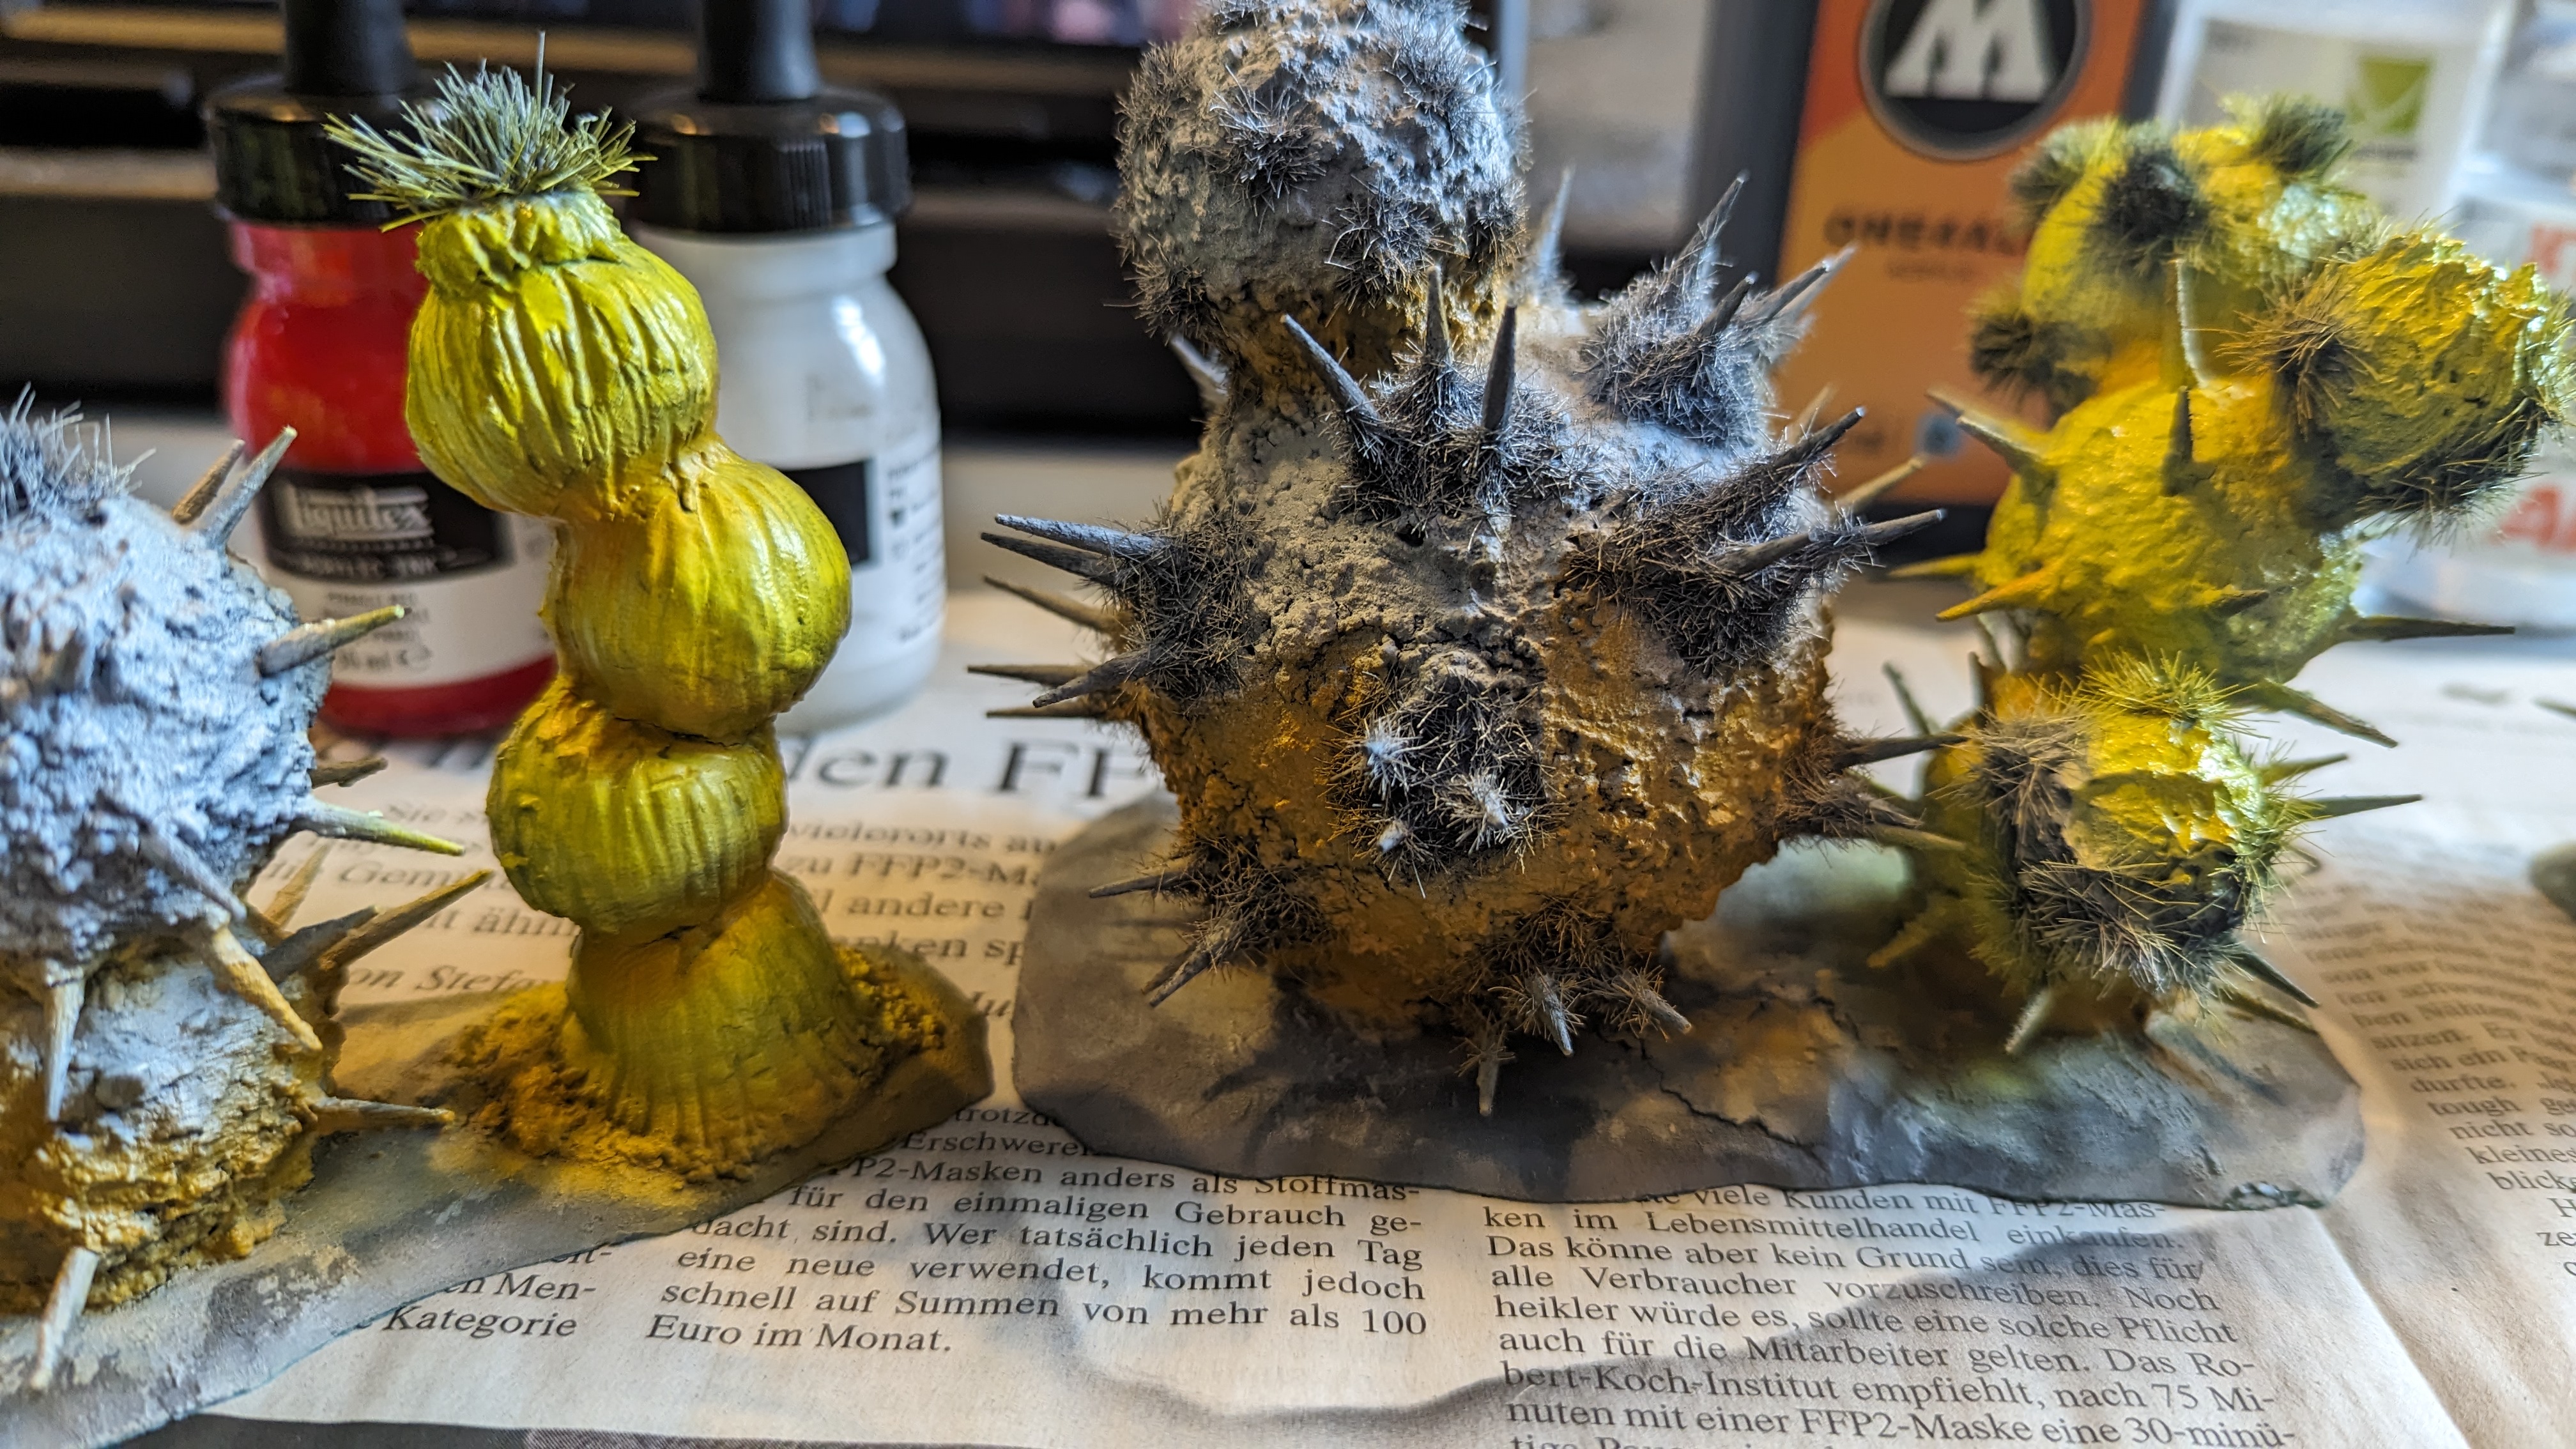
First, I primed the models in Molotow black (#180 signalschwarz), a color I have seen recently quite a lot with different YouToubers, especially MarcoFrisoni NJM. As I always suspect the quality of my output would be much better with tools I don't yet have (which rarely turns out to be true... don't tell my wife... that is my main argument for why I need to spend more money on the hobby), I bought a bottle of the black. The application through the airbrush really went well, great consistency, so far I like it very much.

PXL_20230818_162350079.jpg


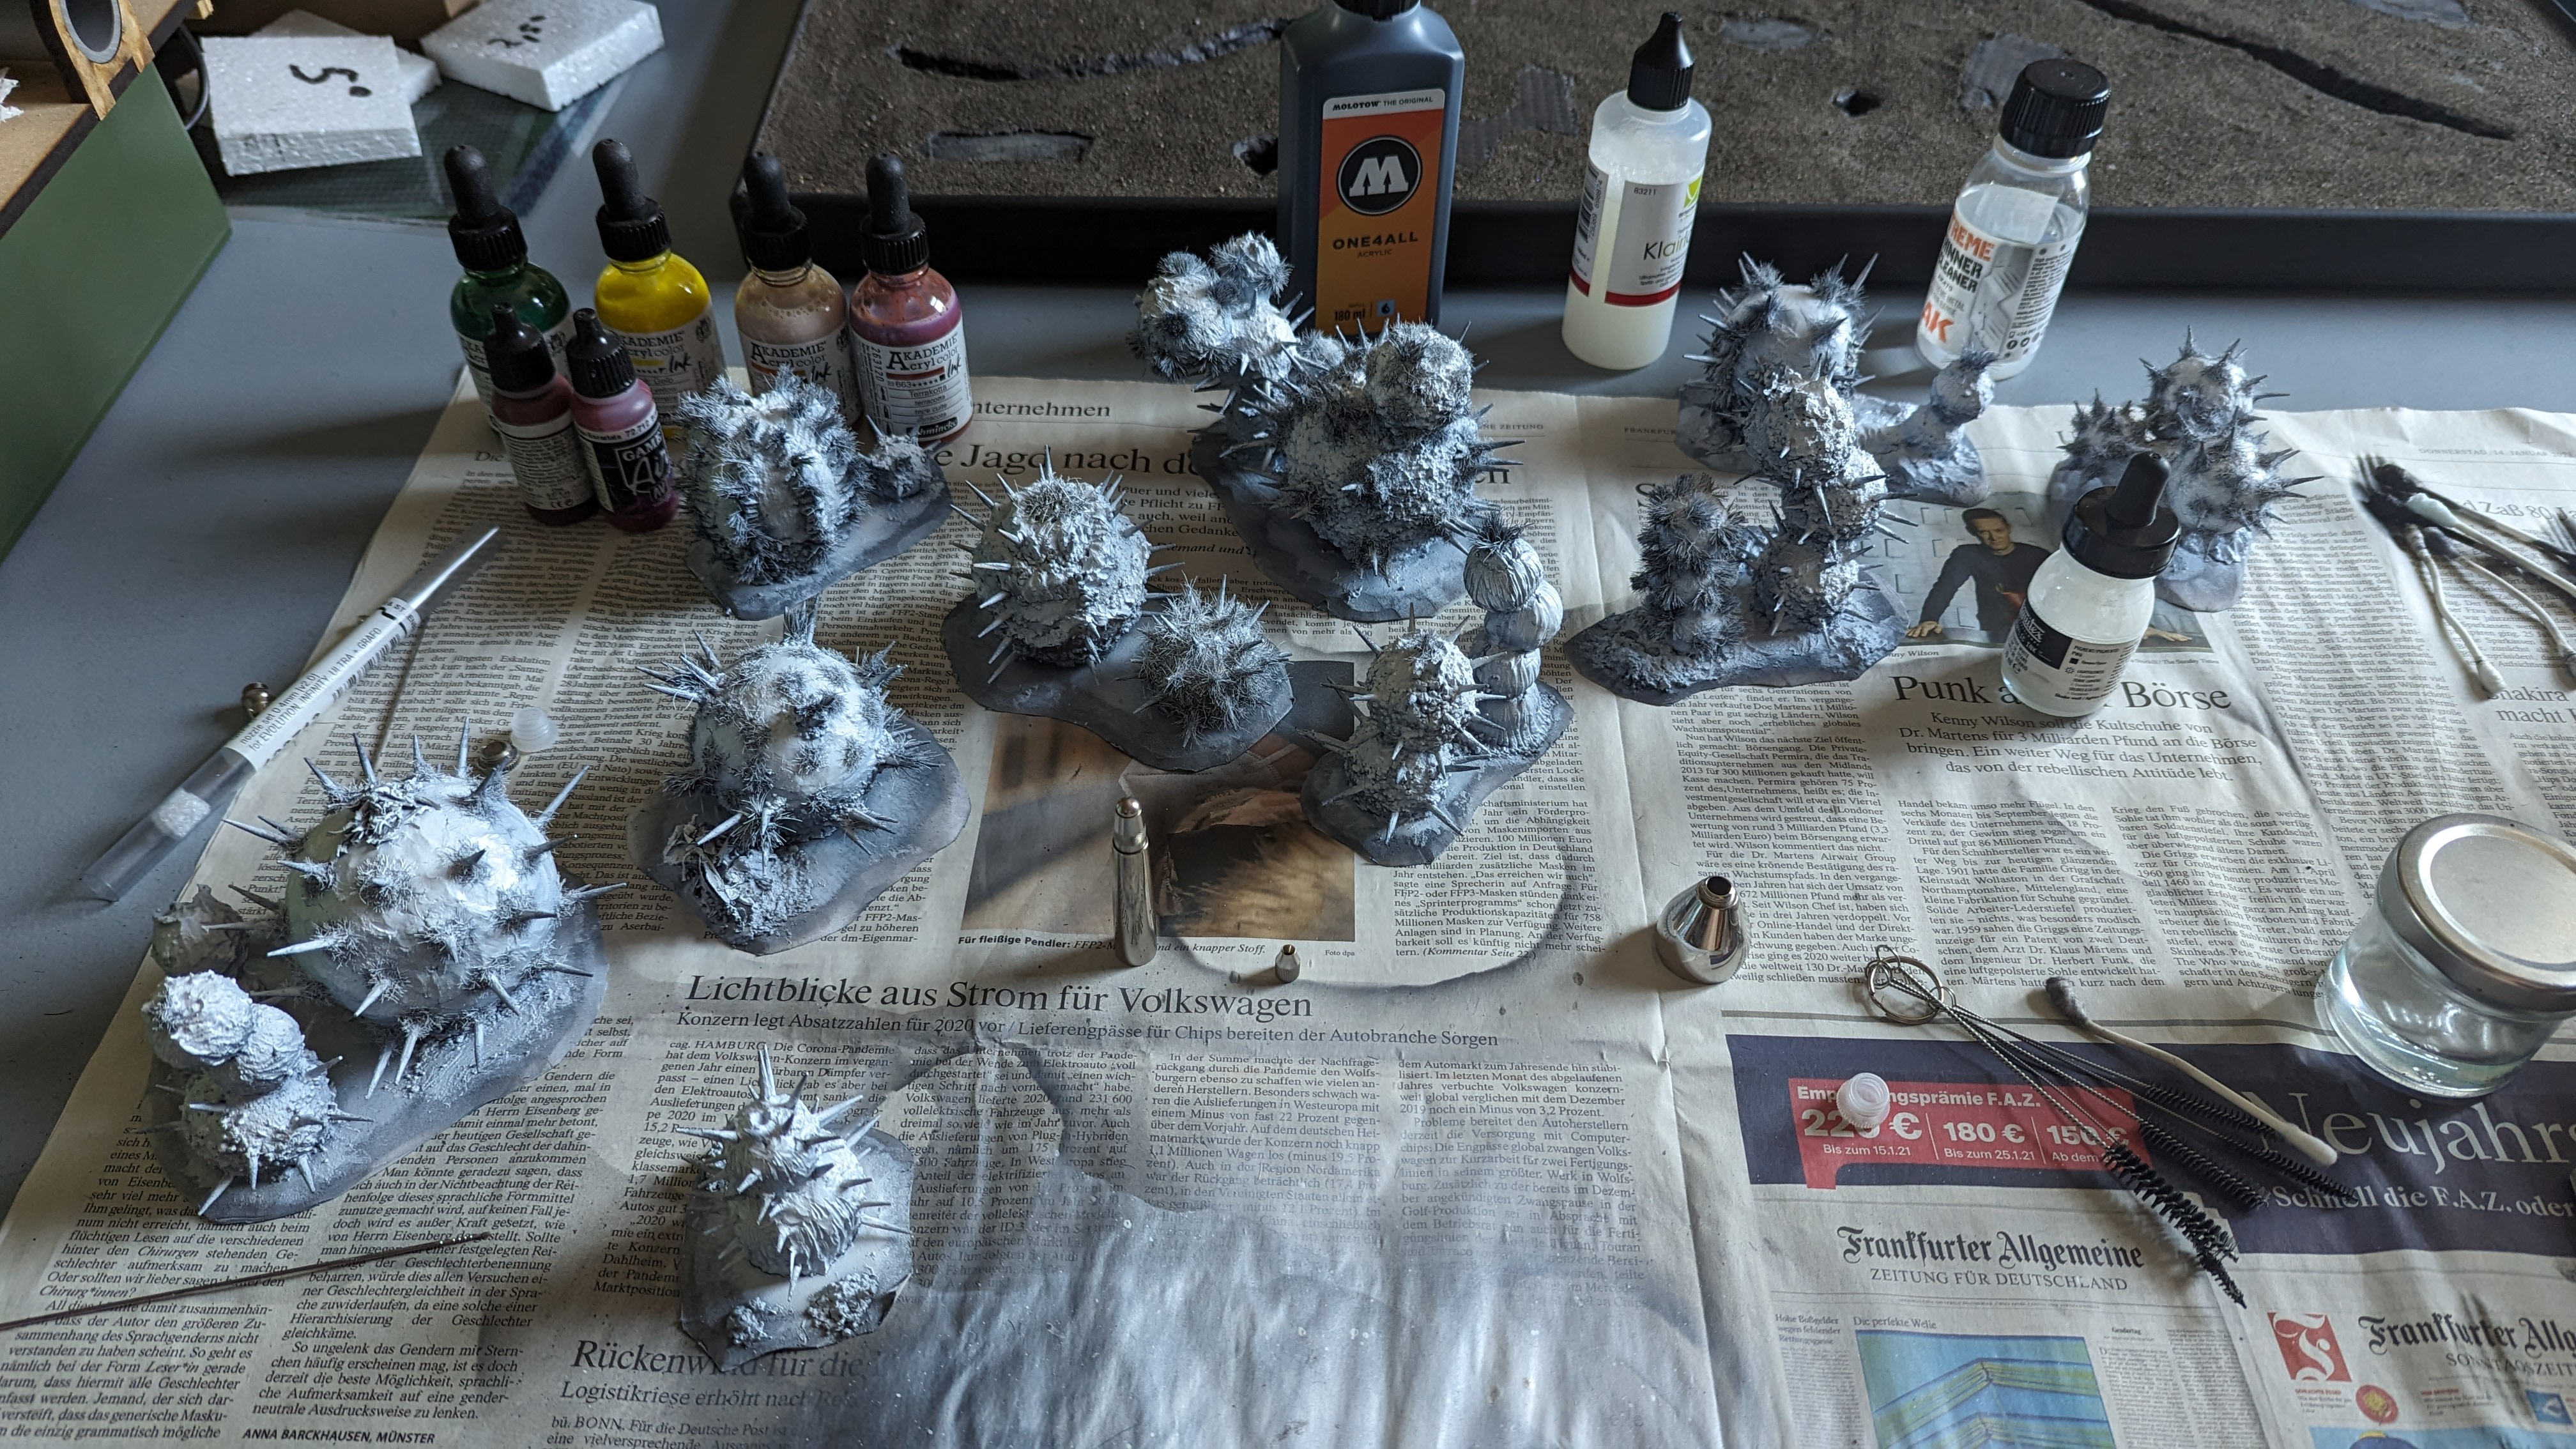
Next came a zenithal with white ink.

PXL_20230818_164626076.jpg


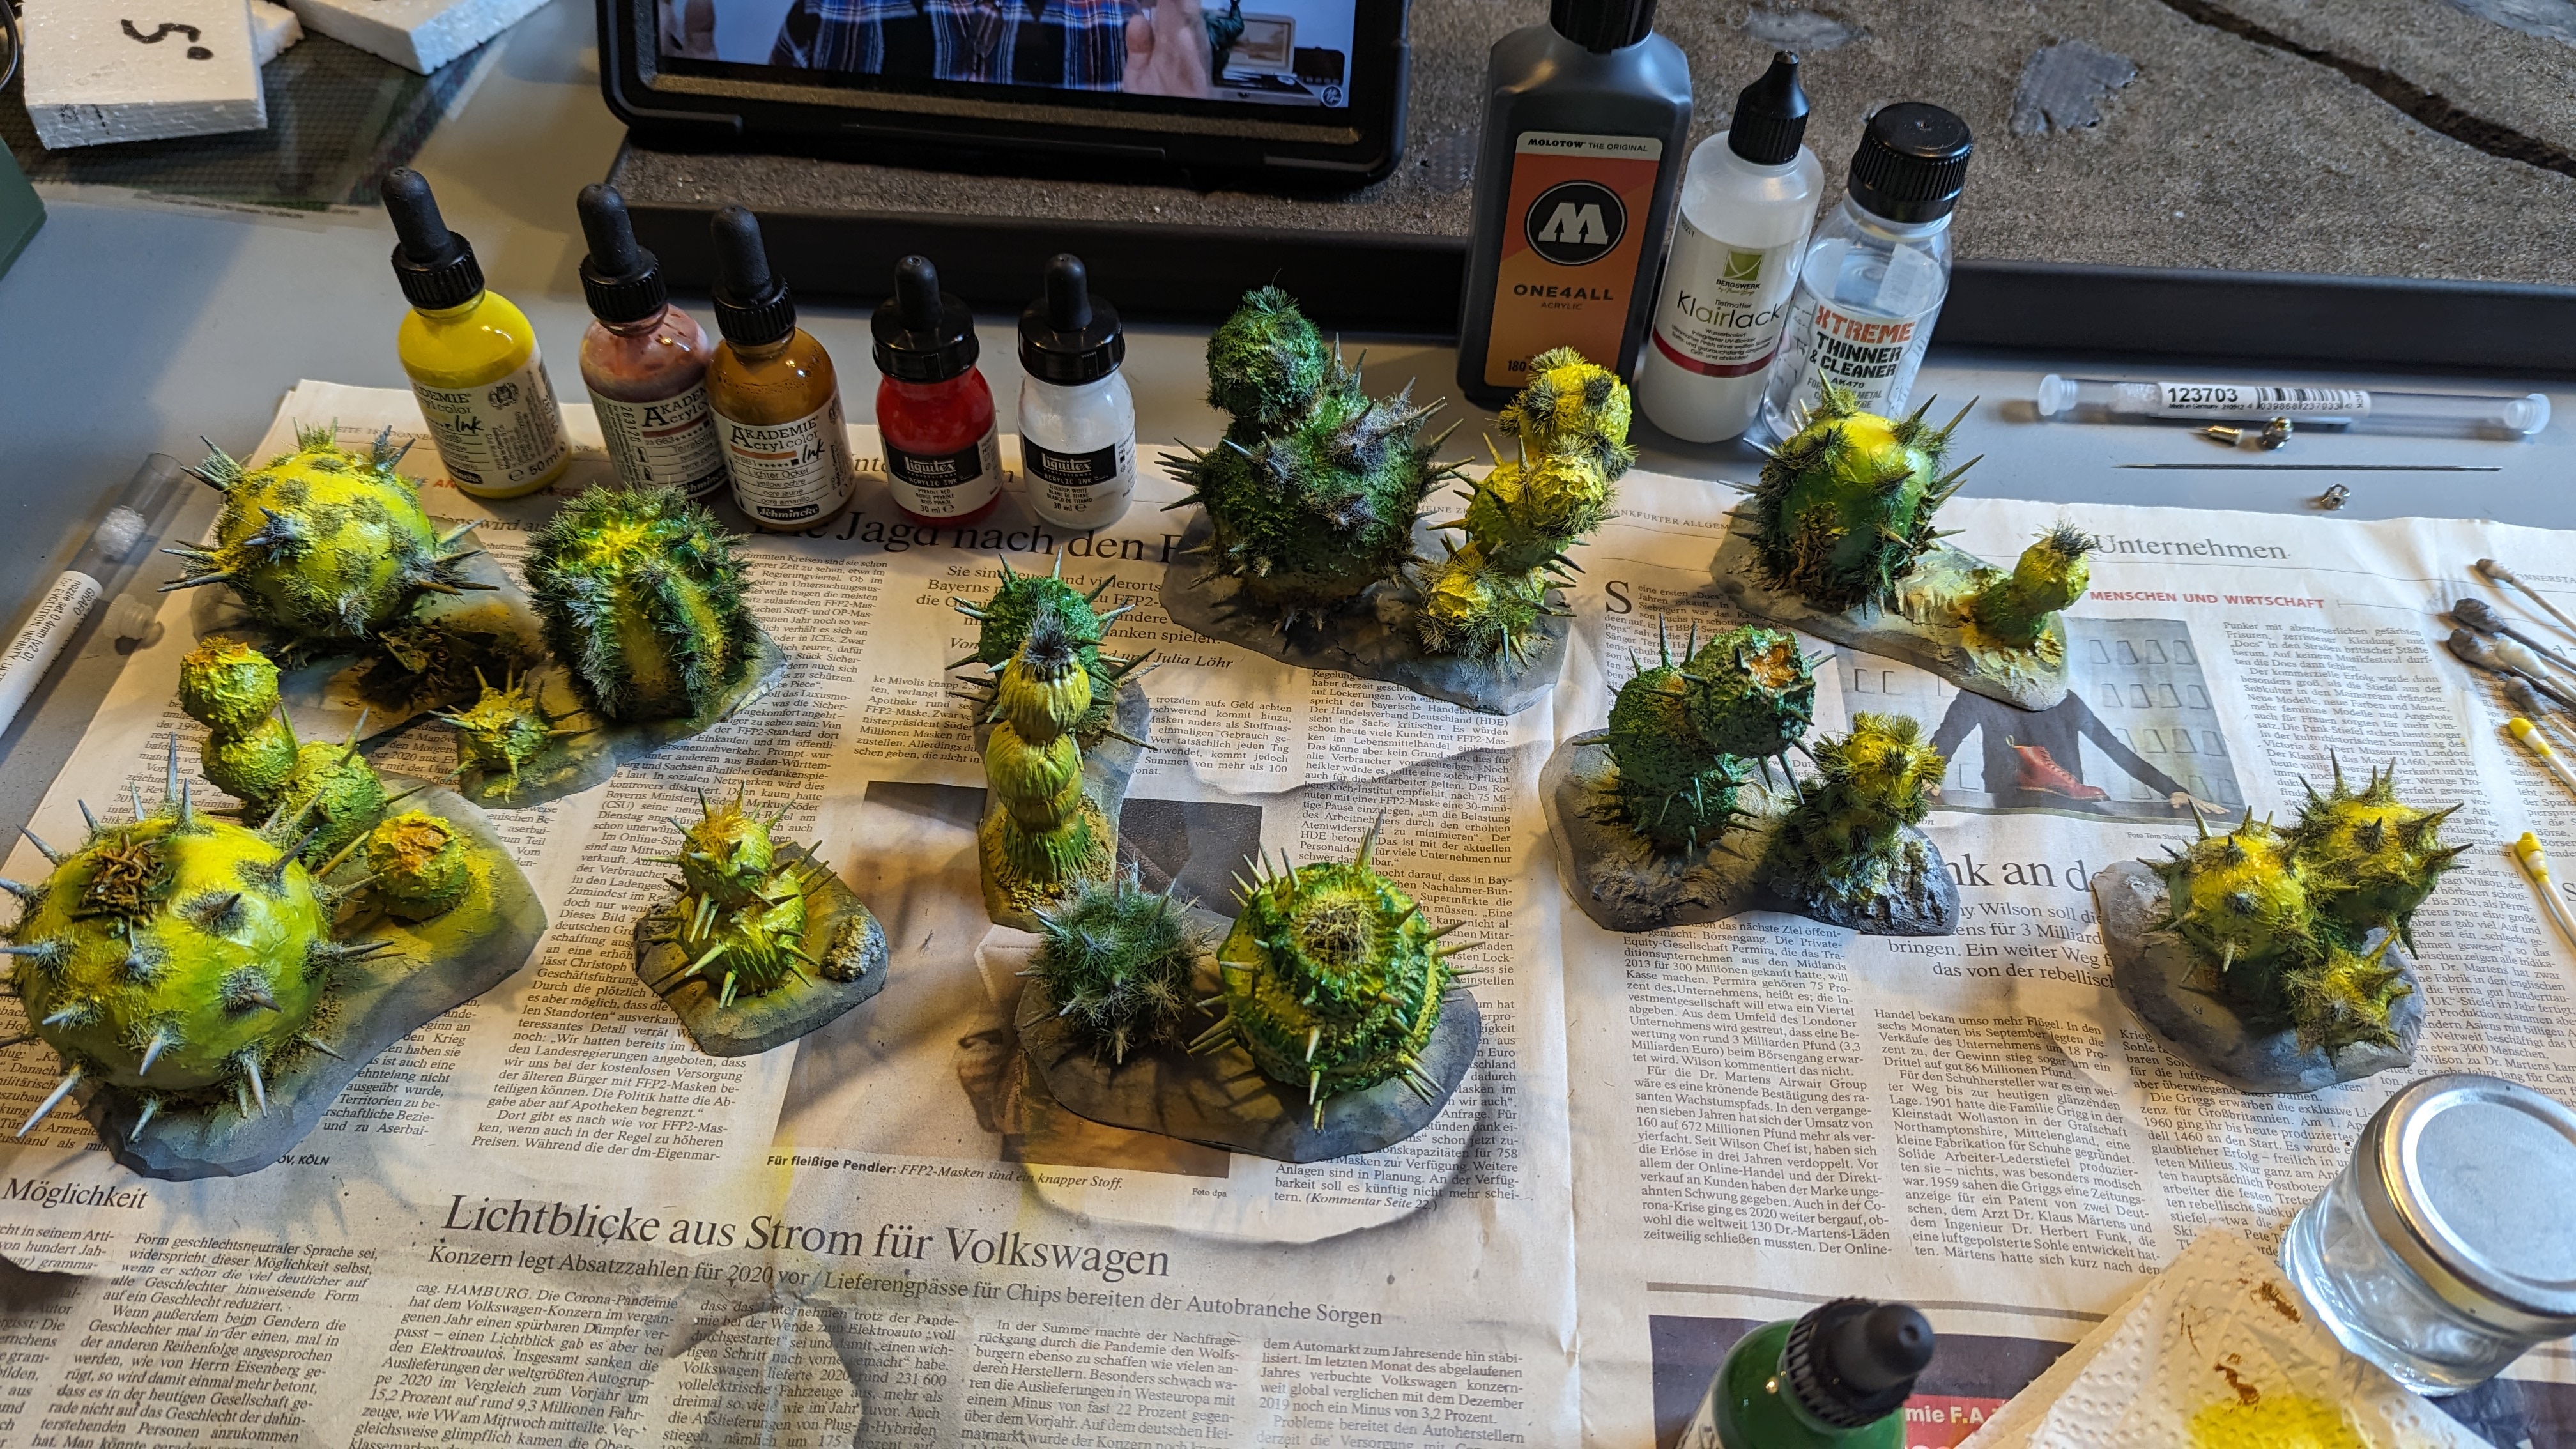
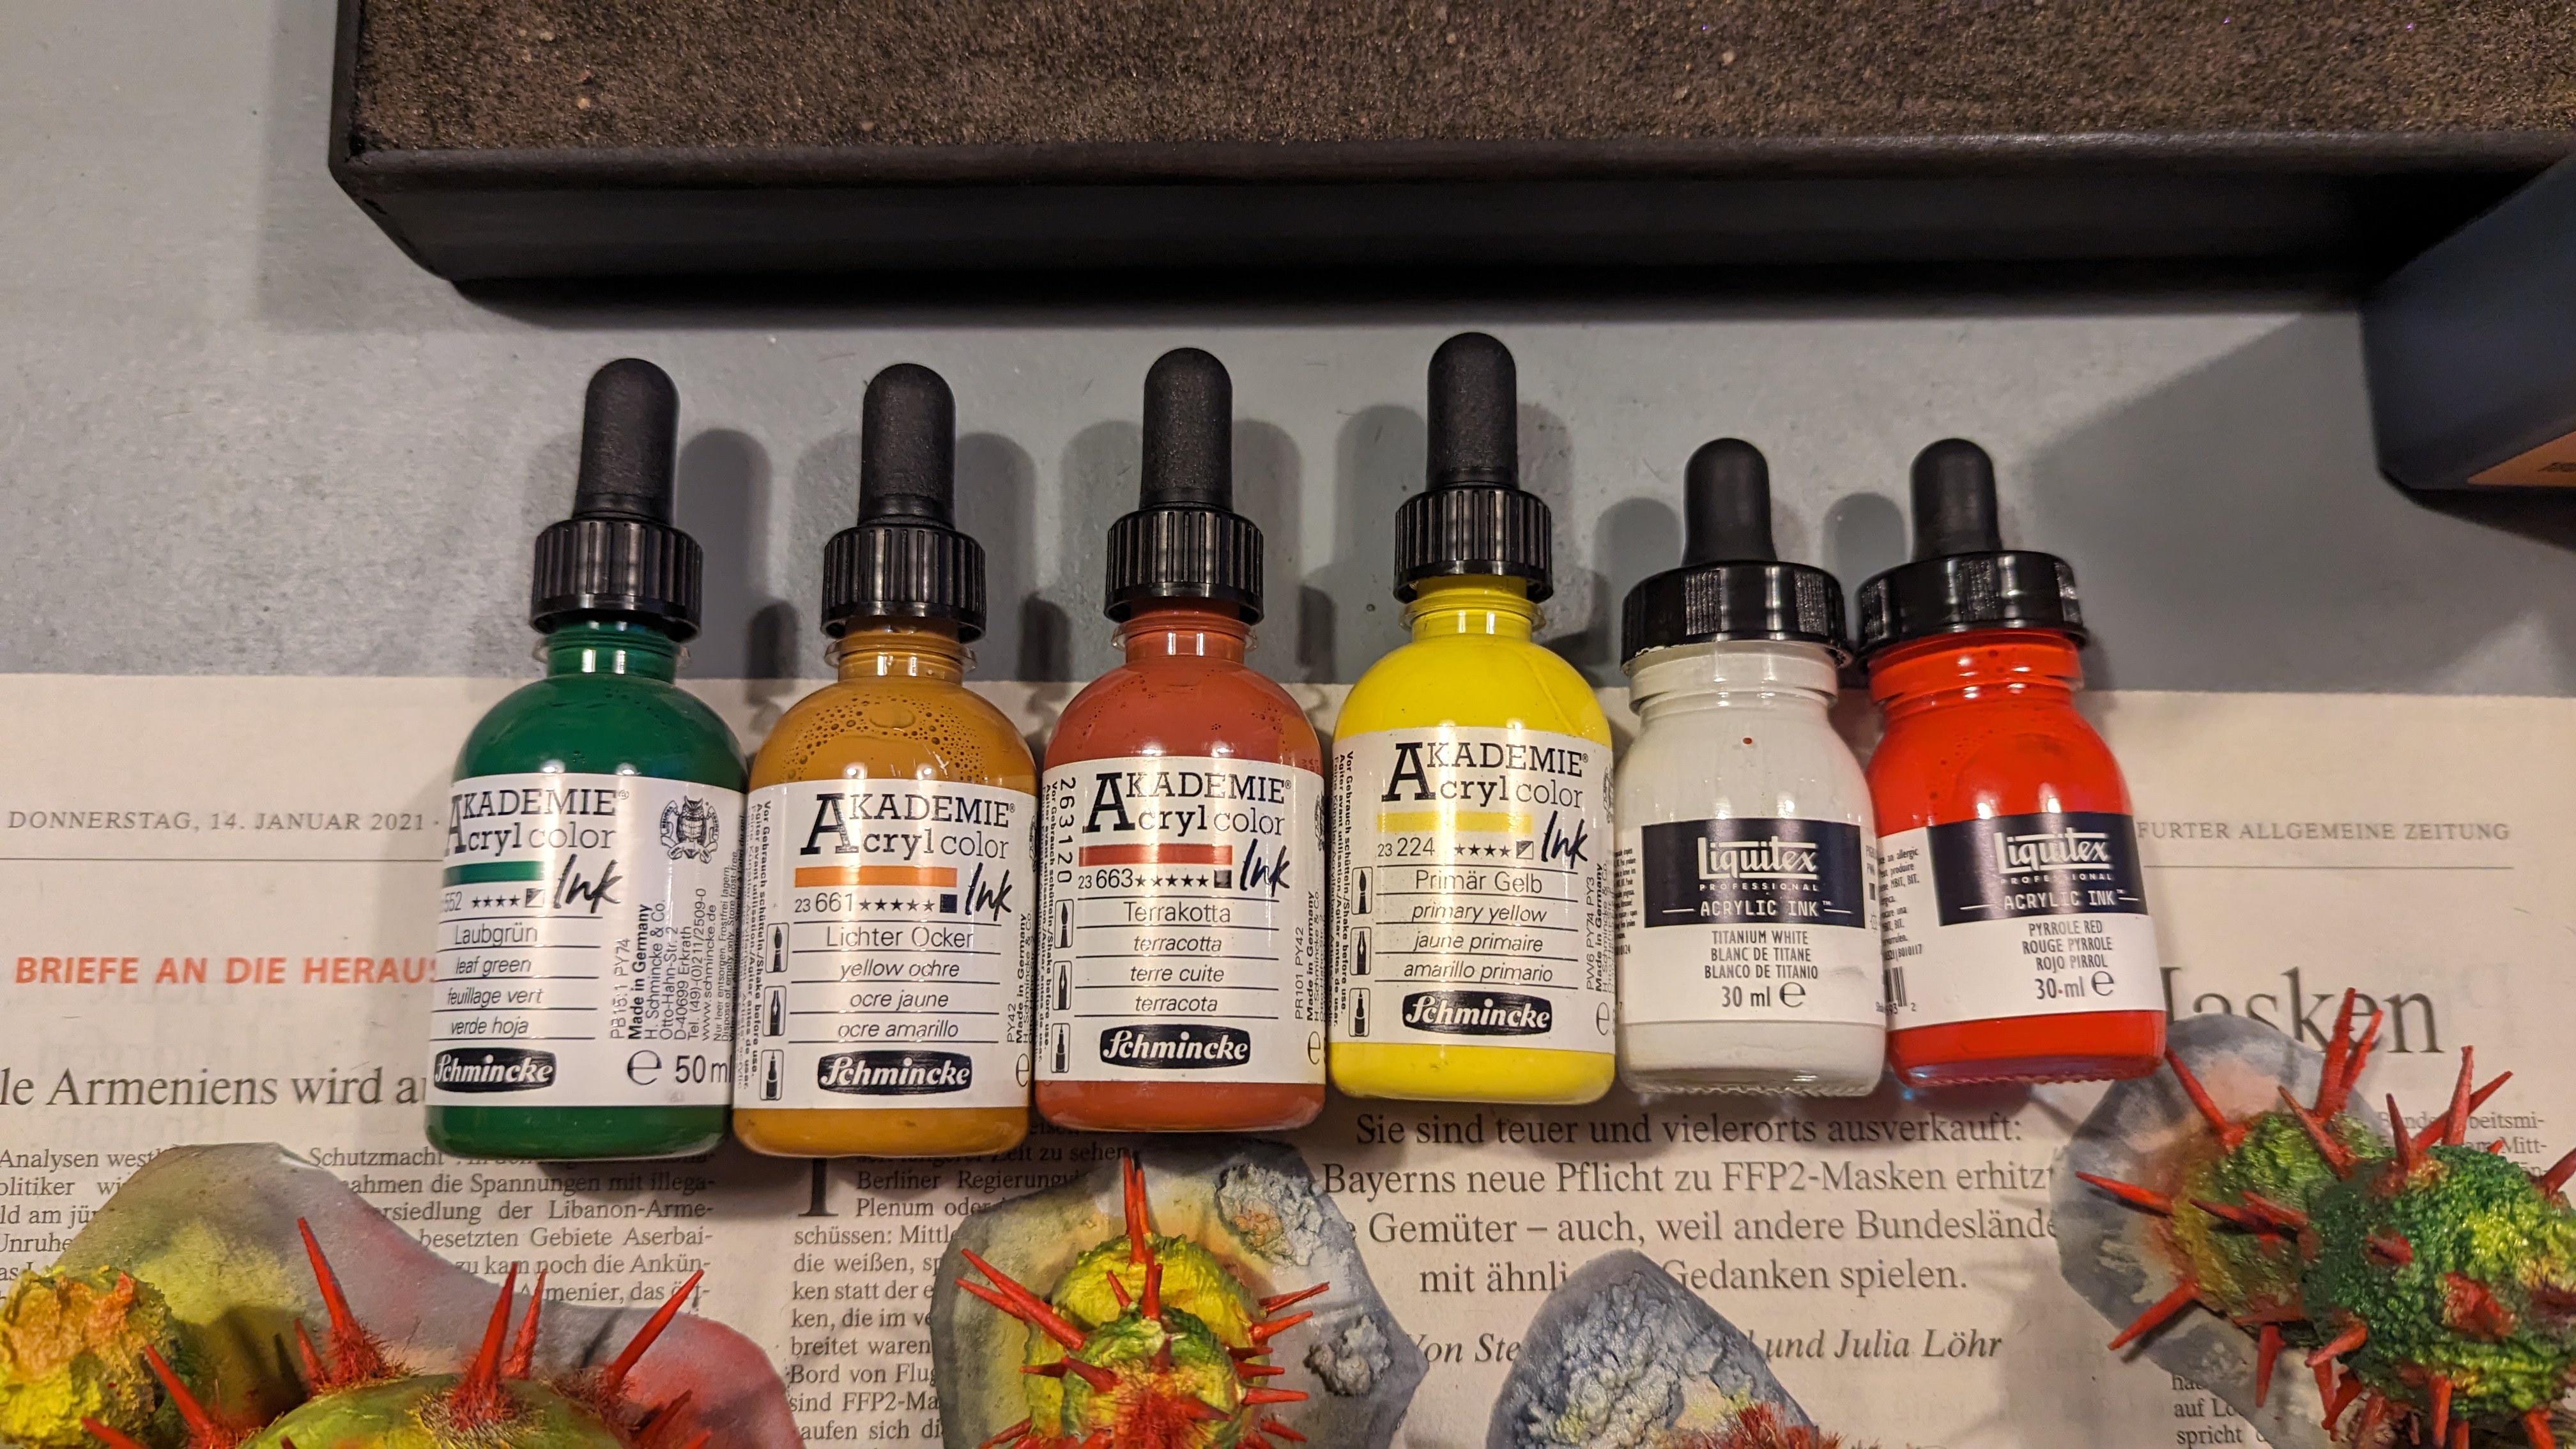
This was followed by spraying large areas with yellow ink. This will be the highlight color for the green in the final result, as well as provide me with different greens. As the inks are only half opaque, spraying the green over white compared to over yellow will produce slightly different greens.

PXL_20230819_161557995.jpg


Next I used ochre, mainly to create some deeper yellow where two yellow balls met; and again as a base for different shades of green.

PXL_20230819_162757850.jpg


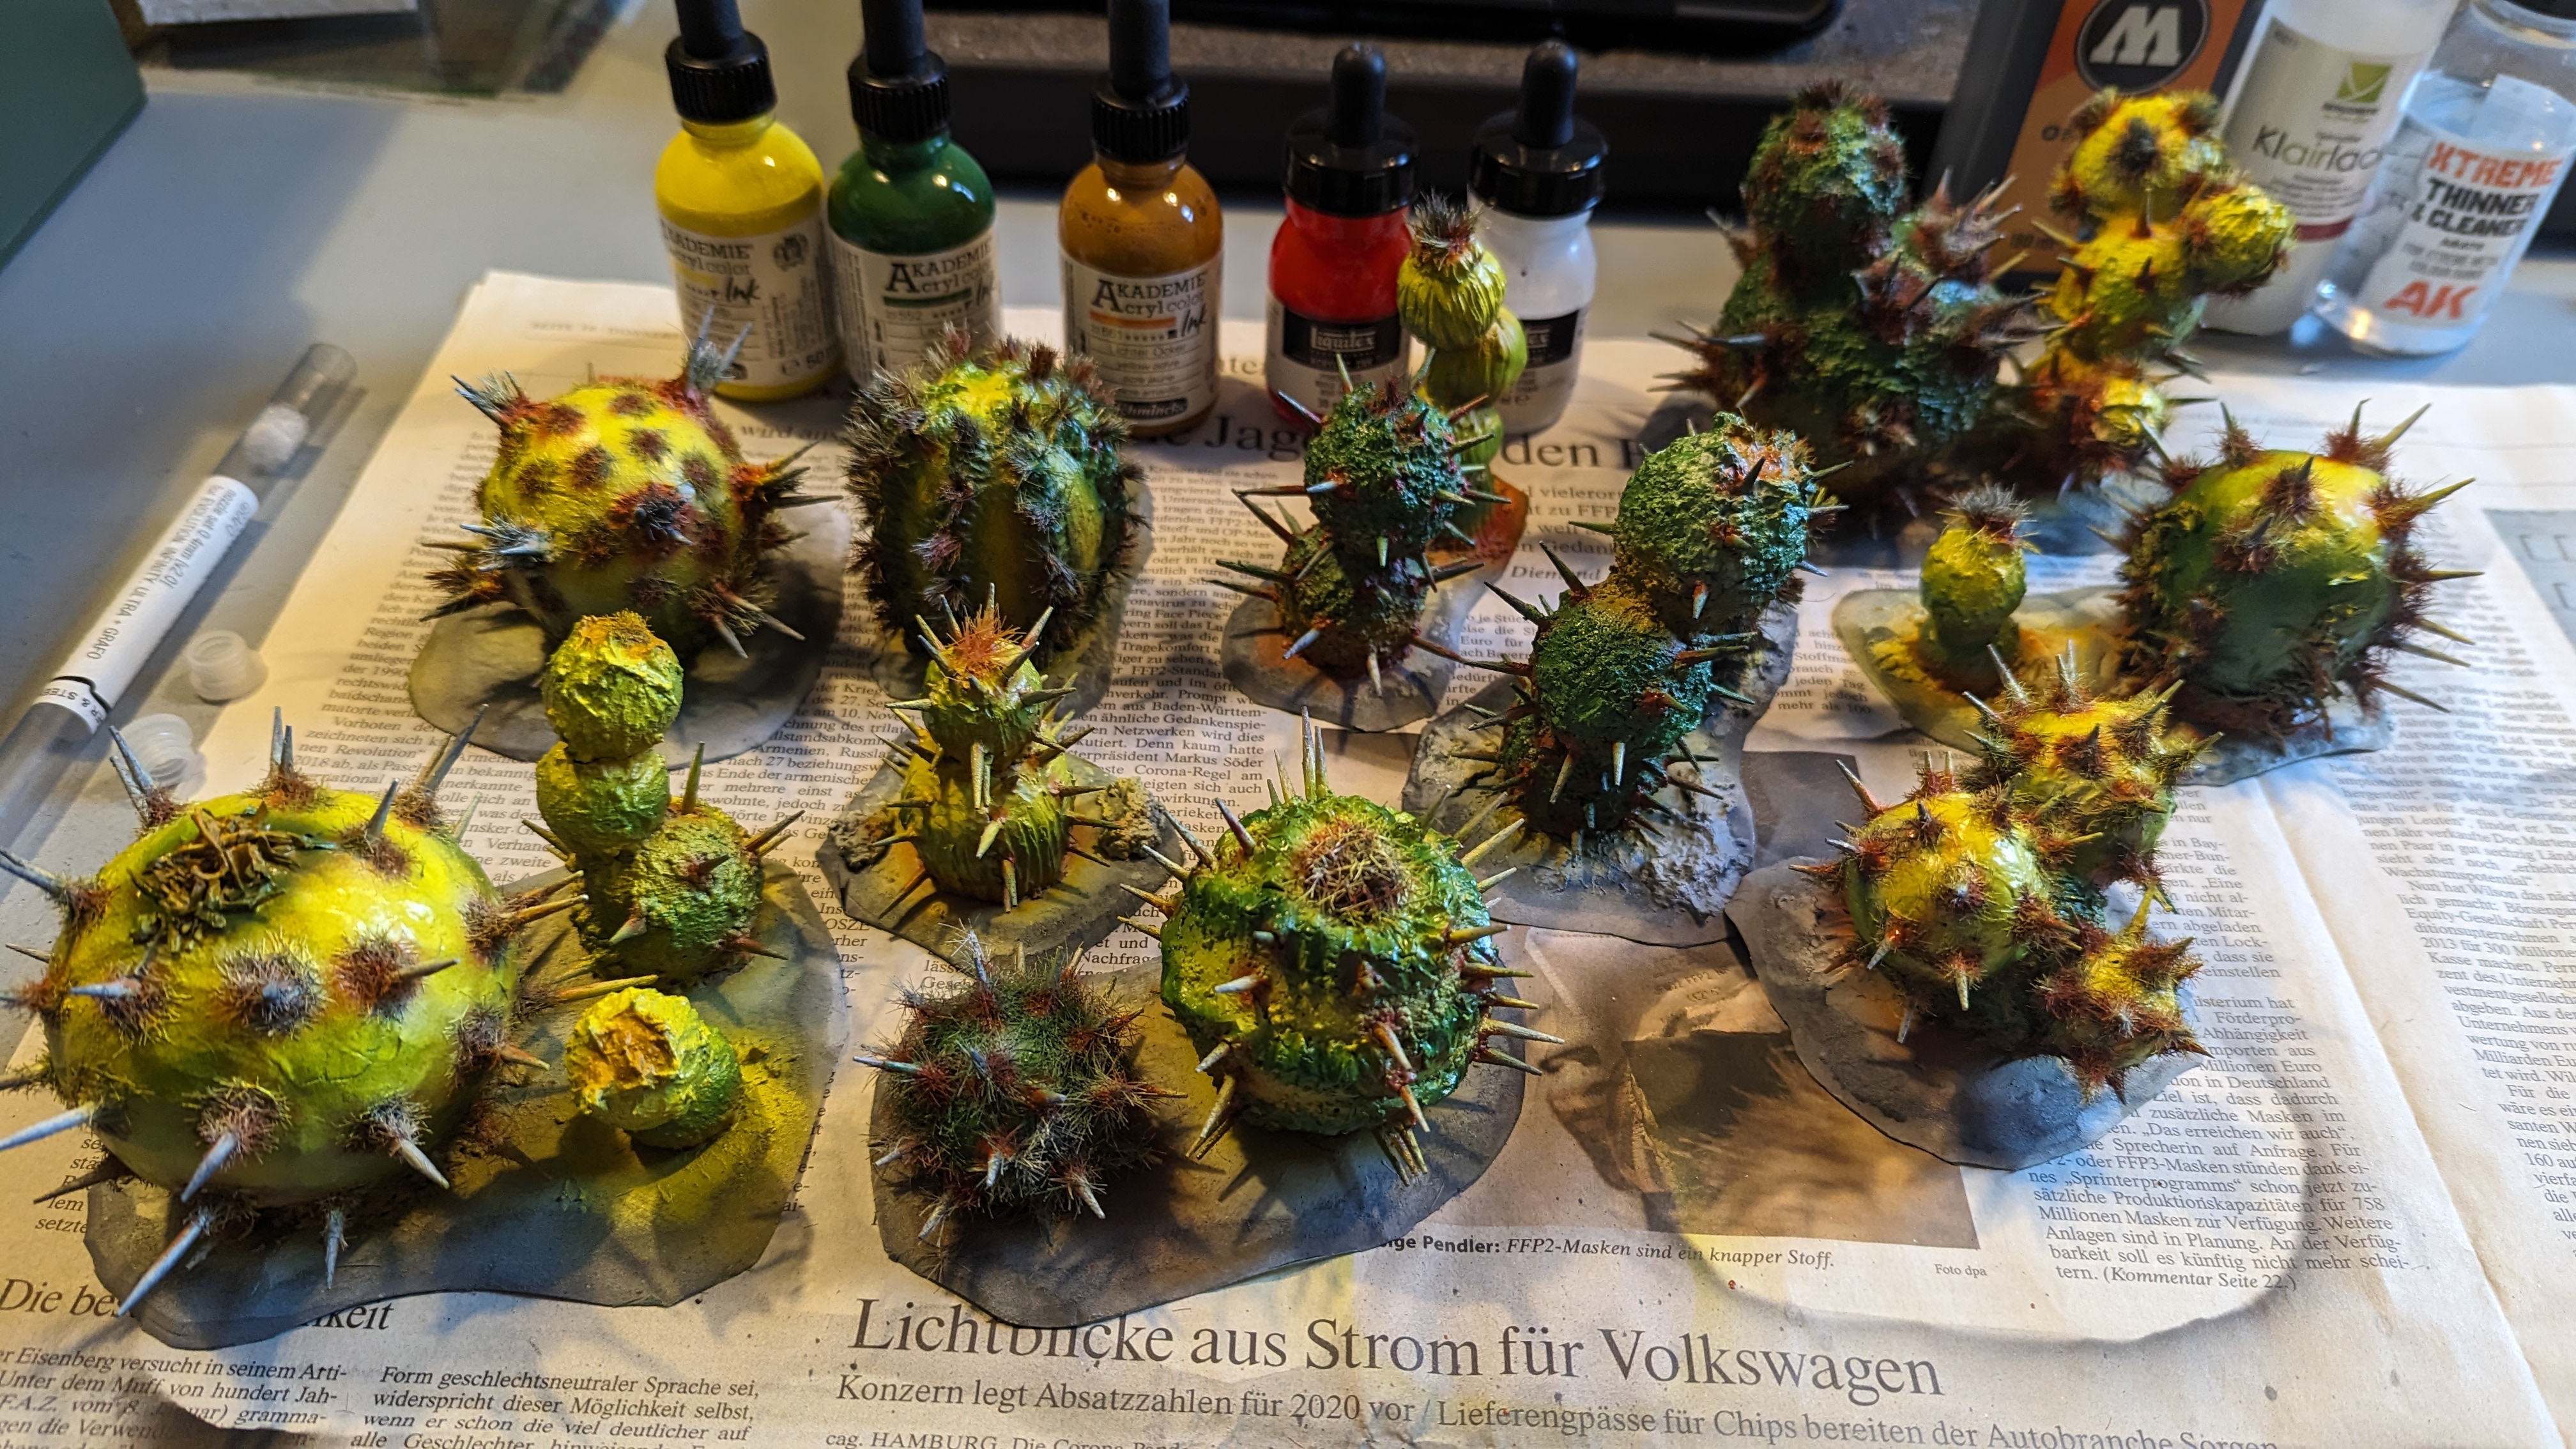
Then came the green. Everything that was still white or ochre over white was sprayed green, where there was already yellow I tried to create some gradients towards the yellow as lightest highlight. Some parts I also left mostly yellow, to be greened in a later stage with washes.

PXL_20230819_163950948.jpg


Next came terracotta wich I used as a shadow color for all areas to be red, as well as a shadow color for green areas where the plants meet the ground.

PXL_20230819_170138831.jpg


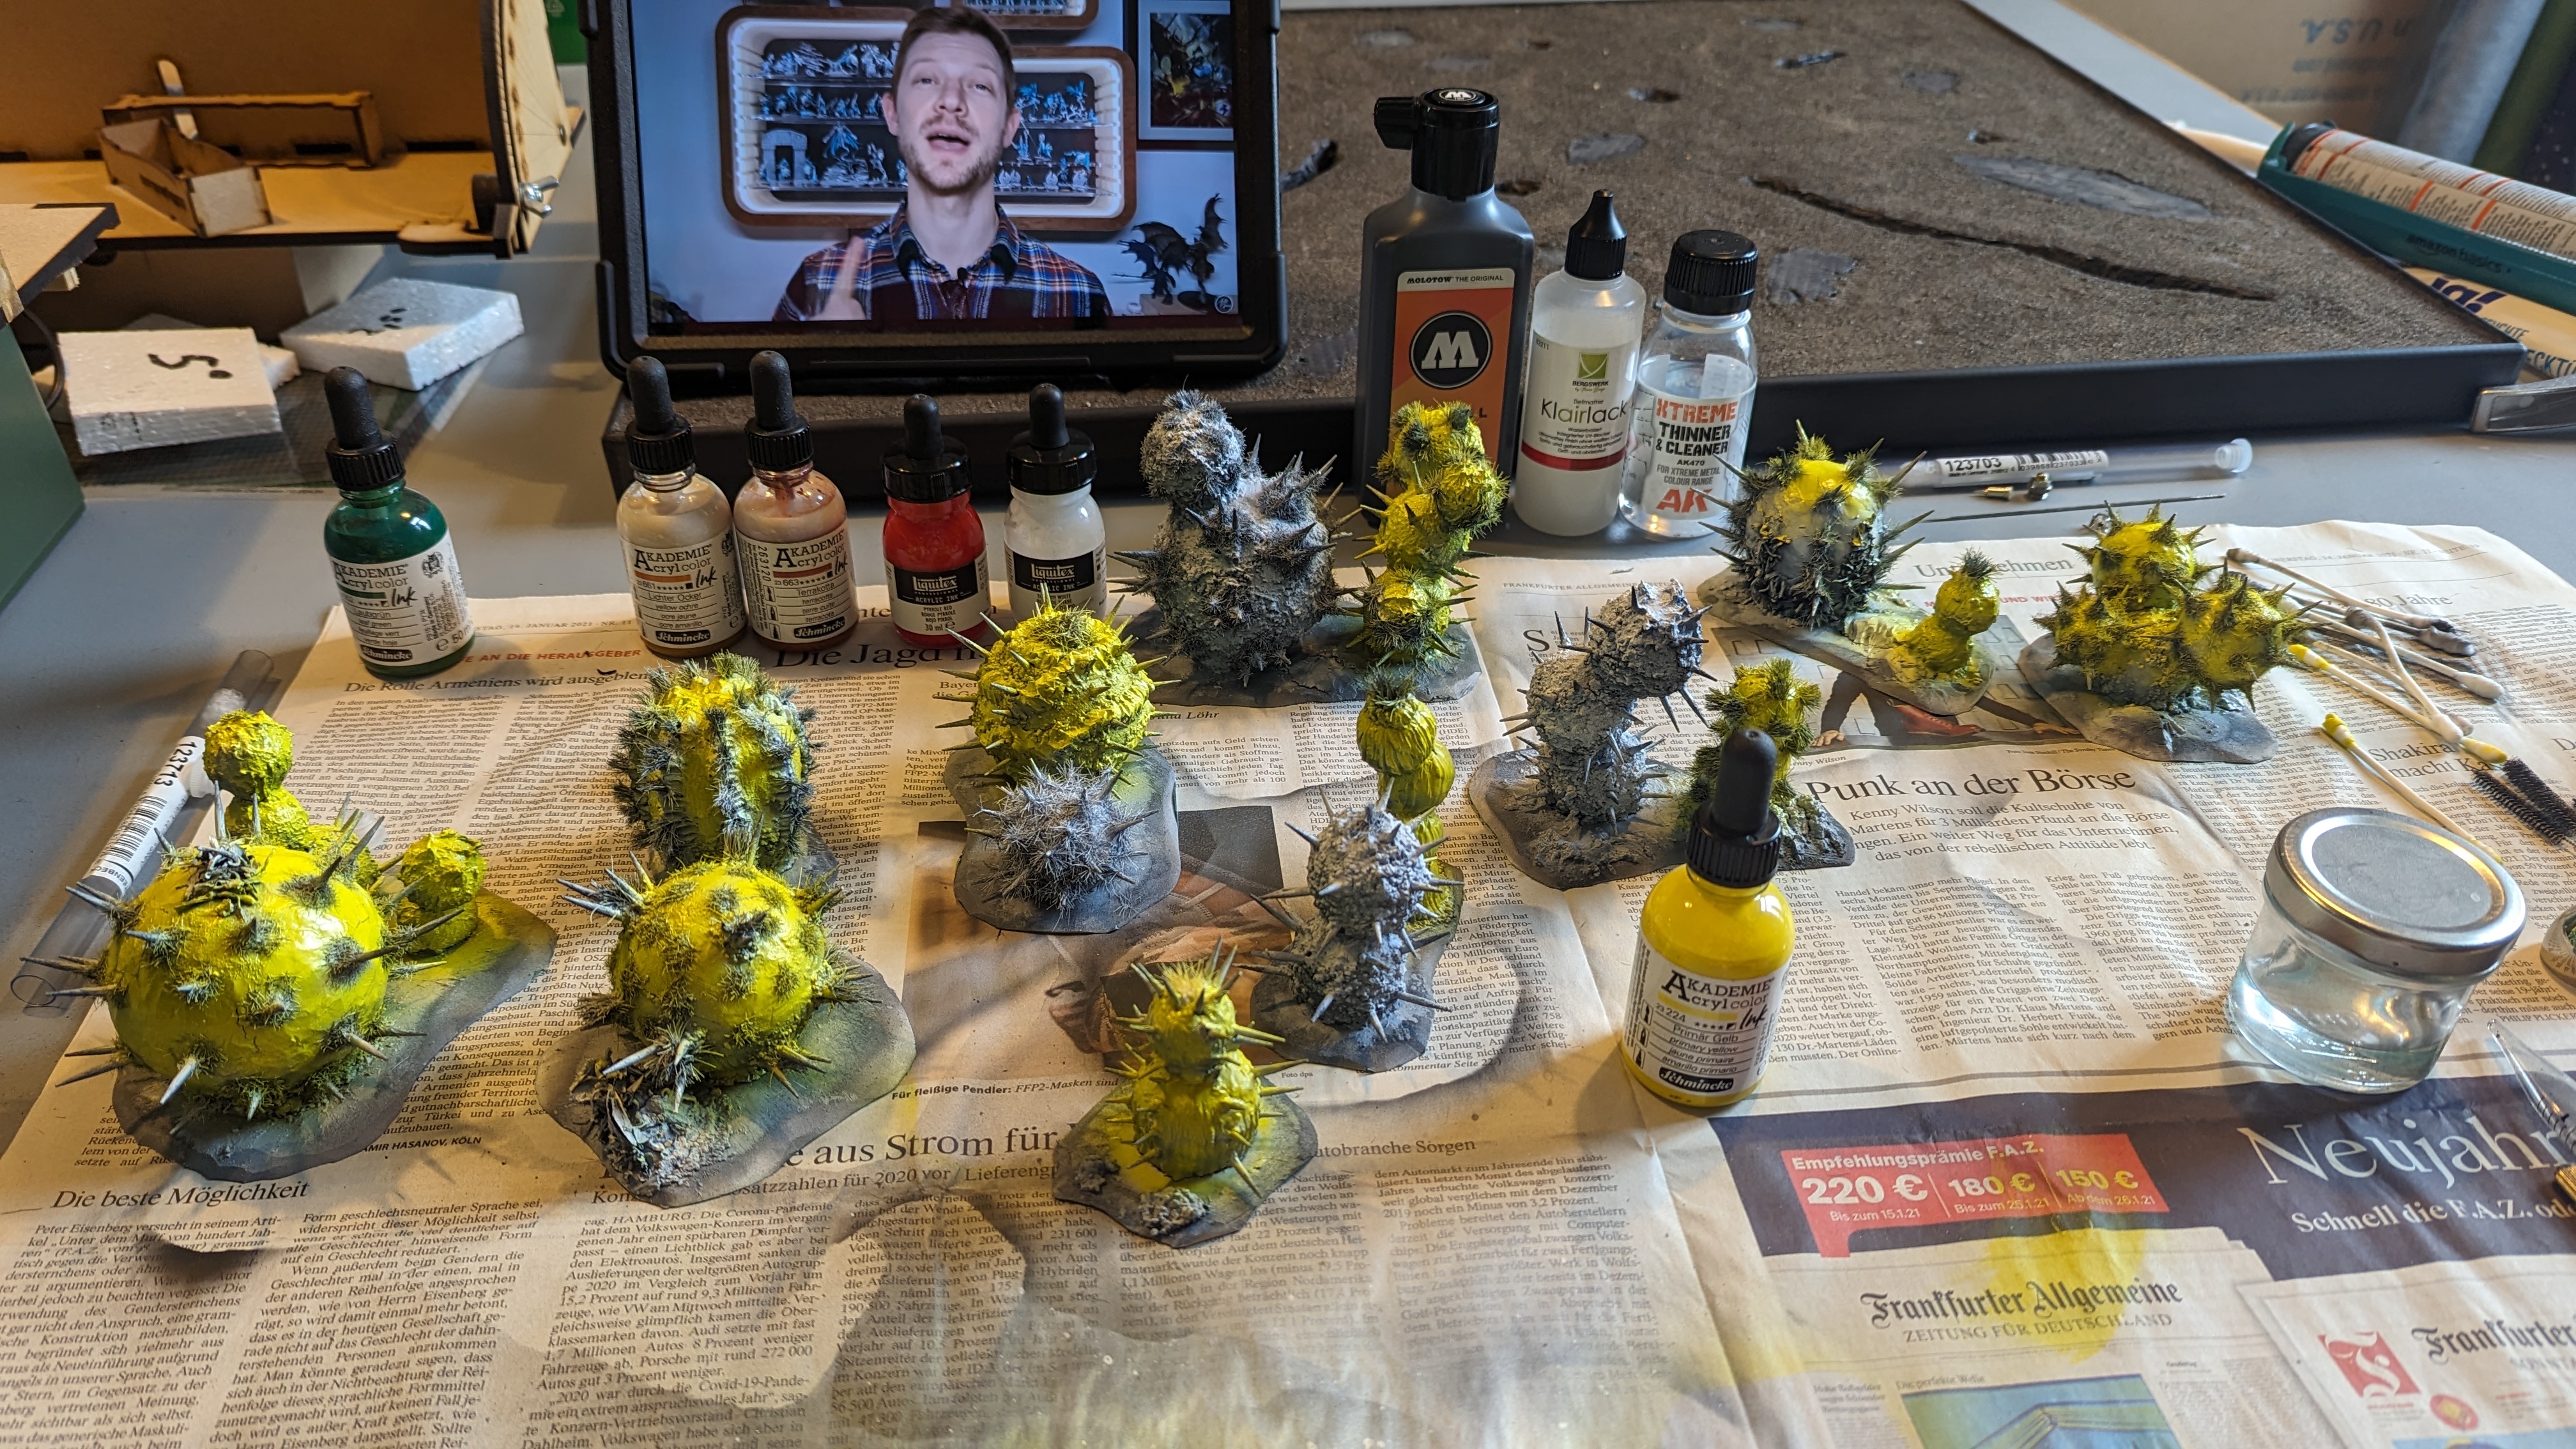
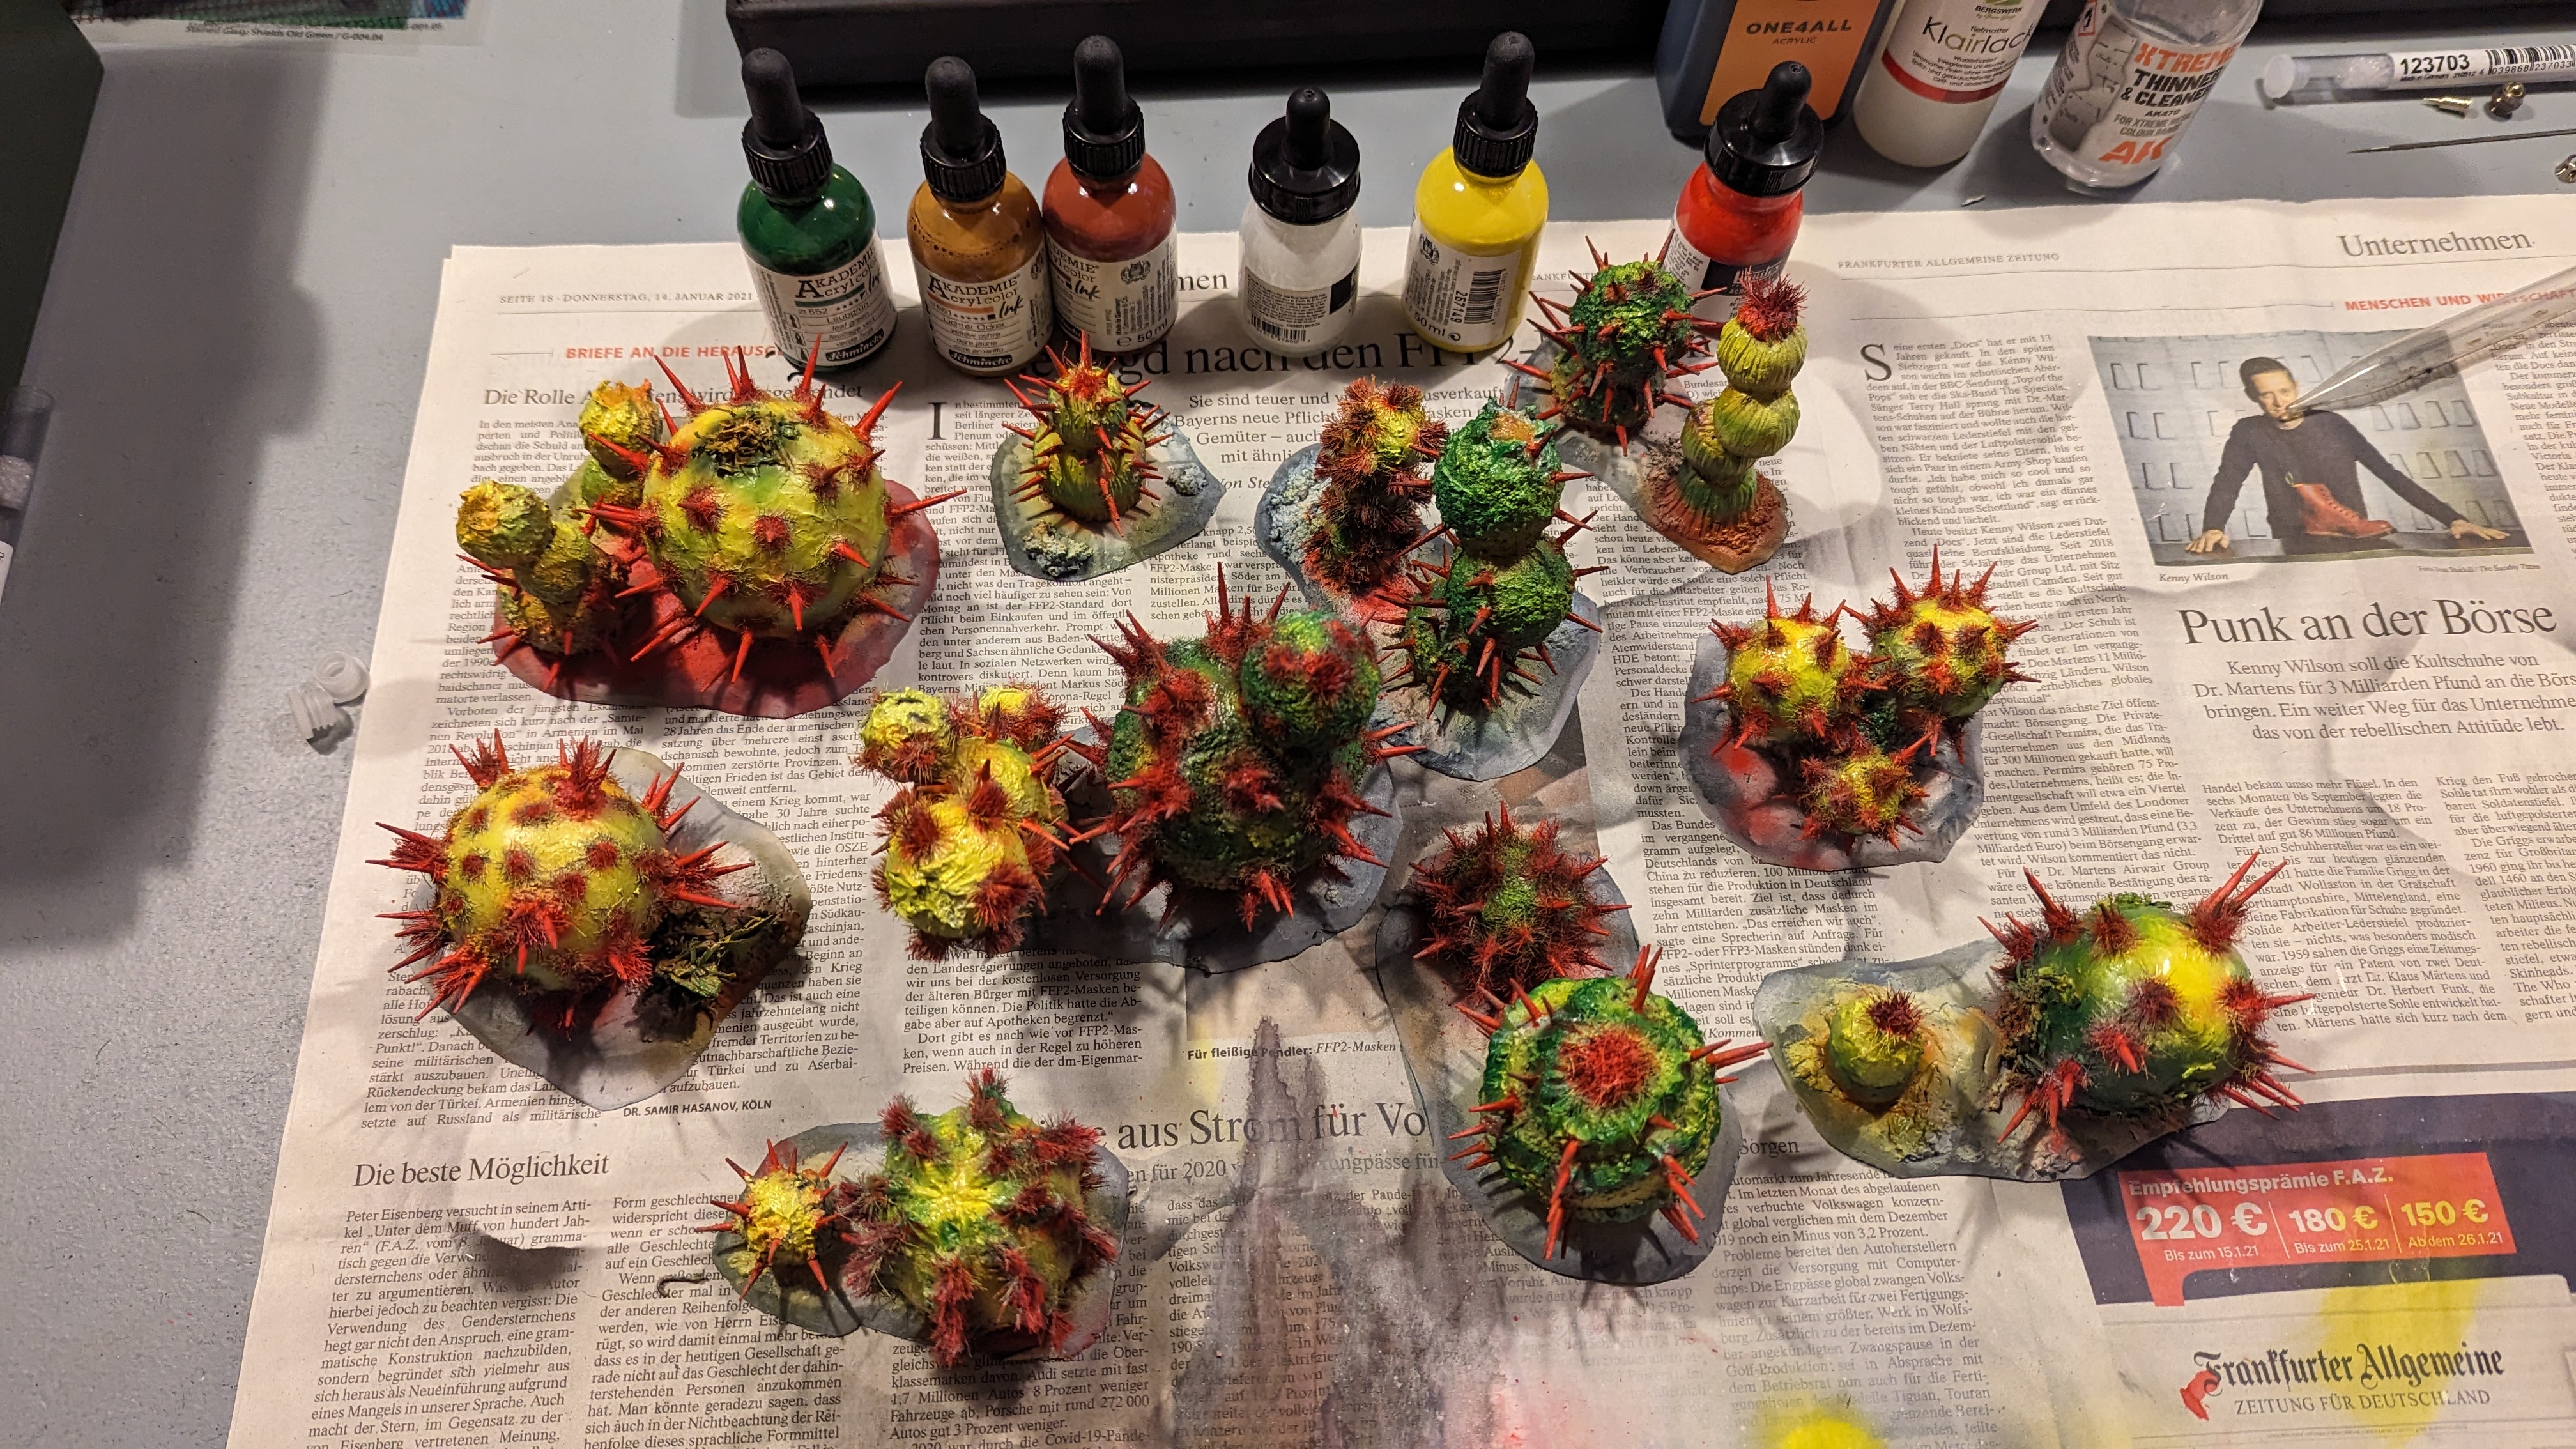
Finally came the red. Although not fully opague, the red is quite strong. I produced quite some overspray, need to work on my airbrush control, but I had to at least airbrush all the static grass, painting that by brush won't go very well.

Had to do some yellow and green correctio... As intended from the beginning, I absolutely intentionally applied the red quite liberally, in order to go over it again with yellow and green, therefore creating even more interesting shades and transitions. Nature, you know.

All the cocktail stick spikes I painted by brush. The red was not intense enough everywhere for my liking, so I came in with some white acrylic paint and quickly brushed over the outward ends of the cocktail sticks. Re-applying the red over these areas provided me with a more dull red at the base of the stick, and a bright red towards the tips.

PXL_20230819_184753677.jpg


All the colors used:

PXL_20230819_184811318.jpg


The result is quite bright at the moment. On the one hand I tend towards leaving it as is, in my mind this is the classical retro-90's vibe. On the other hand I had planned from the beginning to use some oil washes, and generelly tend more towards a more realistic (as realistic as it gets with alien plants...), toned down finish. I will see how heavy I apply the oil washes, and if I go more with browns (muddying the overall effect), or green and yellows to keep the general vibe... Not finally decided yet.

 
Last edited:
Looking good. Thank you for the detailed description of the painting.

As I always suspect the quality of my output would be much better with tools I don't yet have (which rarely turns out to be true... don't tell my wife... that is my main argument for why I need to spend more money on the hobby)
But how would you know unless you have the best tools? You need to cut down the variables! I've always argued that if I didn't have the best tools I'd have never know how mediocre my skills really are. Now once I own the best tool for the job I can learn to accept reality and no longer live in what if land, so that's got to be good for everyone ! :)
 
Back
Top